How to Grow Your Own Sprouts Indoors

Today I am going to show you the easiest way that you can start to grow your own food.

And you won’t need any outdoor space…

You just need a spot on your kitchen counter.

I am going to share with you how to grow your own sprouts indoors.

No need to buy fancy gadgets or machines. You can do this on the cheap.

You ready?

Let’s do it!

What you’ll need to grow your sprouts

  • Mason jar
  • Cheescloth or another breathable cloth
  • Canning lid or rubber band
  • Bowl or dish

Steps to grow your own sprouts

  • The first thing to do is to soak the seeds for 8 hours in the mason jar. I prefer to do this right before I go to bed to let them soak overnight.
  • The next morning, put the cheesecloth over the mouth of the jar and secure it with the canning lid. Drain out the water. Refill with water to rinse the seeds and drain again. Place the jar out of direct sunlight at an angle in a bowl. This will allow the rest of the water to drain.
  • Repeat the previous step every 8-12 hours (about 2 times per day).
  • Generally it’ll take 5-7 days for them to be ready to eat. The seeds are ready to eat as soon as they start to sprout. Just rinse and drain them one last time before you store them in the fridge.

Sound off

What is your favorite sprout?

How to Make a Seed Watering Pot

Do you have problems watering your seeds?

Not sure the best way to water them?

I’ve had this problem too.

That’s why I am happy that I came across this DIY project on FunInTheMaking.net that I can share with you.

It’s DIY seed watering pot and it will help you to easily water your seeds without having the impact of the water harming them.

What you’ll need

  • Plastic jug of some kind – I used a milk container, but you can use a maple syrup container or something similar.
  • Drill and a 1/16″ drill bit or whatever size you find appropriate.

Make it in two simple steps by drilling

  • A hole in the cap.
  • Several holes in the bottom of the jug.

[vimeo clip_id=”36255737″ title=”0″ byline=”0″ portrait=”0″ width=”525″ height=”393″]

To use your seed watering pot

  • Fill a bowl or dish with water.
  • Place your thumb over the hole in the cap and submerge it in the water.
  • Remove your thumb and you’ll feel the water being sucked up into the pot.
  • Remove the pot from the water with your thumb over the hole.
  • To water your seeds, put the watering pot over the seeds and remove your thumb.
  • A gentle flow of water should come out from the bottom.
  • To stop the flow, place your thumb back on the cap.

[flickrset id=”72157629149521591″ thumbnail=”square” photos=”” overlay=”true” size=”medium”]

This is a much gentler way to water your seedlings and not damage them.

Sound off

How do you water your seedlings?

Health Benefits and Reasons to Grow Mint

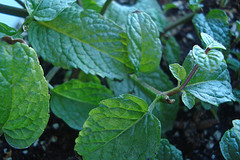
Mint is a commonly grown herb in container gardens…

…but do you know the health benefits of this herb?

Well today, I’ll share some with you some ways that I use it and other ways that it can be used.

Common uses for mint

Soothes aches, pains and stomach problems
You can easily make mint tea by steeping mint leaves in hot water for a few minutes. This has been known to help with:

  • Digestion
  • Hiccups
  • Farting
  • Menstrual cramps
  • Constricted muscles
  • Other minor aches and pains

Antiseptic and antibacterial
“Mint possesses astringent, antiseptic, antibacterial, and antimicrobial properties,” said the Marketing Manager for an online herb company. “Peppermint is great for cleaning abrasions, cuts, burns and wounds. It’s even good for treating acne.- best when steeped with hot water and left to cool, then applied as an external rinse.”

Relieve headaches
If you are suffering from a headache or migraine, you can mash up mint leaves with some oil. Then apply the mixture to where you are feeling the pain.

Decongestant
“It’s also a decongestant and has expectorant and antiviral properties,” said the marketing manager. “Peppermint tea isn’t just a great stress reliever, it’s good for clearing respiratory issues, treating colds and helping to open up nasal and chest passages aided by its mentholated aroma.

I like adding a pouch of it to hot water or to my shower to infuse the steam with peppermint to help me breathe better when sick.”

[vimeo clip_id=”35989867″ title=”0″ byline=”0″ portrait=”0″ width=”525″ height=”393″]

Growing mint

Mint is an herb that you shouldn’t start from seed, and can easily transplant in your container garden.

When you harvest mint a certain way, you can promote even more growth.

You can get a mint transplant from your local nursery or a cutting from a friend.

Sound off

How do you use mint?

5 Herbs You’ll Never Want to Start From Seed

Which herbs should you start from seeds?

You can experiment and find out on your own…

…or you can read the rest of this post and save yourself the hassle.

If you want to save time and energy, continue reading.

Some herbs require too much of your time

There definitely is something fun about starting from seed. You get to take care of the seedling and watch it grow until you finally use. Like a child of yours.

No doubt on that.

But there are some herbs that are too much work and require too much of your precious time to start from seed and you’re better off buying transplants.

This is especially true because we are urban gardening in small spaces like our apartments and in containers. We have to maximize our space.

The herbs that experts say you shouldn’t start from seed

Bay Leaf
“Bay is extremely difficult to germinate because they must be fresh and viable, and must be stratified and kept moist,” said Briscoe White, the owner of an herb company. “That’s one of the reasons bays are in such high demand- they’re hard to find because they’re hard to germinate, have a low germination rate and grow extremely slowly.”

Lavender
“Lavender can be a little tricky because they’re both very slow growing from seed, which can lead to problems with disease or fungus, since the young plants are so susceptible,” said the White. “Lavender also is very finicky with moisture and because of its slow growth can be difficult to keep healthy.”

Flavored Mints
“Many kinds of flavored mints, like chocolate mint or orange mint, can’t be started from seed, only from cuttings,” said Fern from Life on the Balcony. “This is because they’re hybrid varieties that don’t come true to form when grown from seed.”

[vimeo clip_id=”35859819″ title=”0″ byline=”0″ portrait=”0″ width=”525″ height=”393″]

Rosemary
Rosemary is much like lavender and, “It can be frustrating to grow from seed because there are so many varieties,” said the White. “To ensure that you get a true variety, you’re best to take a cutting and propagate from that, rather than seed.”

“Rosemary is so much easier to start from a cutting or from a plant bought at the nursery,” added Fern.

White Sage
“White Sage is also difficult to germinate as it has a 10-15% germination rate and on top of that, just takes a lot of time to get growing,” said the owner. “The viability is so low, that we end up placing 10-12 seeds per cell to try to get enough plants to sprout.”

Where you can buy these herbs

You can get these herbs from

  • Your local nursery
  • A cutting from a friend

Sound off

What herbs are you growing or want to start growing?

Questions to Ask Yourself When Deciding What to Grow

Deciding what to grow is an important decision.

It’s also the question that I get asked most often when people are starting their urban gardens.

To that question, I often respond with a series of questions that you need to ask yourself.

Here they are:

  1. What’s the location that I am growing in?
  2. How much sunlight does my space get?
  3. What am I growing in?

Once you answer those three questions, your choices will automatically be narrowed down.

If you only get three hours of sunlight, your chances of growing cucumbers are small.

Then you can move on to the next set of questions to ask yourself:

  1. What do I use most? If you are using a lot of something, you should consider growing it.
  2. What do I like to eat? This might seem like an obvious question to ask, but it’s an important one. We are working with small spaces and need to get the most out of them. Why grow something that you don’t like to eat?
  3. What makes the most $$$ sense? To me it’s herbs. At the grocery store you always have to buy a big bunch and only need a sprig or two of them.
  4. What season is it? Certain herbs and vegetables will only grow in certain temperatures.

Once you answer those questions, you will have a clearer picker as to what you can grow.

[vimeo clip_id=”35728824″ title=”0″ byline=”0″ portrait=”0″ width=”525″ height=”393″]

How did you answer these questions?

How to Determine the Amount of Sunlight Your Garden Gets

What can I grow?

That’s the most common question that I get asked.

First, you’ll have to decide on the location of your urban garden.

Then you’ll have to determine how much sunlight your garden space gets.

There are four main categories of sunlight:

  • Full sun. 6+ hours of direct sunlight.
  • Partial sun. 4-5 hours of direct sunlight.
  • Partial shade. 2-4 hours of direct sunlight.
  • Shade Less than 1 hour of direct sunlight.

Since we are living in urban environments, we have other structures that we are dealing with as well. Those can be adjacent buildings, over hangs and walls.

I would assume that most of us fall into the partial sun category and below.

Easily figure out how much sunlight you get

A simple way to figure out how much sunlight your space gets is to monitor it throughout the day.

All you have to do is pop outside for less than a minute every few hours and take some quick notes.

Start off with a quick sketch of your garden space. Section it off as the day progresses because the surrounding structures will cast shade in certain areas.

Here is a video of what the process looks like from my balcony garden:

[vimeo clip_id=”35606437″ title=”0″ byline=”0″ portrait=”0″ width=”525″ height=”393″]

Once you know how much sunlight your garden gets, the list of what you can grow has been narrowed down for you.

My balcony gets only three hours of direct sunlight. Based on that my selection is limited down to certain herbs and vegetables. This is why I’m growing a lot of greens.

Now you can repeat the same process and leave a comment below to let me know how much sunlight your urban garden gets.

7 Location Ideas for Apartment and Urban Gardens

When you live in an apartment your space is limited.

That’s especially true when it comes to your garden.

We barely have room for furniture. Forget about tomatoes.

This is why it’s important to consider all options when deciding where to start your apartment vegetable garden.

Since a lot of apartment dwellers are renters as well, we need to take into consideration the costs involved and what our landlord will allow.

It ain’t no thang though because here are seven (7) spaces where you can start your apartment garden:

  1. Fire escape. This is where it all started for me in 2009. You can fit a few containers on the landing, but be sure to leave plenty of space for a footpath.
  2. Hand rails. I used these too on my fire escape to hang 10 soda bottle planters filled with mint, oregano, lettuces and more.
  3. Balcony or patio.This is what I had when I first moved to LA. I had about 10 containers out there. They lined up nicely on both sides allowing for a walkway down the middle.
  4. Walls.There are plenty of vertical garden planters out there right now. The thing with most of them is that you need to secure them to the walls, which might be an issue for some renters or landlords.
  5. Windowsill boxes. These are great to grow shallow rooted herbs and vegetables. Like the vertical planters they do need to be secured to the structure.
  6. Front or backyard.If you are on a lower level, this might be all you have. If you are renting, it’s unlikely that your landlord will allow you to rip up the lawn to start your garden. They might allow you to put some containers out there though.
  7. Along the side of the building. This is usually dead space that isn’t visible from anywhere and not being used. It is worth inquiring to find out if you can put containers out there to start your garden.

Where do you have or can you start your apartment garden?

I’m Moving and Losing My Balcony Garden

I’m going to be moving in the next couple of weeks.

Why does it matter and what’s it have to do with urban gardening?

Even though I’m moving into the apartment next door to mine, I am losing the balcony and the balcony garden.

Why should you care?

It matters because I will be growing in an all new location and using new methods including growing indoors using natural and grow lights and growing hydroponically.

So be sure to hit me up with your indoor and hydroponic questions.

Losing my balcony, but gaining more garden space

I am still going to be container gardening just in an all new location that I never thought of before.

When discussing the move with the landlord, he said that I could use the side of the building to put my containers.

It’s a much larger space and gets more sunlight.

[vimeo clip_id=”35353635″ title=”0″ byline=”0″ portrait=”0″ width=”525″ height=”393″]

Talk to your building manager or landlord

For those of you that don’t have a balcony, ledge or fire escape, ask your building managers or landlords if you can put some containers along the side of the building out of the way.

It will give you space to grow.

I thought I was going to lose space by moving, but I gained a lot more by asking a simple question.

Tell me what’s up

What spaces around your apartment can you ask your landlord to put some containers?

Storing Your Seeds For the Long-Term…in the Freezer

The strangest posts wind up causing some controversy.

It doesn’t make sense to me.

When I wrote about why having an emergency seed bank is important, I didn’t quite get the reaction that I’d expect.

I received emails, Facebook comments and Tweets saying that I couldn’t be more wrong about storing the seeds and that freezing them was a horrible idea.

I’ll admit that I have never frozen seeds before and then used them. It is a recommendation that I’ve seen countless time before.

So I did a bit of research and here’s some excerpts from sites:

Last year we planted a variety of different seeds that we had put in the freezer over 10 years ago and forgotten about and they came up just fine. They were just in ziplock bags. — via Survivalist Boards

Seeds dried to a low moisture content with silica gel and then stored in a freezer can usually retain viability for many years. — via HowToSaveSeeds.com

Freezing seeds will put the embryo into suspended animation reducing its need to consume the sugars that are encased in the seed. This increases it’s storage life immensely… — via Ready Nutrition

Takeaways for Storing Your Seeds in the Freezer

The main takeaways that I got in my research were the following:

  • Make sure the seeds are dry when placed in the freezer. Using a silica gel pack can help with this.
  • Put the seeds in an airtight container. This can be a mason jar or even a ziplock bag. Vacuum sealing works well too.
  • Allow the seeds to thaw before planting. These are for long-term storage, but good to keep this tip in mind.

How do you store your seeds for the short or long-term?

Get 10% Off your Vegetable Seed Purchase Online from SeedsNow.com

All you have to do is click here and use the discount code URBAN10 to get 10% off.

Transitioning from Winter to Spring Worm Composting

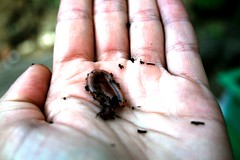
Winter is the time of year when many raising red worms will find it difficult.

They find their worms are dying off.

This can easily be avoided if you take precautions when raising your red worms.

Seasonal changes affect the way one raises their red worms. When winter arrives we concentrate on keeping our red worms warm. It is much easier when raising red worms to keep a worm bin warm than trying to keep it cool enough during the warmer months.

Raising red worms and transitioning from winter to spring can be relatively simple if you approach it properly. Here are some tips to help you make that transition:

Make sure your worm bin does not have too much moisture. Moisture and heat do not mix when it comes to keeping a worm bin. A soil moisture meter can be purchased at most hardware, home improvement and even discount stores this time of year. A good year round moisture percentage to maintain is 60% to 70%.

Add less green items and more brown items to reduce the heat in your worm bin. Brown (carbon) products consist of shredded newspaper and cardboard for one. These products will not generate nearly as much heat within your worm bin as green products do.

Avoid certain vegetables. As we start to transition from winter to spring avoid melons and vegetables such as cucumbers for a while.

These tips will save you and your worms some grief as the warmer months start to approach.

Please Note: This post was contributed by one of my sponsors, Rainbow Worms. For additional information on raising red worms, connect with Rainbow Worms on Facebook, Twitter or subscribe to their blog.

Image courtesy of Vancour on Flickr

Why Having an Emergency Heirloom Seed Bank is Important

Some believe that one of the best investments to currently make is in an emergency seed bank.

With everything that is going on with the global economy and food system, it’s hard to argue.

What would happen if our food supply was cut-off? or the price of food sky rockets too high?

Yes, it is important to have the canned goods and non-perishables, but what happens when they run out and the supermarket shelves are dry?

That’s where having an emergency seed bank helps out. I’m not getting all sensationalistic and saying it’s going to happen today or in the near future, but like any other emergency kit, it’s best to be prepared.

How to use your emergency seed bank

There are two ways that you can use your bank:

  • Keeping it in storage for emergencies. One of the best places to store them is in the freezer.
  • Start your garden. This way you can start to grow your food and build up the seed bank by saving your seeds.

Where to buy a seed bank?

It’s really important you buy a quality seed bank from a place that sells good seed.  SeedsNow.com has a huge selection of seed banks and best of all their seeds are all 100% NON-GMO and Heirloom varieties.  If you don’t know what NON-GMO or heirloom is – don’t worry – that’s the good stuff you’re looking for in a seed bank.

Here’s a couple options worth checking out:

Have you thought about getting an emergency seed bank?

Last Post of 2011 and What’s in Store for 2012

This is gonna be the last post of 2011..hard to believe it’s over.

Have lots planned for 2012 and want to share some of it with you.

Most of which is based on the most and least popular posts of the year, along with all the emails, comments on this site and on the Facebook page, Twitter and YouTube.

In 2012, I am going to be focusing even more attention on showing you how to grow your own food with little to no space. These are the topics that I’m going to be focusing on:

  • Apartment Gardening. Going to get more into how to best find, utilize and grow the most in the space that you have.
  • Indoor Gardening. Not only will I share how to start seeds indoors to get a jump on the season, but also how to grow indoors year round. Might be throwing some hydroponics in the mix as well.
  • Container Gardening. Still focusing on self-watering containers. Will be giving more tips on maintaining your containers and what grows best in them.
  • DIY Projects. Have lots of ideas for projects to experiment with in the new year such as a worm pot container, bookshelf herb garden and more.
  • Indoor Composting. When I lived in New York, I made my own compost bin and attempted to make my own worm bin unsuccessfully. Really looking forward to experimenting with some new composting ideas for those of us without the land.
  • Garden Recipes. Will continue to share the seasonal garden recipes, but will be focusing more on what’s actually growing in my garden or what you are growing in yours.
  • Insects & Diseases. Will help to identify specific pests and diseases and how to best remedy them.
  • Reasons to Grow & Health Benefits. Will continue to share the reasons to grow your own food such as the fact that we are humans and that our food travels such a far distance. In 2012, going to be expanding that out to the health benefits of what you are growing as well. Did you know that raw garlic is a great anti-microbial? See…stuff like that.
  • Tips & How Tos. The simple tips and how to posts will be a mainstay for 2012 as well.

As per usual, these posts will be quick and to the point for you to easily understand and get started.

I’ve already partnered up with some great sponsors including SeedsNow.com, The Greenhouse Catalog, Rainbow Worms, Safer Brand and Vertical Home Gardening to share their products and get your garden going for 2012.

The most important thing is that the information helps you out, so what questions or posts would you like to see relating to these topics or what other topics would you like to be covered?

Thanks for a great 2011 and here’s to an even better 2012!

Top 10 Least Popular Recipes From Urban Organic Gardener in 2011

This was the first year that I started to share seasonal garden recipes. They were a popular addition to the site.

Earlier in the week, I shared the 10 Most Popular Recipes of 2011.

Not all of them were that popular and I like to share my mistakes just as much as my successes.

You are asking, “Were they tasty?” Pssshhh, of course they were, but just not popular on the site.

The list is compiled strictly from my analytics based on how many times a page was viewed, not by how many people ate it and liked it.

Here they are:

Just because they weren’t popular doesn’t mean that they weren’t good. I only hooks up the good stuff.

Which recipe was your least favorite recipe from 2011?

Top 10 Least Popular Urban Organic Gardener Posts of 2011

Everyone posts their greatest and best of collection like I did a few days ago, but no one ever acknowledges the ones that didn’t do so well.

So I thought WTF…why not? As I said the other day, there were over 150 posts on Urban Organic Gardener in 2011. Not all of them were very popular.

Not only have I learned a lot about gardening in 2011, but I’ve also learned a lot about what you like and don’t like, which is just as important.

This list is compiled strictly from my analytics based on how many times a page was viewed or in this case, not viewed. I won’t get into the speculation and reasons why I think they didn’t do well. You can figure that out.

Here they are:

Those are the misses from the site. Just because they weren’t popular doesn’t mean they weren’t good 😉

What were your least favorite posts from 2011?

Top 10 Most Popular Recipes from Urban Organic Gardener in 2011

Yesterday, we counted down the 10 Most Popular Posts on Urban Organic Gardener in 2011.

This was the first year that I started to share seasonal garden recipes. So, I’d like to share with you the Top 10 Most Popular Recipes from the year.

The list is compiled strictly from my analytics based on how many times a page was viewed, not by how many people ate it and liked it.

Here they are:

Now you are probably thinking, which is the best tasting? Well they are all best tasting because that’s how I roll.

Which recipe was your favorite from 2011?

Top 10 Most Popular Urban Organic Gardener Posts of 2011

There were over 150 posts on Urban Organic Gardener in 2011. Do I really have that much to say?!

Since it’s December, I’ve decided to share with you the most popular ones for the year based on your votes. You didn’t really vote, but you kinda of did by checking out these articles.

This list is compiled strictly from my analytics based on how many times a page was viewed. I won’t get into the speculation and reasons why I think they are so popular. I will let you do that.

Here they are:

There you have. What are some of your favorite posts from 2011?

Roasted Acorn Squash Stuffed with Sauteed Greens, Tomatoes and Goat Cheese

    Here’s what you’ll need:

  • Acorn squash
  • 1/2 onion
  • 2 cloves of garlic
  • 1 tablespoon of oil (I prefer coconut)
  • Tomato
  • Dark leafy greens (I used collards and dandelion. Kale also works really well.)
  • Goat cheese
  • Dash of salt and pepper
    How to make:

  • Cut acorn squash into halves and scoop out the seeds.
  • Rub the inside and outside of the squash down with oil and sprinkle with salt and pepper.
  • Put in oven at 375-400 for about 45 minutes until it can be easily pierced with a fork.
  • Mince up the garlic and onions.
  • Sautee in a heated pan for about 3-5 minutes until translucent.
  • While the garlic and onions are cooking, finely slice up your greens.
  • Add them to the pan with the garlic and onions.
  • If the pan is dry add a tablespoon or water or vegetable broth.
  • Stir it up and cover it to let the greens wilt down.
  • Cut up the tomatoes into chunks.
  • After 3-5 minutes of the green cooking, adding the tomatoes and stir.
  • Season with salt, pepper and whatever other seasonings you’d like.
  • Turn off heat and let pan sit covered.
  • When squash is ready, put some goat cheese in the bottom.
  • Then add your greens and tomatoes.
  • Top with more goat cheese and put back into the oven.
  • After 5-10 when the cheese has melted, remove from oven and serve.
  • Enjoy!

Charlotte Airport to Open Recycling Center With Composting System

One of my most favoritest sites, Earth911, had a post titled Charlotte Airport to Start Worm Composting.

They post said:

The airport plans to open a new $1.1 million recycling center in February with a worm-based composting system that can handle up to two tons of waste per day, the Charlotte Observer reported.

This is such a dope idea. The airport will be using the compost generated on their facility. Whatever is left, they will be packaging and selling it.

It would be great if other facilities around the country took on similar projects.

What’s your thoughts on the composting program and have you seen any others similar to it?

Photo courtesy of Vancour on Flickr.