When To Start Vegetable Seeds Indoors In New York City

Truthfully a lot of that last frost and zoning information is a bit over my head. So I had to look it up quickly.

According to the book Incredible Vegetables from Self-Watering Containers, New York City is in Zone 7 and the last frost date is sometime in mid-April. The map and legend were hard to decipher. In the video, I erroneously say Zone 8 and mid-May. Genius idea to color code a map and put similar colors side by side.

I also checked out a bunch of sites online and the only one that was somewhat coherent was the What to Plant Now guide from Mother Earth News.

It’s March and I’m in the Mid-Atlantic, so here is what you should be planting now and where. You can easily select your region.

My seed order from Botanical Interests arrived in the mail last week. It was my first order, and somewhat exciting to get the packets in my hand.

(Jayme from aHaModernLiving seemed much more happy to get her seed order than I was. Check out her post on Facebook about it.)

The back of the packet says when to plant outside, when to start inside and also gives any special sowing instructions. Apparently there is even more information on the inside of the packet as well.

In looking at the packets, I need to start them anywhere from 3-10 weeks before the last spring frost date. Some say that it’s not recommended to start indoors at all and to sow directly into the containers like cilantro. Check Perry J Post’s great insight on planting cilantro.

To be safe and realistic at this point, I’m going to plan to have everything planted by mid-May the latest and I’m sticking to it. That means I need to start these vegetable seeds with the quickness.

When do you start your vegetable seeds indoors?

httpv://www.youtube.com/watch?v=5hiiJa8j17E

Making Kitchen Compost Containers Of All Sizes

Now that I’ve figured out a way to compost in my kitchen without worms, I’ve started to pack as many containers as I can to make compost.

I found an empty container of cat litter on the sidewalk that I brought home and filled. I’ve also had my roommate keep his coffee containers and have begun to use them as well.

More food scraps were added to the original container, but didn’t want it to get too heavy to shake around. This is why I started new ones.

A scoop of old potting soil was added to the bottom of each of them, the blended food scraps were added and then covered with a bit more soil and shredded newspaper.

They were then set off to the side out of the way and are going to be to shaken up every few days. I should have fresh compost in a few weeks. Little hassle and easy to maintain.

This is something that anyone can do and it can be scaled up or down to your needs. I’m not stopping here. I plan to start many more.

When are you getting started on yours?

Five Gardening Mistakes I’ve Made

Since I’m still new to this gardening thing, I’ve made plenty of mistakes in my first year. I’ve also had many successes as well, with the most memorable being my first lettuce harvest.

For this post, I’d like to share the Top Five Gardening Mistakes that I’ve Made. Life ain’t perfect and neither are my gardens. I know hard to believe.

I’ve made these mistakes, learned from them and have become better at gardening (and life) because of it.

  1. Putting too many food scraps in the compost bin. This was one of my first mistakes and happened before I even planted my garden. Luckily, it wasn’t a tell-tale sign of things to come and easily rectified. Though the smell in my apartment was absolutely horrendous for a few days.
  2. Upside down herb gardening. When I first started this, it seemed like a great idea and looked cool as hell too. The first time around, they all died in less than a month. So I tried again with the same results – dead herbs. Then I realized I should turn grow the herbs out of the top, not the bottom…duh.
  3. Planting cherry tomatoes on my fire escape. It was great that I was able to get fresh, ripe tomatoes from my fire escape, but the plant grew to be way too large for my fire escape. I definitely won’t grow it again in such a small space.
  4. Plant fewer or single plants in each container. The celery plant that grew alone in a container was more than double the size of the ones that were packed together. Also I had combined herbs into containers, which stunted the growth of some of them. It was just a case of me being greedy and trying to plant as much as I could.
  5. Worm composting. I went through not one, not two, but three sets of worms that I killed. What can I say? I’m a worm serial killer. They were literally dying to get away from me. It was a major fail.

These are only five of the mistakes that I’ve made while gardening this first time around. There were plenty more and there will be plenty more to come. None of which will stop me from continuing to garden.

What are some gardening mistakes that you’ve made?

Taking Back Our Food From Corporations

Day 28: Harvested My Own Vegetables
Not sure if it’s me or the crowd that I keep, but it seems like a food revolution has started. People are starting to take food back from corporations.

This is one of the reasons that I started to garden. I wanted to get back in touch with my food. I feel that America has lost its connection with food for business and corporate reasons.

The fact that gardening on my fire escape allows me to harvest my meals so that I can trace my produce from fire escape to table still amazes me.

There are no words that can explain the joy that goes into growing, harvesting and eating your own produce. Food is the fuel that energizes and nourishes our bodies. Somehow we’ve given that responsibility to someone else.

By starting to garden, I’m taking that responsibility on myself. Being in an urban environment hasn’t stopped me and it hasn’t seemed to stop others as well. Urban gardens and farms are in the news more and more lately.

Stacey Murphy founded BK Farmyards as a decentralized urban farming network in Brooklyn.

BK Farmyards puts the farmers in consumers back in touch, cutting out the middle man. They help to transform people’s backyards into farms. The residents pay for the farmers to tend to the land and make it bountiful and get to keep some of the produce. Those without land to farm on can pay for the produce that is harvested in their neighbors yards.

New York isn’t the only urban area that is getting into the gardening and farming. In South Florida there are lots of gardens and farms starting to pop-up.

The reason that they are starting is the same – people are looking for more locally grown produce that they grew on their own.

Mid-westerners factor urban farming and gardening into their plans for revitalization. Parts of western Pennsylvania and eastern Ohio have already started to move forward.

Grow Pittsburgh has the vision of, “Grow Pittsburgh envisions the day when growing and eating healthy, local food is commonplace. ”

Similar programs have started in Youngstown and Cleveland, Ohio with Akron not too far behind in the urban farming and gardening space.

The food revolution has begun. Are you on board?

Getting Into and Out of My Fire Escape Garden

I’m sure that most of you think that having a fire escape garden is easy. Well it aint’s.

You already know that my fire escape garden is out of my roommate’s room.

There is a radiator that is in front of the window that the fire escape is out of. On the radiator is a bunch of stuff that I need to take off each time I want to go out. Then I have to open the gate and the window, which doesn’t freely open.

Once the window is open, I can get out onto the fire escape. Not that simple though. The radiator is mad shaky, which makes it difficult to use as a stepping stool. There is also about a foot or so of window ledge that I need to clear as well.

On the way out of the fire escape, it’s just as difficult again because of the shaky radiator.

Contrary to popular belief, fire escape gardening is much more dangerous than you think it would be and that’s just getting to and from the garden.

Check out this video to see what I’m talking about.

httpv://www.youtube.com/watch?v=_xrbAHDAwo0

Watering The Urban Kinder-Garden

After checking in with Miss Avalos and the Urban Kinder-Garden, the kids showed me how they watered and tended to their garden.

Before they watered the garden, they filled me in on what’s been going down with the garden since I last saw them.

“Some of the plants died, but we got more in and they are still growing,” one student told me.

That comment was followed up with, “The plants are pretty.”

And, “The plants are super big.”

When Miss Avalos asked her class if they thought that they are going to have enough for a salad soon, they answered with an enthusiastic, “Yes!”

Table One is in charge of watering the garden this week and took me outside to show me what’s up.

The kids took turns using the rain water that they harvested to water the plants. They shared their favorite plants with me as well. The red leaf lettuce, kale and peas were some of the top.

When I asked them how soon until they thought that they were going to get a salad, the number of days ranged from 20 through 100. We’ll just have to wait and see.

httpv://www.youtube.com/watch?v=5WNV-SdfRDg

Checking In On the Urban Kinder-Garden

It’s been just over two months since I set up the Urban Kinder-Garden with Miss Avalos’ class at Kester Ave Elementary, so I took a visit to check in.

Shortly after the garden was set up, the students went on winter break. Some of the students families took the containers home to care for them. Unfortunately, there were some casualties and not all of the plants returned.

Miss Avalos and the students replaced the plants with some new ones, including kale and parsley.

Each week, Miss Avalos has a table assigned to taking care of and watering the plants.

Southern Cali has been getting some rain lately, so the class set out a bucket to harvest rainwater to water their garden and taught them about using the resources that are available.

Since the garden is starting to grow, the kids are getting more excited as they get closer to getting the salad that they set out to grow.

httpv://www.youtube.com/watch?v=he8Xuibe7KE

Ordering Vegetable Seeds For The First Time

When I asked for help buying vegetable seeds, I got all kinds of advice and suggestions, which are much appreciated.

Spinach, chard and all sorts of greens were the most recommended. I don’t really eat that many starchy veggies like carrots and beets, so didn’t want to get those for my fire escape garden.

Since I only have three containers for veggies and the hanging soda bottle planters, I really wanted to maximize the space for productivity.

I decided to do all greens and lettuces in the containers and ordered some herbs for the hanging planters. I decided against growing cucumbers and tomatoes because they just get too large for the fire escape and there isn’t enough sunlight for the peppers.

This first round of seeds: Here is what I ordered from www.SeedsNow.com:

I’m also going to have to order some seeds for my backyard vegetable garden.

What do you think of the selection for my fire escape?

Kitchen Compost Bin Minus The Worms

I started a kitchen compost bin since I’m done with worm composting.

Gabriel Withington (@IntegroDesign) gave me a great idea. He said to compost in buckets similar to the
the aerobic compost bin that I built.

The main difference is that there is no need to drill holes to aerate the compost. If you leave enough room, you can shake it up to aerate. If it gets too moist, drain off the liquid and use as fertilizer. Brilliant!

Here’s what I put in the bin in order:

  • Fresh compost (b)
  • Old potting soil (b)
  • Shredded newspaper (b)
  • Old worm compost bin (b/g)
  • Coffee grinds and tea bags (g)

(b) indicates browns
(g) indicate greens

I layered them in the bin in the order above. Some more finished compost and newspaper was laid on top of the coffee grinds and tea bags.

When composting you want a balance of browns and greens. If you have too many greens, it will smell horribly. Trust me.

NYCCompost.org has a good list of browns and greens to add to your compost bin.

If this works out as well, I’ll be starting a lot more of them in my kitchen.

What are your thoughts on composting this way?

httpv://www.youtube.com/watch?v=IPNcNdJCs3o

Done With Worm Composting

I can honestly say that I am done with worm composting after killing my third set of worms. This isn’t much of a surprise since they were literally crawling out of the bin a few days back.

My first set of worms I killed because they were too damp. The second batch were too dry and this batch…obviously I have no clue because I keep killing them.

So I’ll leave it at three pounds of dead worms and likely start more aerobic compost bins in my kitchen.

I’m sure that there are some worms somewhere thanking whoever worms thank that they won’t have to go home with me.

httpv://www.youtube.com/watch?v=IKQ45uPnSdI

Worms Are Crawling Out Of The Worm Bin

I must be making a name in the worm community and not a good one. When I checked on my latest batch of worms some of them crawled out of the bin. The ones that escaped didn’t last long and were dead under the kitchen sink.

Since I started this third bin, I moved it under the kitchen sink to protect them from the light. I also noticed that some of the worms were crawling to the top of the bin, but the lid was on.

Fresh bedding was added because I didn’t want to make the same mistake as before and have too moist of a bedding.

The lid was also removed to get some more circulation going throughout the bin.

Once the bin was removed from the under the sink, there were dead worms that escaped the bin scattered under the kitchen sink. Dried up and dead worms are gross.

Since the worms are escaping, it means that there is something wrong with the bin that they don’t like and want to escape. It could just be a few stragglers or they could’ve heard about me and my worm killing ways and decided it was best to off themselves.

I’m going to add more bedding and toss it together with what’s already in there to freshen it up and aerate.

If this doesn’t work, it’s likely my last go at this.

Any more advice to save these worms?

httpv://www.youtube.com/watch?v=fZwl-uoThhg

How Much Horse Manure To Order For The Soil?

Now that I’ve gotten some advice on planning for the garden beds in my Grandmother’s backyard, I made a call to obtain some horse manure.

I definitely want to add things to the soil to mineralize and amend it. One reason that I want to do this is because Brooklyn soil is known for being flat out nasty and on the border of toxic. The other reason that I want to is because I’ve seen the crap that my Grandmother has put in her soil and I wouldn’t want it anywhere near my stuff. The 60+ years of what’s been put in there ain’t for me.

The first, and only, spot that popped into my mind was the Jamaica Bay Riding Academy in Brooklyn off of the Belt Parkway. Yes, there is a horse riding academy in Brooklyn.

My hope was to call and ask if I could take some of their excess horse manure off their hands. The reality was that they don’t just give it away. They sell it. A 50lb bag costs $5 or I could fill up the bed of a pick-up truck for $25.

Shawna Coronado put over 5,000 lbs of buffalo manure into her garden. My garden area isn’t nearly as big as hers. She did refer to me this link which says 250-300lbs per 1,000 square feet.

Knowing that I’m still not sure as to how much I would need to fill in the garden beds. They are 4’x2′, 4’x6′, 4’x4′ and 4’x4′.

How much horse manure do you think I should buy?

httpv://www.youtube.com/watch?v=yOm0NxUsnVE

Help and Advice for Planning Garden Beds

This spring season, I plan to use some of the garden beds in the backyard vegetable garden at my Grandmother’s.

I got her approval and documented in the video below, but I’m sure that she’ll still have some complaints about it.

There are four beds that measure approximately 4×2, 4×6 (which has a little bit of moss growing on it), 4×4 and 4×4. I’ve seen some of the stuff that my Grandmother has put in her soil, so I’d definitely like to mineralize and amend it.

The plan that I had was to till it and add compost, seaweed and horse manure once the weather warmed up.

The questions that I currently have are:

  • Is there anything else that I should do to mineralize the soil?
  • Should I be worried about the moss? If so, what should I do
  • Is there anything else that I can do now or should be aware of?

httpv://www.youtube.com/watch?v=PErx1227H8Y

My Fire Escape Garden and the Fire Code

The complaint that I often hear about my fire escape garden is that it is a fire hazard and that I’m putting lives at risk.

I do respect the fact that it is a fire escape and a means for people to evacuate the building in case of an emergency. This is something that I take seriously because on January 29, 2003, my apartment burned down.

This is just one reason why I make sure that there is a clear foot path for people to walk and that the hand rails are available to use.

Screenshot 2014-04-10 17.40.00
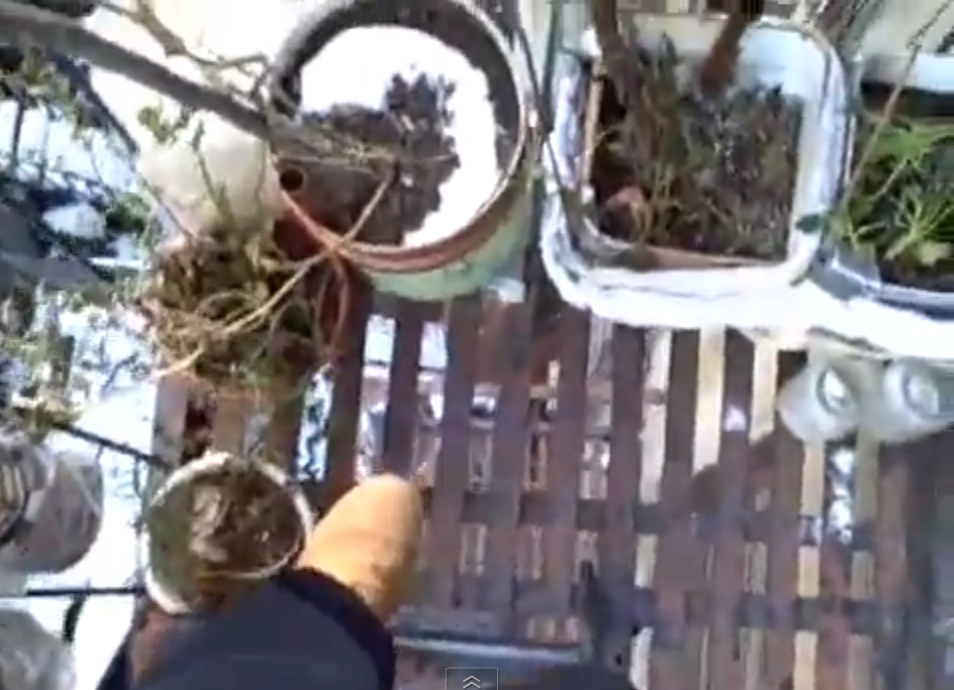
Technically, my garden violates the fire code because I am storing items on it. I also break the law daily when I j-walk. I’m not trying to be a smart ass, but it’s one of those laws that’s not always enforced.

The landing space of the fire escape is about 2’x3′ with the containers taking up about 8″. That leaves 16″ of foot space, which is plenty of room for someone to safely walk.

The one potential hazard was the cherry tomato plant, which wasn’t a small plant. I won’t be growing that on the fire escape in the future.

With all of that being said, I do maintain the integrity of the fire escape while using the available space to grow fresh organic vegetables.

What do you think about my fire escape garden?

My Fire Escape Garden Isn’t Outside Of My Room

One misconception about my fire escape garden is that it is outside of the window in my room. Well, it’s not.

The fire escape is actually outside of my roommate’s window. So I have to go through his room to get to it.

One of the windows in my room is where I initially planned to garden. I even built a window garden, but it gets absolutely no sunlight.

Having the fire escape outside of his window puts me at his mercy for taking care of the garden. If he sleeps in late or goes to bed early, I can’t tend to it. I also have to be extra cautious when bringing things to and from the garden, especially compost.

Having the garden out of his window is also one of the reasons that during the winter months, I couldn’t take the containers in and out during the night.

This is what I go through for my fire escape garden.

httpv://www.youtube.com/watch?v=gtbIF80duZM

Help Buying Vegetable Seeds For The First Time

The kind people at SeedsNow.com have contacted me and offered to help me out with some seed packets to get my garden started.

I’ve never started from seed before and I like experimentation (with growing vegetables that is). My plan is to continue the fire escape gardening, backyard vegetable gardening and potentially expand that to the garden beds.

I’m leaning towards some of their Seed Banks.  What would you recommend me getting or would like to see me experiment with?

Building A Cheap Hoop House With Andrew Odom

Andrew Odom (@AndrewOdom) is one of my imaginary friends that I met on Twitter. He lives and gardens down south in Georgia.

He built an almost recycled hoop house for his garden for under $30. I’m jealous.

Since the small plastic greenhouses that I made failed, this is something that I will definitely consider for my backyard vegetable garden in Brooklyn next winter.

Curious as to what went into the construction of Andrew’s and the results, I asked him a few questions that he kindly answered.

Where’d you get the idea of the hoop house?
I wanted to grow beyond the traditional season and I still had some plants that were hanging on and I definitely wanted to try something out of my comfort zone. After seeing The $50 Greenhouse, I knew I had it in my to give it a try.

How much did it cost to make?
It cost about $29 in actual legal tender but about $75 worth of begging, borrowing and pleading.

How long did it take? Actual time spent working on it? And actual time from beginning to end?
It took me about a week to get all the materials together (including the plastic and PVC), about 6 hours of actual labor. I kept it up from about November 4 to about January 16. Full photo set of building the hoop house.

What was the most difficult part in making it?
The most difficult part was manipulating the plastic without putting any holes in it or allowing for any air draft. The plastic needed is in one large sheet and required a second and third set of hands at times.

What were the results? Did it work?
The results were about 3 harvests of baby romaine lettuce, 1 harvest of purple cabbage (7 heads) and 25 or so sweet onions. We did lose some plants to an unpredictable (and totally unexpected) freeze in early January. Because we were using geothermic temperatures as well (the raised beds were actually one inch into the soil causing the roots to dig into actual earth and not just developed bed) we had to deal with unseasonable ice. It worked well though…especially for a first (and rather unorthodox) try.

What was it like deconstructing it?
Deconstruction was easy. The plastic was contractors plastic so I didn’t expect it to work more than one season. Because it had weathered – stretched and sagged a bit – I ended up just kind of ripping it off and folding it to be used later on random projects. The PVC I took down, labeled for next year and taped up. Check out his hoop house deconstruction photo set on Flickr.

Would you do it again? If so, what would you change?
I would do it again, for sure, but I would make the skeleton a little more stable using a wood framework for the front and back and only using PVC in the middle structure. I would also give myself more plastic to negotiate rather than being so specific with my measurements.

Thanks Andrew. Now I feel like a complete lazy ass for putting a garbage bag over my containers and calling it a day. This would’ve been so much more practical. Great work my man!

Troubleshooting My Worm Composting Problems

It’s time for me to troubleshoot my worm composting problems again.

After starting my worm composting bin in my kitchen, they died when I made a composting mistake and drowned them out. This time I kept the bin too dry and the worms died.

I brought the container into the worm lady at the Lower East Side Ecology Center in the Union Square Farmers Market. I wanted to see if the bin was the issue.

She looked over the bin and said that it looked fine. Her recommendation was to fill up the bin about 3/4 of the way full with shredded newspaper bedding and to gently rinse it with water until they are moist, but not dripping wet.

After I wetting the bedding (get it wetting the bedding?), she told me to dump the worms on top and let them sit out in the light for a few minutes until they dug themselves into the bedding.

When they dug themselves into the bedding, I was to put some food scraps in the bin for them and continually add throughout the week. She also recommended to sprinkle coffee grinds or to put tea bags into the bin to keep up the moisture, but not too much. I learned that lesson already. If you don’t have either, you can use a spray bottle to mist the bedding.

This is my third time with the worms. Any additional advice for me? What else might I be doing wrong?

httpv://www.youtube.com/watch?v=PtOWyt3Zjpc

Making An Outdoor Compost Bin

I decided to make an undercover outdoor compost bin at my grandmother’s for my backyard vegetable garden in Brooklyn.

Why is it undercover? It is because my Grandmother would flip out if she knew I was composting in her backyard? Why would she flip out? I dunno. She’s 90 and does that kind of thing. We are talking about the woman who freaked out when I brought my first harvest into her house.

Making this outdoor compost bin was very similar to the aerobic compost bin in my kitchen.

This bin also had no cost in putting together as well. All of the tools and materials I already had.

    Here’s how the construction went down:

  • Drilled 1/4″ holes in the bottom of the can.
  • 1/4″ holes were then drilled vertically along the sides of the can about 2″ apart. Horizontally they were about 4″ apart.
  • Collected leaves from the backyard and filled it about half full, then pressed them down until it was about a quarter of the way full.
  • Some of the plants and soil from the containers that I broke down were put on top of the pile.
  • Topped that with some of the Jamaica Bay Sticky Icky (seaweed).
  • Put one last pile of leaves on top.
  • More holes were drilled along the sides to allow for more aeration.

This was a two-day operation. By the time the second day rolled around much of the soil was frozen and couldn’t be used. Luckily, the seaweed didn’t freeze up.

When completed, the compost was put back way in the corner of the backyard where my Grandmother doesn’t go anymore.

Unfortunately, in this weather the compost has froze up. You think it’ll last? How long until I should have some good usable compost?

httpv://www.youtube.com/watch?v=fbpMD-_Dv4c

Breaking Down and Composting My Fire Escape Garden

Since my fire escape garden died after the snow storm in December, I needed to break it down.

Breaking these down were definitely easier than breaking down the ones at my Grandmother’s.

Yes these froze up as well, but I was able to bring them indoors to defrost for a day.

Some of the dead plants that were above the soil line weren’t completely frozen. I was able to trim those off and toss into my indoor aerobic compost bin.

The rest I had to wait to defrost. I put them in my room next to the heater. For those of you that have never been in an NYC apartment, the heat is controlled by the building and is blasted. It’s 20 degrees out and I still have my windows open.

Needless to say, the next morning they were defrosted. I piled on a layer of the potting soil onto the plant trimmings, followed by a layer of blended food scraps and coffee grinds.

I then layered on another big layer of soil to help balance out the greens. The lesson that I learned back in May still sticks with me – don’t put too many food scraps into your compost pile. That smell was horrific.

To make doubly sure I put a layer of shredded newspaper on the pile as well. It’s now all covered up and sitting in my kitchen.

I also kept a container of soil to use and put on the compost pile as needed. The excess and muddy soil I brought to my community compost center.

This was my final step in finishing up my first season of fire escape gardening.

I’ll have to look back at my success and failures and start to get ready for the spring plantings.
httpv://www.youtube.com/watch?v=-iUYIUOPZgU