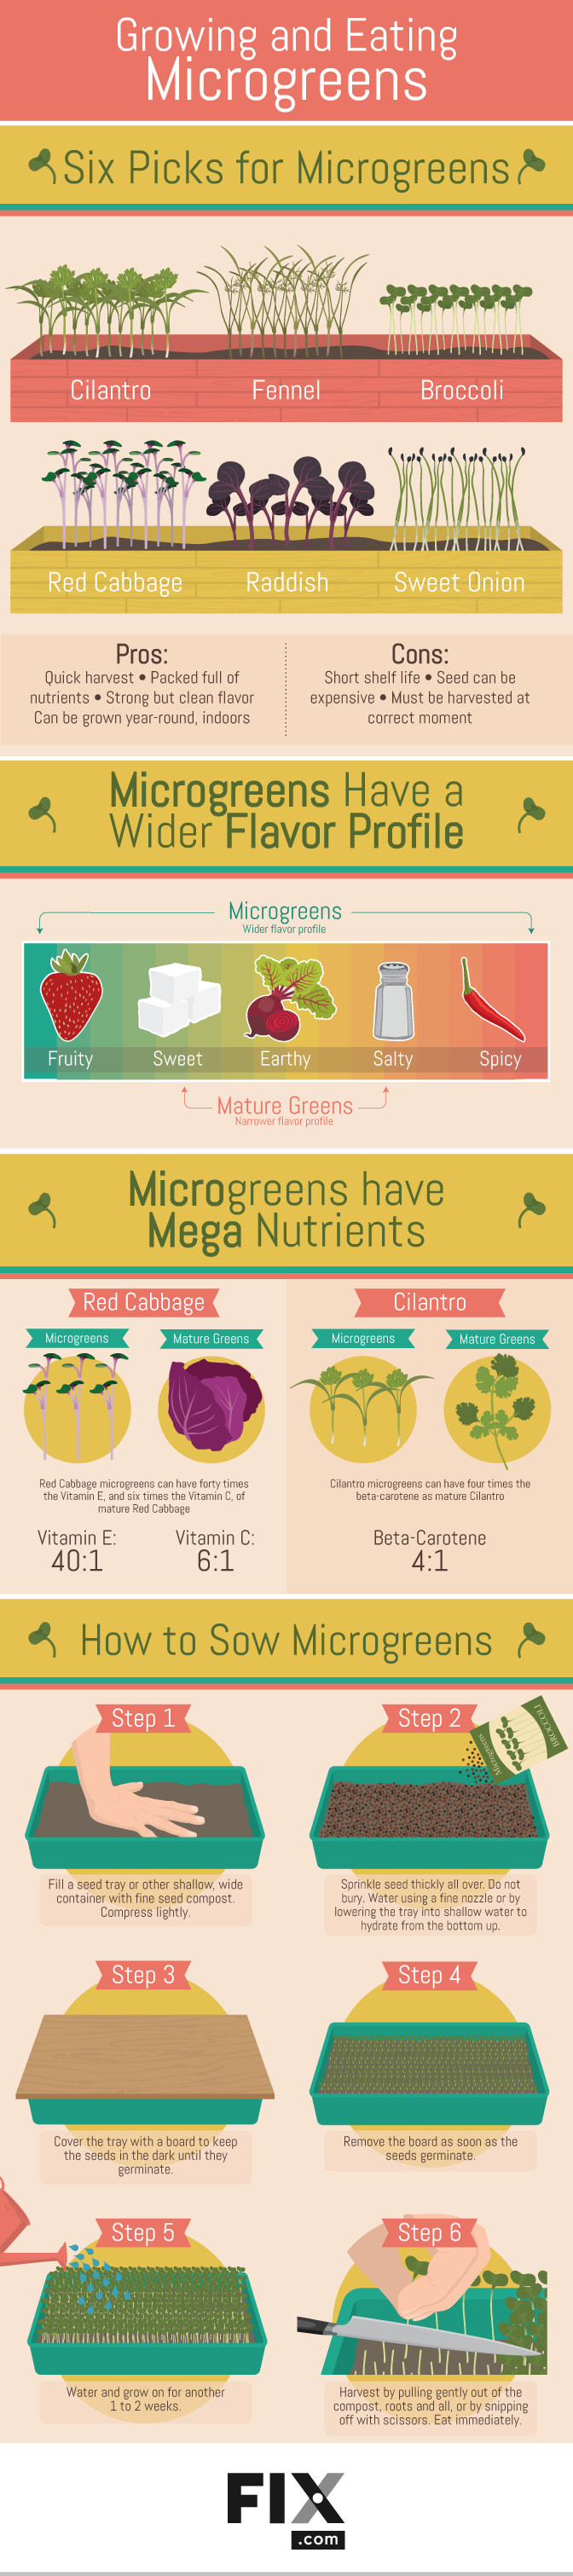
To read more about Microgreens and Mega Nutrients, visit: “VisualListan.com”


Urban-style organic gardening blog about growing your own food with limited space and creative resources.
To read more about Microgreens and Mega Nutrients, visit: “VisualListan.com”
Just a REMINDER: If you want to receive a shipment for the month of September, you must sign up before Sept. 4th, at 11:59pm PST.
Calling all Urban Organic Gardeners! Did you know that RIGHT NOW is the perfect time to start planning your Fall/Winter urban gardens?
Join the Urban Organic Gardener’s UOG Monthly Garden & Seed Club – Sign up now at: https://urbanorganicgardener.cratejoy.com
Our September shipment will feature some of the most popular varieties to grow in colder weather.
Get your FIRST MONTH FREE with promo code: URBANORGANIC – just pay a small s/h fee.
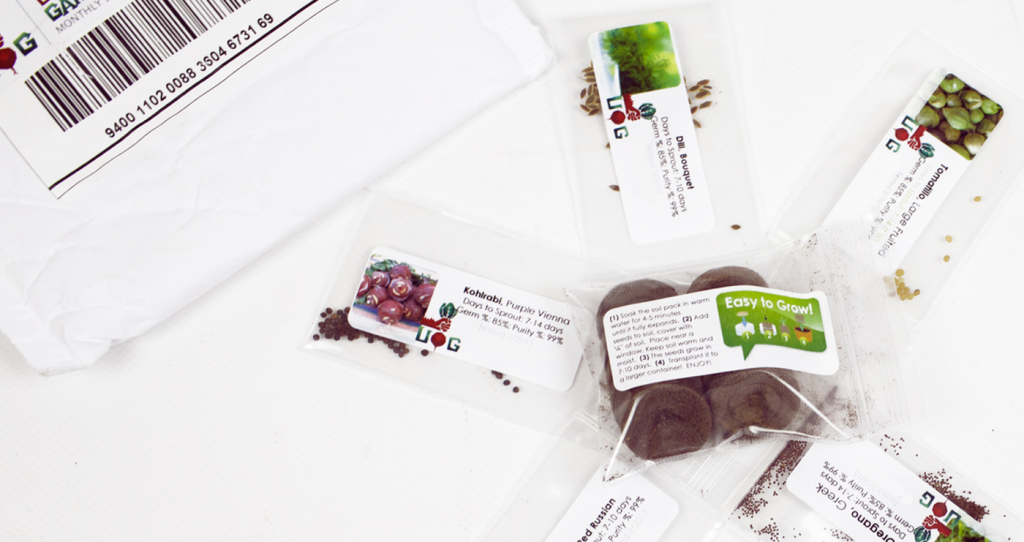
Our garden experts will build a custom curated collection of seeds & garden supplies designed around YOU – your grow zone – your garden space/location – and your preferences.
Having a thriving vegetable garden doesn’t have to end when summer does. With a little bit of planning, and preparation you can grow vegetables well into the winter months or even year round if you live in a warmer climate down south. But regardless of where you live, there’s a few crops you can count on to withstand cooler temps, frost, and even sometimes snow.
Did you know that there are vegetables you can plant now that will only become sweeter and more delicious if they go through a frost?
When a frost comes into contact with a lot of these cool season vegetables, they naturally react to the cold and produce extra sugars which can make some of the more bitter tasting vegetables taste rather sweet.
Prepare now to have the garden you’ve always wanted during Fall/Winter! With these crops, put the fear of your plants being damaged or destroyed aside. When Winter weather rolls around, these vegetables will do well & actually THRIVE!
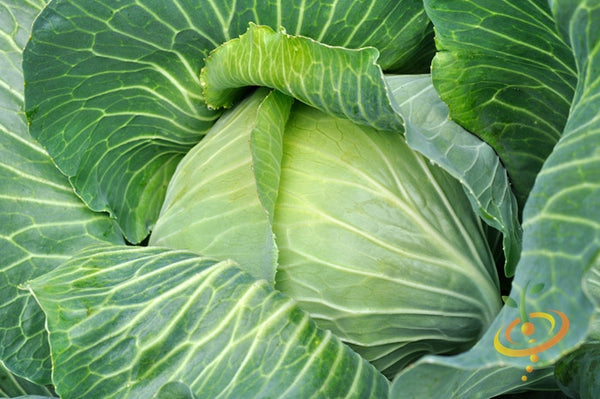
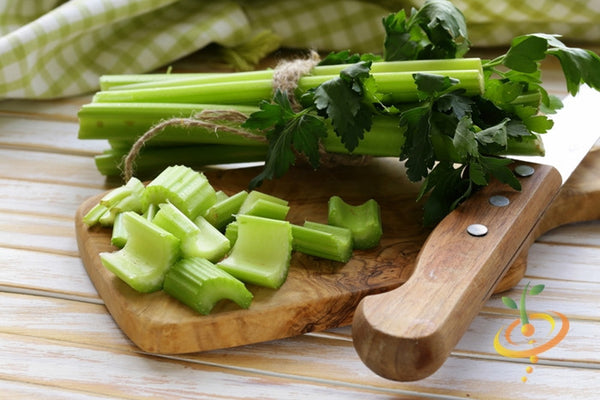
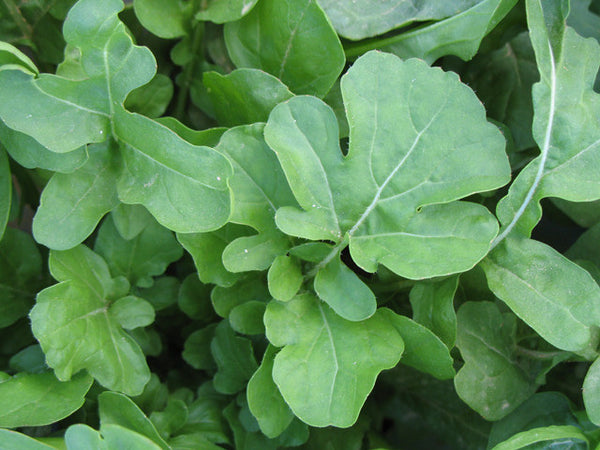
Here is a list of 19 Frost Hardy Vegetables you should plant this fall:
Source//www.SeedsNow.com
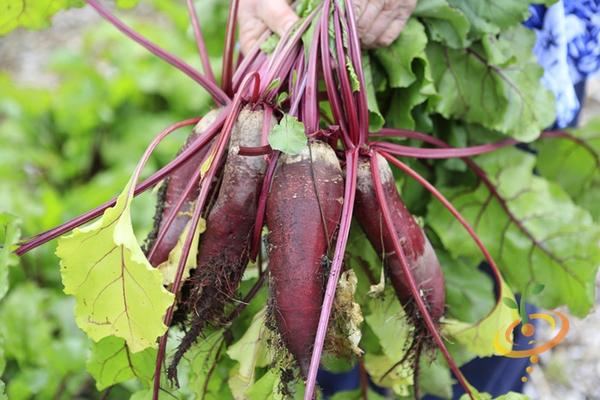
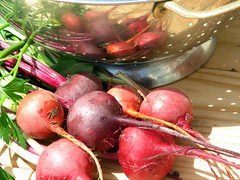
Although beets grow well during warm weather, the seedlings are established more easily under cool, moist conditions.

Broccoli plants thrive in cool temperatures, they have been known to survive temperatures as low as 28 F.

The plant will withstand frost and can be harvested until a hard freeze strikes. The best-quality sprouts are produced during sunny days with light frosts at night.

Cabbage can withstand frost down to 20 degrees or even 15 degrees F.
Carrots can survive temperatures as low as 15 degrees Fahrenheit, but prolonged periods of cold results in long, pale roots.

Cauliflowercan survive temperatures as low as 10 degrees Fahrenheit.

Celery tolerates light frost only.
Collard greens are the most cold resistant of any plant in the cold-hardy Brassica family.
Collards can withstand winter temps. down to 5 F. and they usually come through the cold even more flavorful.

Onions are as hardy as they come. Frosts, freezing temperatures and snow will not kill them.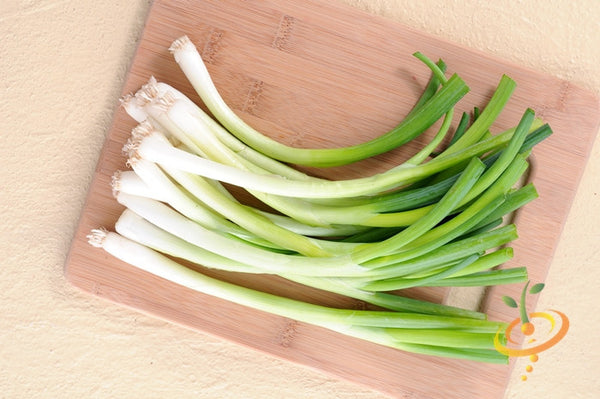
Frost damage on leafy vegetables doesn’t render the plant inedible like a disease. You can harvest non-damage parts by cutting away brown areas and edges that are frost damaged and save just the leaf parts that are uninjured and your plant will continue to grow.
Snow can protect plants from extreme cold so that they stay in the garden longer. Kale is one of these plants! Very cold-hardy.

Leeks are very cold-tolerant, most likely to survive plunges to 0 °F

When spent days under the cover of snow they have been known to emerge in perfect condition once the snow melts.

Parsnips are generally tolerant to 0 °F and will sweeten in flavor if hit with a light frost or two.

Radishes thrive in the cooler weather when frost can be a threat to other crops. They can survive hard freezes as well.

When exposed to light frost, rutabagas can actually taste sweeter. To extend the harvest season & protect the crops from heavier frosts, just add a thick layer of straw.

Grows slowly through the winter but will always bounce back in early spring.

Swiss chard is very cold-tolerant, & can survive dips to 15 °F without any protection.

Turnips lose much of their spiciness and accumulate sugar when they mature in cold weather.


JOIN the Urban Organic Gardener’s MONTHLY SEED CLUB TODAY!
For $10/month our garden experts will build a custom curated collection of seeds & garden supplies designed around YOU – your grow zone – your garden space/location – and your preferences.
Sign up now at: https://urbanorganicgardener.cratejoy.com
The weather in August is oftentimes more mild than we anticipate, especially as we get closer to the rapidly approaching first day of Fall. This is a great time to get things growing again, after July’s hot temperatures. A garden is hardier than you may think, and there are plenty of varieties that will do well and actually THRIVE this time of year.
To receive a shipment for the month of August, you must join before August 4th at 11:59pm PST.

Don’t wait, join the new Urban Organic Gardener’s Monthly Seed Club now! MUST JOIN BEFORE JULY 4th at 11:59pm PST to receive the next shipment. Sign up now at: https://urbanorganicgardener.cratejoy.com
For $10/month our garden experts will build a custom curated collection of seeds & garden supplies designed around you – your grow zone – garden space – and your preferences.
Includes everything you need to grow 5 new edible plant varieties every month – varieties can include herbs, vegetables, flowers, sprouts, micro-greens, bulbs, and more!
Join the rest of the UOG community and get growing now! We promise to make this a great experience for you and your family.
Don’t wait, join the new Urban Organic Gardener’s Monthly Seed Club now! Must join before July 4th at 11:59pm PST to receive the next shipment.
Sign up now at: https://urbanorganicgardener.cratejoy.com
For $10/month our garden experts will build a custom curated collection of seeds & garden supplies designed around you – your grow zone – garden space – and your preferences.
Includes everything you need to grow 5 new edible plant varieties every month – varieties can include herbs, vegetables, flowers, sprouts, micro-greens, bulbs, and more!
Join the rest of the UOG community and get growing now! We promise to make this a great experience for you and your family.


We will curate the absolute best seeds known to grow for your exact garden location, preferences, grow zone, and time of the year.
WHAT KIND OF SEEDS WILL I RECEIVE?
We will surprise you with everything from vegetables, culinary herbs, sprouts, medicinal herbs, edible flowers, micro-greens, and more. Our goal is to make growing your own organic garden as fun, healthy, exciting, and as easy as possible.
WHEN IS THE NEXT SHIPMENT?
Shipment occur on the 5th of every month. You will be notified via email as soon as the order has been shipped. Receive instant tracking and delivery confirmation.
Ready to Sign Up? Visit, https://urbanorganicgardener.cratejoy.com/
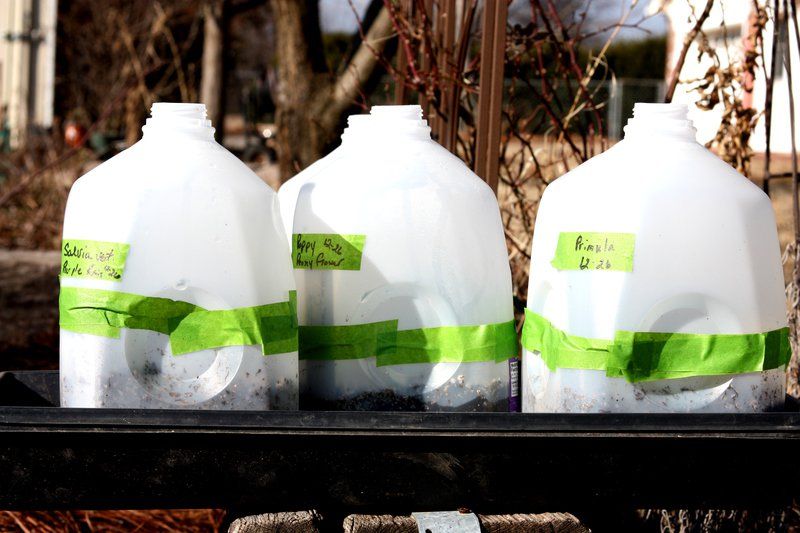
If you want to get a jump start on your gardening outside, but temperatures are still quite cool, you can use milk jugs to create mini-greenhouses.
“Three cold-treatment methods that work include: 1) Plant in recycled containers that are monitored outside; 2) Pre-chill the seeds in the refrigerator; and, 3) directly sow the seeds on prepared beds that are either open to the elements or mulched.”
Steps for making a milk-jug greenhouse:
To read the entire article, visit: “TheMuskogeePhoenix.com”
Join the club that delivers you garden seeds at just the right time of the year to plant them – hand selected based on your garden specs. Every month you’ll receive a collection of heritage garden seeds and everything you’ll need to get growing. Buy a subscription for yourself or give one as a gift!
Sign up here: https://urbanorganicgardener.cratejoy.com/
It’s simple: $10/month + s/h
Ready to start receiving monthly shipments of seeds, customized for your exact grow zone? START HERE!


Here at UOG we believe that growing your own organic food can be one of the most rewarding things you can do for your mind, body, and soul. Become a member of the UOG Monthly Seed Club and receive a handpicked collection of seeds and garden goodies specifically catered to your exact growing requirements.
Whether you’re growing in containers on your patio or using hydroponics in your backyard we’ve got seeds for you.
Just start by answering a few basic questions about your gardening experience and where you will be planting your seeds.
Gardening isn’t usually a process that should be rushed. It takes time to prepare a spot that you’ll be planting in, and patience usually pays off when you’re growing your own food. There are a few crops, however, that always mature fairly quick. If you’re short on time during your growing season or just want to get your toes wet as a first time gardener, we’ve put together a list of a few crops that are quick to grow and will have you harvesting your own homegrown veggies in no time at all.
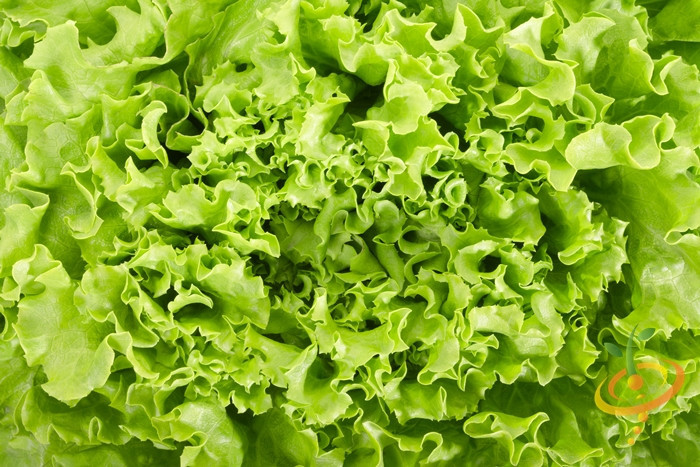 Learn how to grow your own organic Lettuce >
Lettuce – (Harvest in about 30 days) Lettuce is a wonderful crop to grow, and matures fairly quickly. Sow new lettuce seeds every 30 days for a continuous harvest that will provide you with fresh leafy greens year-round. Lettuce prefers cooler temps, somewhere around 50-60 degrees but will also thrive during the summer if grown in the cool shade. Have a sunny window? It grows wonderful indoors as well. Short on space? Lettuce loves being grown in containers and usually doesn’t mind being crowded when planted so you can sow your seeds fairly close together as long as you’re not sowing varieties that produce a round head.
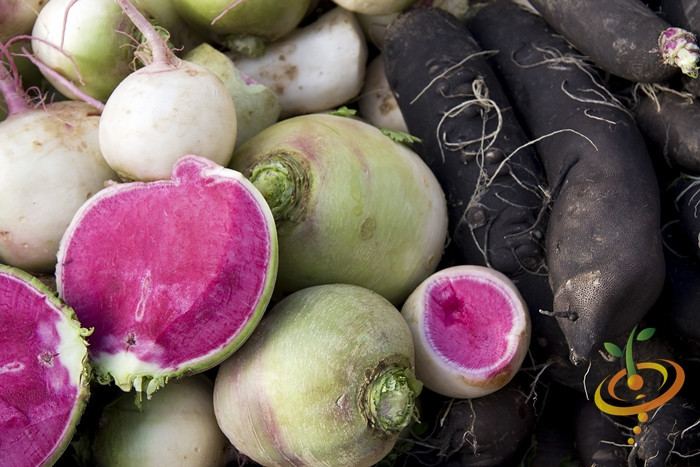 Learn how to grow your own organic Radish >
Radishes – (Harvest in about 20-25 days) Want a fast growing crop that packs a ton of flavor? Radishes take up very little gardening space, grow very quickly, and can come in over 200 varieties with a wide array of colors, shapes, sizes and flavors. They grow well in containers, and prefer full sun however some varieties can be grown in partial shade. In cooler climates they can be planted in both the spring and fall. In warmer climates they should be grown over winter.
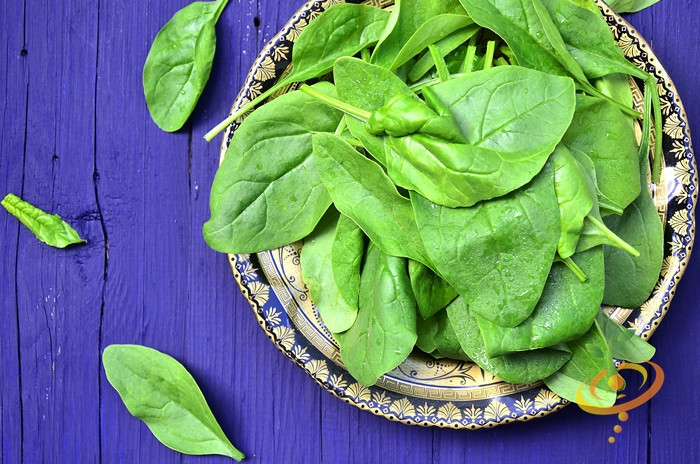 Learn how to grow your own organic Spinach >
Spinach – (Harvest in about 30-45 days) Baby spinach leaves can be harvested about a month after planting. The smaller leaves are loaded with flavor, regardless of the variety you choose. Harvest the larger leaves at the base and allow the plant to continue growing and you’ll be able to harvest from a plant for quite a few weeks before it goes to seed. It grows a lot like lettuce, so try and grow it in cooler temps. or in the shade during the summer. Also grows well in containers and doesn’t require a lot of space in the garden.
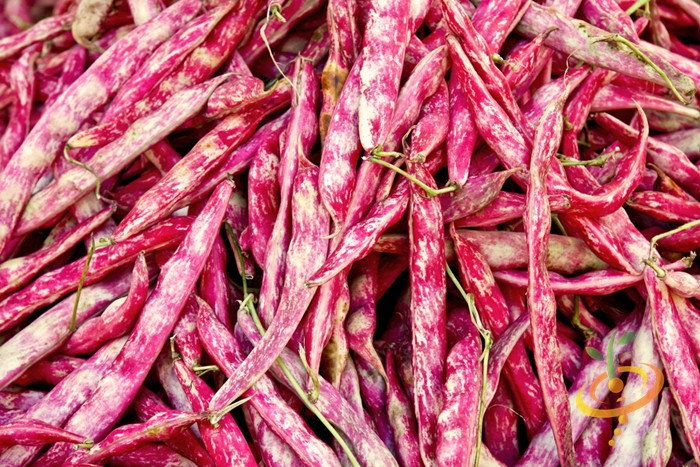 Learn how to grow your own organic Beans >
Bush Beans– (Harvest in about 50 days) Beans love warmer temps. and seeds can be sown every two weeks during the summer to ensure a continuous harvest. Bush beans usually produce most of their beans within a 2 week period.
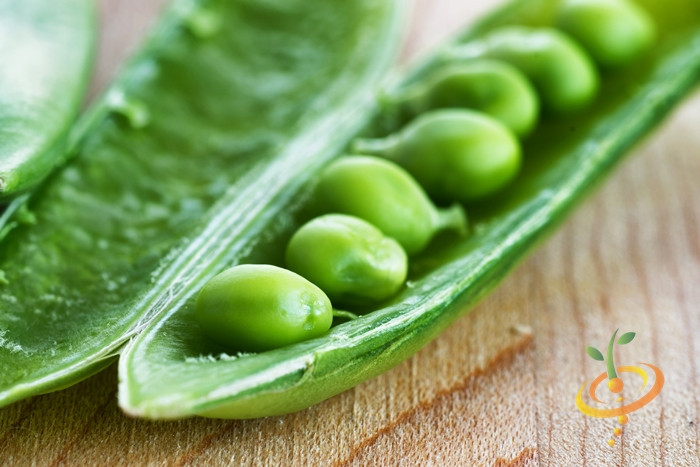 Learn how to grow your own organic Peas >
Peas- (Harvest in about 60 days) Peas are a wonderful cool season crop that take up virtually no space since they grow vertically on a trellis. They do best when directly sowed. The simplest way to prolong harvest is to plant early, mid season, and late varieties at one time rather than sowing every 2 weeks.
Source: NaturallyLoriel.com
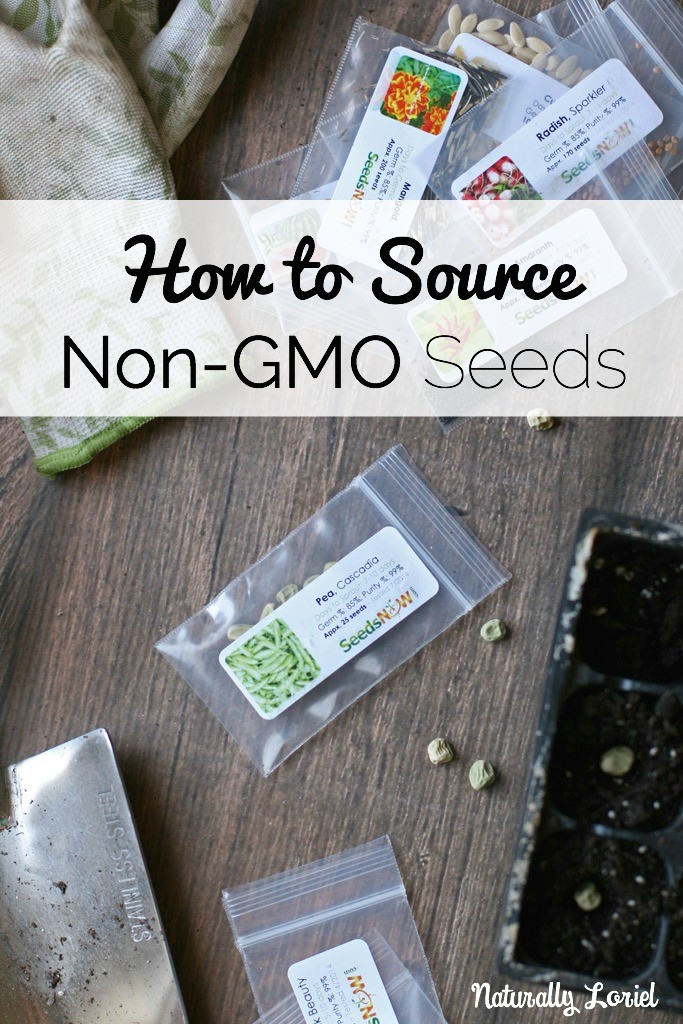
Naturally Loriel recently published a blog post on a very important topic: How to Source Non-GMO Seeds.
She says, “You begin to learn which food companies deserve your support and try to find a local farmer’s market in your area. You realize it’s so important to meet and shake the hands of the farmer that produces your food. Unfortunately though, you’re not as lucky as Lauren is, and the farmer’s markets in your area royally suck. The only other logical solution is to grow your own food.”
Click here to read the original blog post: http://www.naturallyloriel.com/how-to-source-non-gmo-seeds/
 The strangest posts wind up causing some controversy.
It doesn’t make sense to me.
When I wrote about why having an emergency seed bank is important, I didn’t quite get the reaction that I’d expect.
I received emails, Facebook comments and Tweets saying that I couldn’t be more wrong about storing the seeds and that freezing them was a horrible idea.
I’ll admit that I have never frozen seeds before and then used them. It is a recommendation that I’ve seen countless time before.
So I did a bit of research and here’s some excerpts from sites:
Last year we planted a variety of different seeds that we had put in the freezer over 10 years ago and forgotten about and they came up just fine. They were just in ziplock bags. — via Survivalist Boards
Seeds dried to a low moisture content with silica gel and then stored in a freezer can usually retain viability for many years. — via HowToSaveSeeds.com
Freezing seeds will put the embryo into suspended animation reducing its need to consume the sugars that are encased in the seed. This increases it’s storage life immensely… — via Ready Nutrition
The main takeaways that I got in my research were the following:
How do you store your seeds for the short or long-term?
All you have to do is click here and use the discount code URBAN10 to get 10% off.
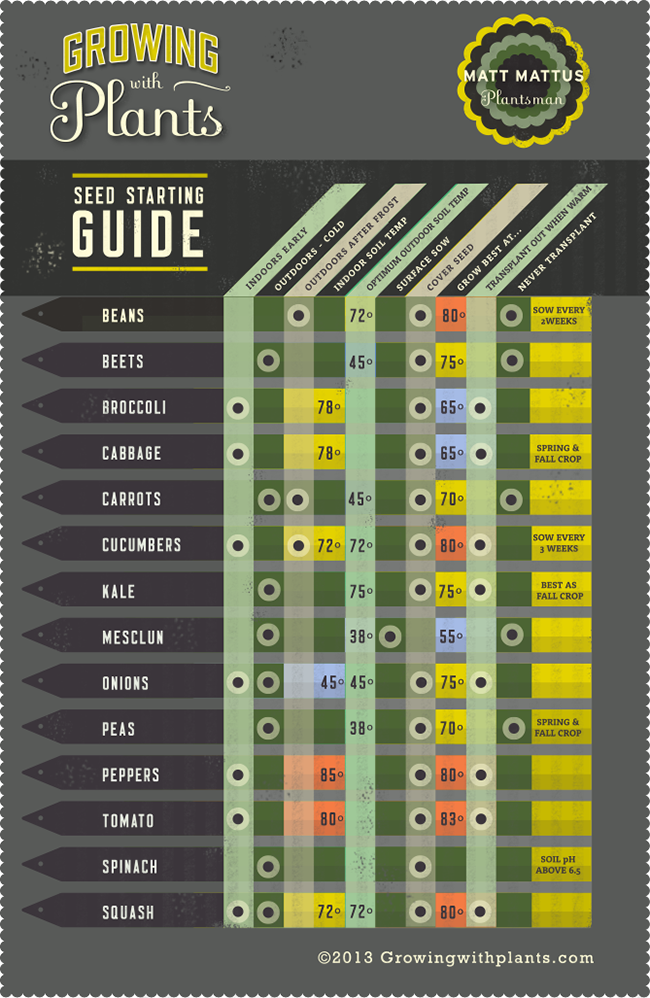
This is by far the easiest chart to understand. All the information you need to know to successfully start seeds is right here. Click the image to enlarge.

 Seed starting.
Who thought that it could be so intimidating…
..but there are lots of questions and things to take into consideration when starting your seeds.
We’ve already covered some basic seed starting tips and tips for those of you starting indoors, but I want to make it even more simple and basic.
Because that’s how I do.
On the Urban Organic Gardener Facebook page, I’ve been sharing gardening tips.
They’ve been pretty popular, mostly because I think they are so simple to follow and easy to remember.
I thought that they’d make for a great post…so here they are:


Thanks to my sponsors SeedsNow.com and Thrive for the tips.
“Share” this information with your friends and family to help them to get their seeds started.
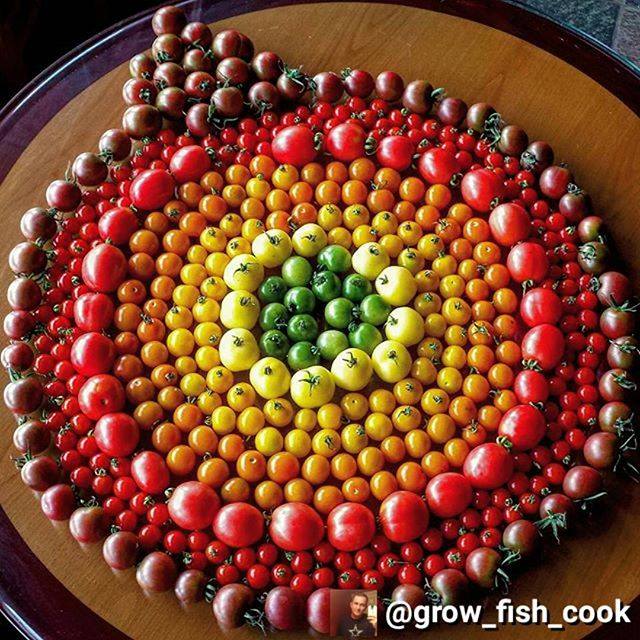
 What’s the difference between an heirloom and hybrid tomato?
Are open-pollinated seeds good or bad?
These are all questions that you have asked me.
You already have reputable sources to buy your seeds.
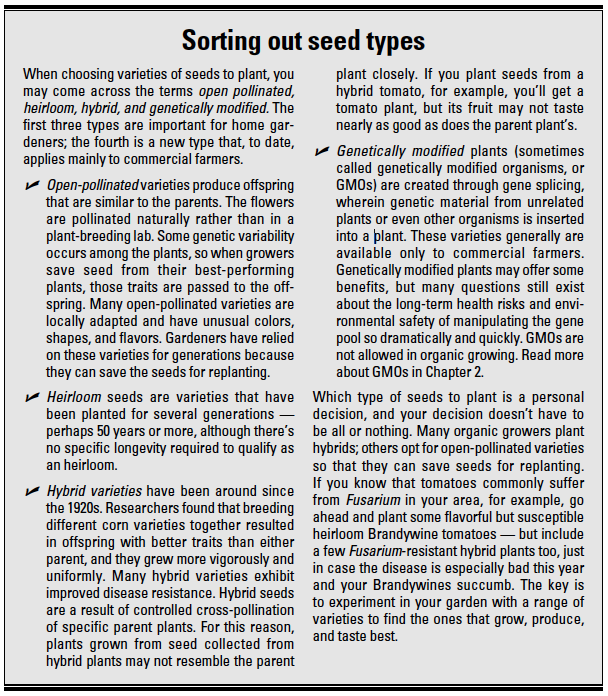
Here’s a simple explanation of the different types of seeds.
Here’s a simple explanation of the different types of seeds. — Tweet This
To help with the clarification, I asked SeedsNow.com, who sells 100% NON-Genetically engineered seeds – all of which are heirloom/non-hybridized and open-pollinated varieties. Here is what they said:
Genetically modified seedsGenetically modified seeds (GM) have been genetically altered/engineered in a lab somewhere and have had specific changes introduced into their DNA by applying genetic engineering techniques. The interesting thing about GMO seeds is that gardeners are not able to save the seeds after harvest and must buy seed every year from large seed corporations, such as Monsanto.
3 sources to buy your vegetable seeds
They are typically open to debate, but some would argue that any seed that has been passed down for generations, usually for 50+ years, is called an heirloom seed. Heirloom seeds are also non-hybrid and open-pollinated.
When someone talks about a hybrid seed variety it typically means the seed has been cross-bred with another variety to try and enhance its results. For example, one might try and cross breed it with another variety that has disease resistance. The problem with hybrid seeds is that when a gardener tries to save the seeds from that variety it typically reverts back to its wild parent and will never really know what will grow.
On the other hand, non-hybrid seeds have not been ‘crossed’ with any other strain. Non-Hybrid seeds are the most natural and purest form of seed anyone can find. Anyone can save the seeds after each harvest and be assured they will grow the same every time.
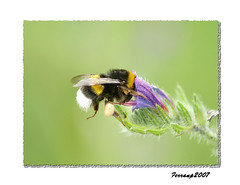
Means the plants are pollinated by insects, bees, birds, wind, and other natural ways. The good thing with open-pollinated plants is that it will continue to reproduce new generations of those plants.
Help spread the knowledge by sharing this post with friends and family. Then in the comments below, let me know what kind of seeds you have started.
 We’ve talked about indoor seed starting and it’s advantages.
While it may be advantageous to start some seeds indoors, it’s not wise to do so with all seeds.
The general rule of thumb is if it grows underground, plant it directly.
Stick with that and you should be good.
Save yourself the hassle and plant these seeds directly in your containers.
Save yourself the hassle and plant these seeds directly in your containers. — Tweet This
[vimeo clip_id=”39030373″ title=”0″ byline=”0″ portrait=”0″ width=”525″ height=”393″]
In the comment below let me know which of these will you be planting directly in your containers this year.
Photo courtesy of B.D.’s world on Flickr
 You want to start your seeds…
…but you aren’t into the diy seed starting projects.
It’s all good and I understand.
If you want to buy a seed starting tray, but not sure what to look for, then read this.
I want to help you to get a quality seed starting tray and provide you with the information that will help you to buy one.
If you want to buy a seed starting tray, but not sure what to look for, then read this. — Tweet This.
Make sure your seedling tray has good drainage so your seeds don’t rot. There should be holes at the bottom of each cell.
The soil or plugs should have good water retention qualities and be porous for vigorous root growth.
You should be able to easily stick your finger under the seedling cell and pop up the seedling when you are ready to transplant.
A seed kit that comes with a sturdy bottom tray makes it easy to move your seeds from place to place.
A reusable seed starter is always best for you pocket book and the environment!
This list is courtesy of The Greenhouse Catalog. Check out their selection of seed starting supplies.
[vimeo clip_id=”38469411″ title=”0″ byline=”0″ portrait=”0″ width=”525″ height=”393″]
If you are reading this post before 11:59pm EST on March 15, 2012, you can win a Smart Float Seed Tray from the Greenhouse Catalog by clicking here.
Are you starting your garden in a seed starting tray? Let me know in the comments below.
 By Michelle Moore
Owner of The Greenhouse Catalog
There is nothing like new life in spring…
…and starting seeds is one of the best ways to enjoy the start of the season.
Unlike transplants, seedlings are fragile and require newborn-like attention:
The right media, temperature, light, water and food.
To a new gardener, meeting these needs may seem like a challenge.
But with a little knowledge and the right equipment, success is easy and just a few short days or weeks away.
With a little knowledge and the right equipment, seed starting success is easy. — Tweet This
It is important to select the right seeds. There is nothing wrong with planting seeds that are more than a year old, but if you are trying seed starting for the first time and need a confidence boost—stick to current year seeds for the best germination rate.
Media: The best seed-starting media holds moisture and air. Seedlings need to stay moist, but not wet, and need to have plenty of aeration. You can purchase specially formulated seed starting mix, use coco-pith, or a number of seed starting cubes for the best results.
Temperature: Seeds need warmth, so don’t put your seed trays in a drafty area. Add bottom heat for even better and faster roots to development. Seedling heat mats are an excellent investment.
Light: Most seedlings germinate best in light. A sunny window may be enough light, but the addition of a small grow light can make a tremendous difference in a healthy start. Plants receiving too little or too much light tend to get leggy and don’t make for the best transplants. T-5 or LED grow lights are extremely energy efficient and do not take up much space. They also don’t create a lot of heat, so seedlings won’t dry out as quickly.
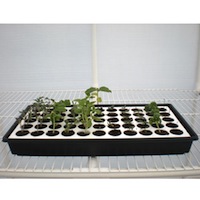
Water: Seedlings dry out quickly, so it’s easy to overwater them. The best methods include frequent but gentle misting, or bottom watering. We love the Smart Float tray. It provides an excellent media and the sturdy Styrofoam base floats on the water, so seedlings are never over or under watered. Additionally, the Styrofoam insulates tender seedlings and the white base reflects lights back to plants.
Feeding: Once plants have their second set of leaves, they are ready for food (generally within 72 hours of spouting). A high-quality organic fertilizer, diluted to ¼ strength for the first feeding, works well. Continue feeding at ½ strength until seedlings are ready to transplant.
Happy planting and be sure to check all of the seed starting supplies at The Greenhouse Catalog.
Michelle Moore is the owner of the Greenhouse Catalog where she has worked with greenhouses for 20 years. Michelle writes and lectures about greenhouse gardening as an Oregon State University Master Gardener and member of Garden Writers Association. Michelle and her husband live in Oregon, but they enjoy hints of summer all year in their greenhouse! Become a Greenhouse Catalog fan on Facebook to get year-round gardening tips and advice.
Share this post with your friends and family to help them successfully start their seeds this year.
Photo courtesy of janeyhenning on Flickr
 You’ve scouted out the location for your garden…
Figured out how much sunlight your space gets…
And have decided what you are going to grow.
Now it’s time to finally get your seeds started and aren’t sure what to use. That’s why, I wanted to share 5 items that you can start your seeds in.
Strawberry containers. If you are growing fruit bearing vegetables, you can reuse strawberry containers to start your seedlings in.
Toilet paper rolls. Toilet paper is something that we all use and wind up tossing into the trash when done with them. If you are feeling crafty, you can turn your toilet paper rolls into seed starting pots.
Newspaper pots. You can either make these on your own by following these directions or buy a kit that allows you to easily make them.
Expanding seed pellets. If you aren’t feeling so crafty, you can buy seed starter pellets from an online seed company like SeedsNow.com
Seed starting kits. If you really want it to all be done for you, then you can purchase a seed starting kit that comes with everything that you need. You can buy ones that have heating mats, greenhouse covers and pellets.
Whether you are a DIY kind of person, or want to buy a ready to go kit, one of these five (5) options will help you to get your seeds started.
What are you going to use to start your seeds this year?
Photo courtesy of annethelibrarian on Flickr.