We will curate the absolute best seeds known to grow for your exact garden location, preferences, grow zone, and time of the year.
WHAT KIND OF SEEDS WILL I RECEIVE? We will surprise you with everything from vegetables, culinary herbs, sprouts, medicinal herbs, edible flowers, micro-greens, and more. Our goal is to make growing your own organic garden as fun, healthy, exciting, and as easy as possible.
WHEN IS THE NEXT SHIPMENT?
Shipment occur on the 5th of every month. You will be notified via email as soon as the order has been shipped. Receive instant tracking and delivery confirmation.
In residential areas near Battle Creek, backyard chickens, goats and honeybees may become more common. Recently, there have been proposed ordinance changes that would allow urban dwellers to keep small livestock, bees and grow gardens all in their backyard.
The new ordinance changes would also allow urban residents to sell fruits and vegetables grown on their property between certain hours.
“Urban farming could be beneficial for the city.” They’ve “pointed to studies that claim urban agriculture raises home values, generates additional economic activity, creates jobs and helps increase access to healthy food.”
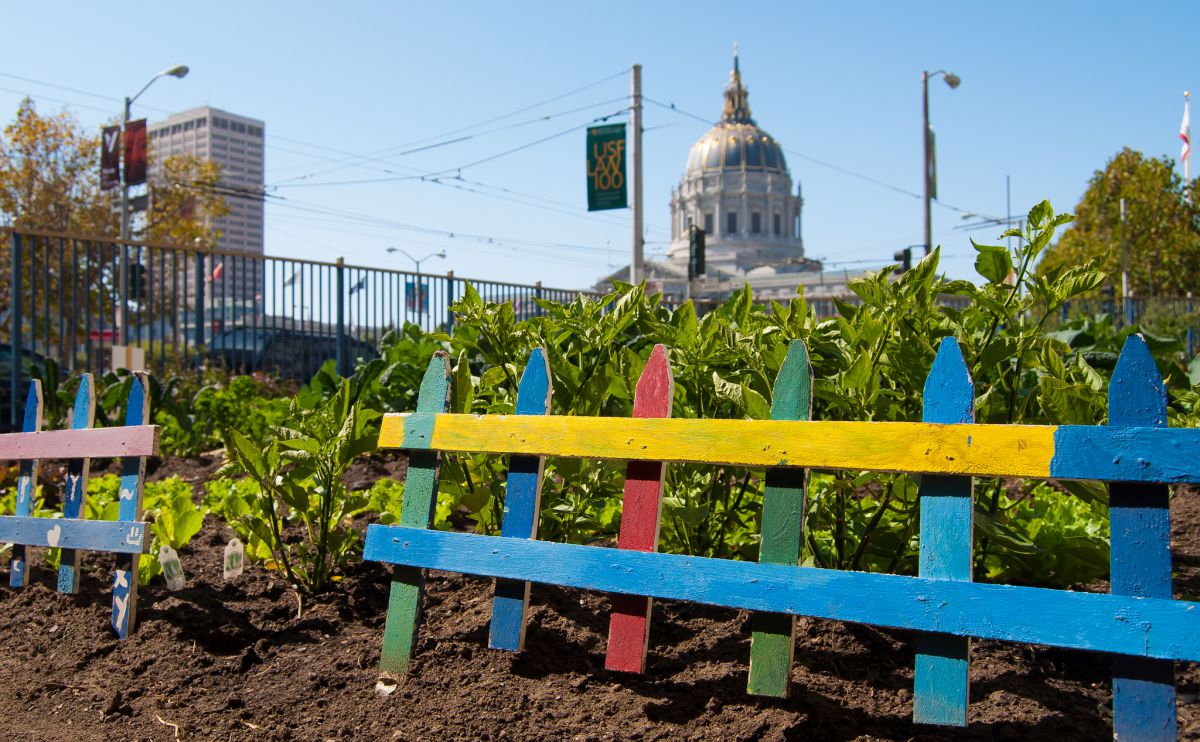
San Antonio’s city council has recently changed city codes that makes it legal to grow and sell food from your own backyard. One resident recently bought two vacant lots next to his home and has transformed them into a vegetable garden!
When trying to figure out if it’s safe or not to grow your own food in urban soil, it’s important to first determine what real possible dangers there are. Is the risk is high enough to cause harm?
“Urban farming does present some difficulties not seen in more rural environments; the greater concentrations of people and pollution can have an adverse effect on soil. The most common contaminants in soil are lead, other heavy metals like arsenic and copper, and a group of baddies known as polycyclic aromatic hydrocarbons, or PAHs. These come from a wide variety of places, including paint, fuel emissions, treatments on wood, coal ash, sewage, and pesticides.”
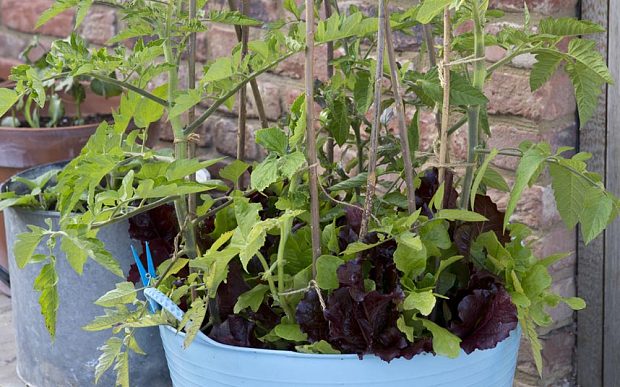
Even if you’re short on space, or gardening in urban areas, you can still grow some of your own food and enjoy a year-round garden. Container gardening can be very productive as long as you maximize your containers potential. As long as you have one large pot, (we suggest 18″ or larger in diameter) you can grow “10 different crops in a single year if you combine compatible plants and plan the growing year carefully.” -source “Telegraph.uk.co”
To Get Started, You will need:
• 1 large pot – a rubber tub bin is ideal or any plastic pot at least 45cm diameter
• Household drill and drill bit if no drainage holes
• Multipurpose, organic, peat-free compost
• A wigwam support made from bamboo canes or any strong flexible sticks such as willow
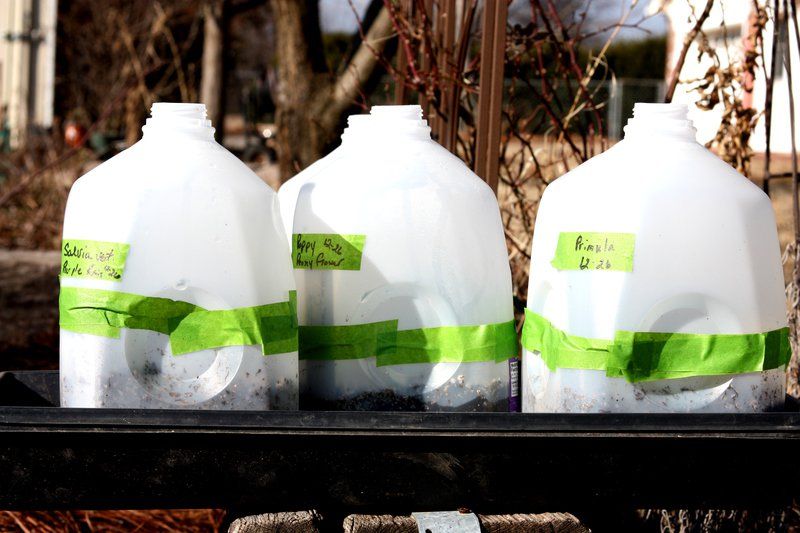
If you want to get a jump start on your gardening outside, but temperatures are still quite cool, you can use milk jugs to create mini-greenhouses.
“Three cold-treatment methods that work include: 1) Plant in recycled containers that are monitored outside; 2) Pre-chill the seeds in the refrigerator; and, 3) directly sow the seeds on prepared beds that are either open to the elements or mulched.”
Steps for making a milk-jug greenhouse:
To make a min-greenhouse garden, collect clear plastic bottles from milk, juice, etc. Poke drainage holes in the bottom with scissors or something like a heated ice pick. Cut containers horizontally at least 4-inches from the bottom and discard the bottle caps.
Gather your seeds and write the plant’s name and date planted on the container with a permanent marker. Also put a marked tag, such as a Popsicle stick inside each container.
When planting begins in the spring it will reduce the confusion if your labels include a hint about where they go in the garden (sun or shade, wet or good drainage, etc.).
Fill the bottom of each mini-greenhouse with loose soil such as commercial potting soil. Many people mix their own out of garden dirt, sand, compost and perlite.
Wet the soil and let it drain. Tiny seeds that need light to germinate are pressed into the top of the soil and seeds that need dark to germinate are pressed into the soil.
Secure the top of the greenhouses with tape. It does not have to be a perfect seal but you want it to hang together through rain, freeze, warm days and wind.
Put the containers in a sunny spot where rain and snow can enter through the top. During periods of no rainfall, bottom water the greenhouses by putting them into a plastic and pouring water – not freezing cold water – into the pan. When the soil has absorbed enough water to be moist not wet, drain the saucers.
Mr. Willie Anderson, an 82 year old Mississippi man, has been container gardening for over 8 years. He originally started out with 100 buckets, but now his garden boasts over 1000! He grows fruits, vegetables and herbs and even has a sprinkler set-up to water his “bucket garden”. The garden is totally organic. “I use grass clippings, soybean stalks, cotton hulls — that’s the waste that comes out when they gin the cotton,” Willie said.
People living in urban areas are sometimes frightened about lead being in their soil. In a new study, they found that by using compost you can help keep yourself and your family safe from toxic lead poisoning. “Good compost will also guarantee that you will have plenty of vegetables to harvest.”
The University of Washington led a study that looked at potential risks that commonly are associated with urban gardening. The conclusion was, that the benefits of consuming locally produced vegetables, outweighed any risks from gardening in “contaminated” soils.
“We’ve shown that lead is harmful by eating the dirt, not from eating the lettuce grown in the dirt.”“People are terrified of soils in urban areas. They always think it’s a mystery brew of toxins in the soil, but in vast majority of cases, the contamination is lead,” said lead author Sally Brown, a UW research associate professor of environmental and forest sciences.
Go here to read the rest of the article at: “WashingtonEdu“
Gardening in small space can be just as rewarding and fun as growing in a large garden area. These days, urban gardeners are growing more of their own food in sometimes less than 100 square feet. Balconies, patios, even indoor windowsills are a great place to grow vegetables and herbs. Almost anything can be grown in a container, and if you’re wanting to know what you should plant to maximize your yield in a small area, here are 9 of the best vegetables/herbs to grow in a small garden.
1. Shallots:
Space shallots approx. 4-6 inches apart with the rows 18 inches apart. Plant the bulb root side down, the top of the bulb 1 inch below the surface. Planting too deep grows elongated bulbs that don’t store well.
2. Carrots:
Sow seeds evenly in a very shallow trench, about 1/4 inch deep. Keep seeds moist so they will germinate. Space rows about 12″ apart and when the first leaves emerge, thin to 1″ apart; when true leaves emerge, thin to 3″ apart.
3. Cherry Tomatoes:
To start tomatoes indoors, sow seeds using expanding seed starting soil pods about 8 weeks before the last frost date for your area. Seedlings will be spindly with less than 12-14 hours of light per day, try to keep them in a warm sunny location. When seedlings have 4 leaves, transfer to a deeper pot (3-4″) and again when 8-10 inches tall. Each time, place the uppermost leaves just above the soil line and remove all lower leaves. Transplant into the garden when the stem above the soil has reached 8-10 inches tall. Be sure to harden them off before transplanting them outdoors. Allow up to 10 days for the tomato plants to harden off to the outside temperature fluctuations.
4. Runner Beans:
Set three 6 foot poles in the ground, tepee fashion, and tie together at the top. Leave 3 to 4 feet between the pole groups. Make a hill at the base of each pole, enriched with compost or well-rotted manure, and plant 6-8 seeds in each. After the second pair of true leaves appear, thin to 3 plants per pole. With regular harvesting, the pole beans should bear all summer.
5. Garlic:
Break apart cloves from bulb but keep the papery husk on each individual clove.
Ensure soil is well-drained with plenty of organic matter. Plant in Full Sun.
Plant 4 inches apart & 2 inches deep, in their upright position (the wide end down and pointed end facing up). Come springtime, shoots will begin to emerge.
6. Kale:
Plant Kale in rows 18 inches to 2 feet apart. When the seedlings are 3 or more inches high, thin plants to 10 inches apart and use the thinnings for salads or as a cooked vegetable.
7. Basil:
Try to space your basil plants about 12 inches apart. As long as you harvest the leaves when they are young, basil plants make a wonderful container crop.
8. Lettuce:
Seed should be sown thinly in rows 1 foot apart; for leaf types, thin plants to 2-3 inches apart, then thin again by pulling every other plant when half grown. This will encourage thickly developed plants. For head, Bibb, and cos types, space rows 18 inches apart, plants 8-10 inches apart. Closer spacing results in smaller heads, which may be preferable for small families.
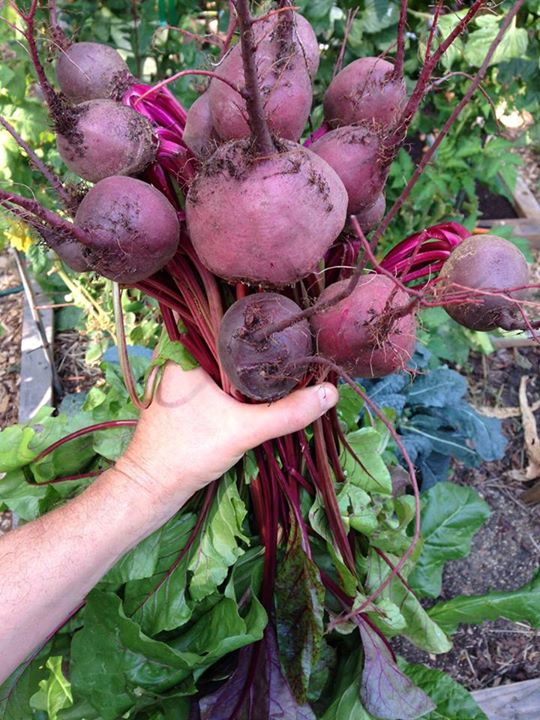
9. Beets:
Sow seed 1/2 inch deep in rows 12-18 inches apart. The beet seed is a compact ball of many tiny seeds. Many plants germinate where each seed is sown, so seed should be placed sparingly. When seedlings are 4-6 inches high, thin plants to stand 1 1/2 inches apart. (They can be used in salad or cooked as spinach.) Then, as these beets grow to about an inch in diameter, pull every other one to allow larger beets to grow.
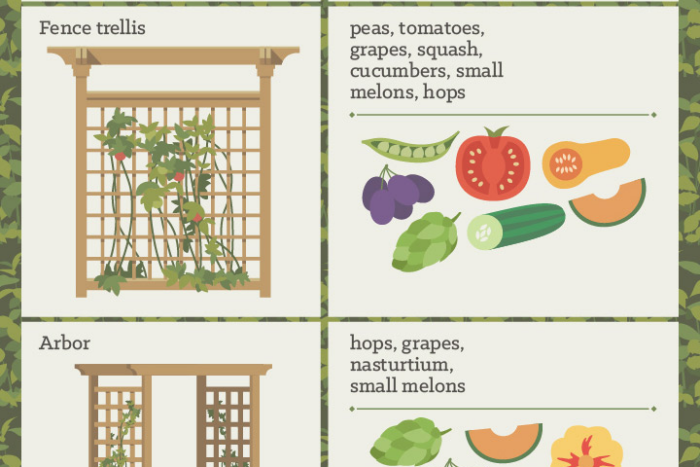
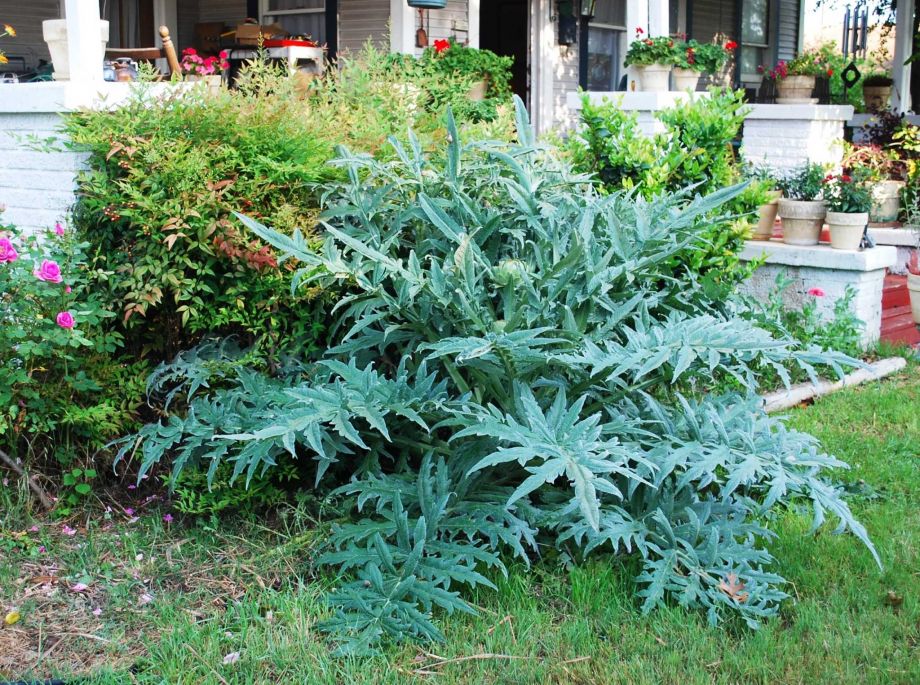
If you’re looking to landscape your yard why not landscape with edibles? These edible plants will not only provide you beautiful surroundings to look at, but some healthy and nutritious food to eat. These days a lot of people are finding ways to put their yard to work for them by planting edible trees, shrubs, and vines which will provide their family with edibles year-round.
Before you go laying all new sod or traditional hedges/bushes think outside the “norm” by focusing on herbs, vegetables, edible vines and ground covers, maybe even some fruit trees.
Tryplanting in a wheelbarrow.
“What you plant depends on the depth of the wheel barrow. Carrots may not work because they need plenty of soil to grow in. But shallow-growing greens such as Swiss chard as well as strawberries and most herbs, including thyme and basil, should all be right at home in a wheelbarrow garden.
Finally, before filling it with dirt, drill several drainage holes in the bottom of the wheelbarrow to help keep the soil from getting — and staying — too wet.”
Try herbs as borders.
“Consider planting herbs such as bay or rosemary instead. Not only will they provide a year-round screen, thrive in full sun and require little water or other maintenance once established, but you can use the leaves while cooking.”
Try planting veggies in the front yard.
“For example, ornamental sweet potato vines, are popular for their attractive leaves, but the sweet potato tubers they produce tend to be bitter. How about planting pumpkin, melon or cucumber instead? They grow well in full sun, all produce long, interesting vines that, at the end of the growing season leave you with something good to eat.”
To read the rest of the article and find more ways you can landscape with edibles, visit: “ExpressNews.com”
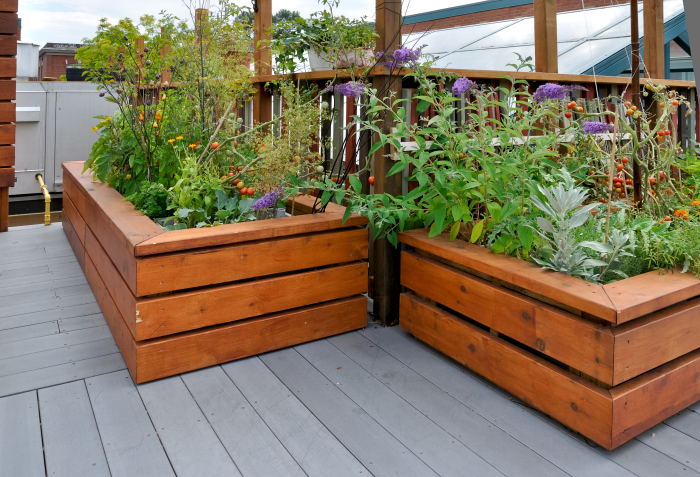
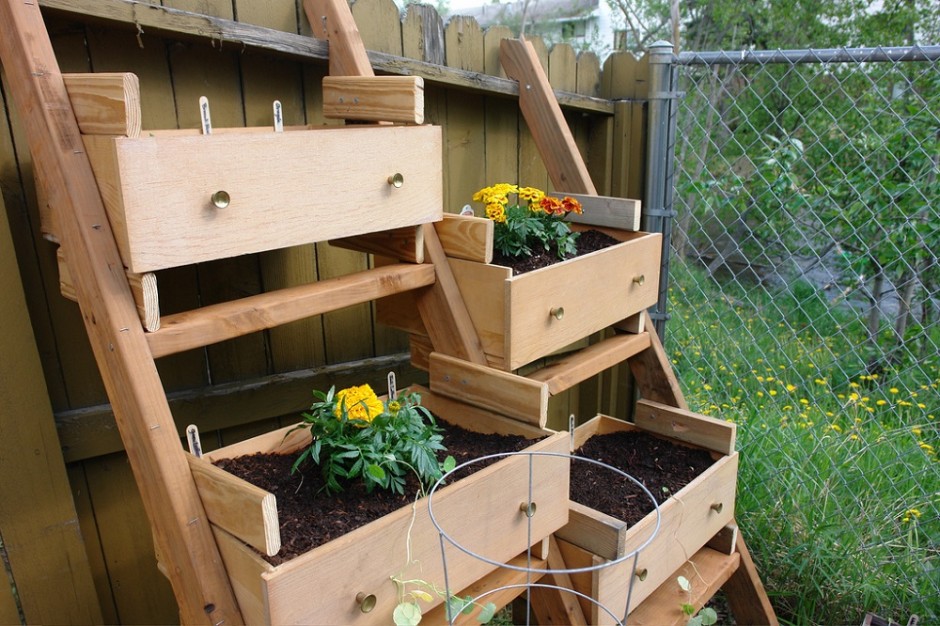
Old dressers are easy to come by and for balcony gardeners or anyone who’s wanting to grow more food in less space by creating a vertical garden, this project might just be for you! “Making a container garden from up-cycled dresser drawers is pretty simple. You’ll want to start with a plan. Things you’ll want to consider…
Where will the container garden go? This will depend heavily upon what you plan to plant.
Do the plants you want to grow thrive in full sun, partial sun or shade? Also keep in mind that the drawers lend to a very shallow growing space. Plants that can thrive with less depth include lettuce, herbs, strawberries, cucumbers, onions and radishes.
Once you know what you want to plant and where your garden will grow, it’s time to inspect your drawers.
Are they sturdy enough? If not, reinforce them.
Have they been treated with any sort of paint, stain or chemicals? If so, you’ll probably want to sand them down or use some sort of a liner that will act as a protective barrier.
Next, you’ll need to drill holes in the bottom of your drawers so moisture has somewhere to drain out. Now it’s time to fill your new dresser drawer vegetable garden with potting soil. Be sure to add some of your homemade compost to give your veggies an extra boost!
At this point, you’re finally ready to plant your seeds. Be sure to read the instructions on the seed package and properly space the seeds so your plants have room they need to thrive.”
Read the full article and find more step-by-step instructions here: “Earth911.com“.
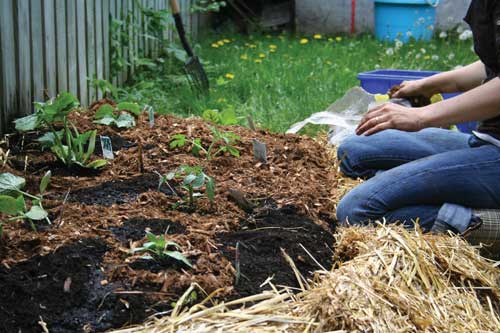
Do you dislike tilling? Have you heard about lasagna gardening yet? If not, you may want to read up on this popular gardening technique that allows you to do more with less work. It’s also referred to as “sheet composting” or “layer gardening”. It’s a no-dig, no-till method that provides the gardener with rich and fluffy soil, perfect for vegetable and herb gardening.
“Just like the lasagna you cook, your lasagna garden has to be layered in a general order.
The first layer of your lasagna garden is either brown corrugated cardboard or three layers of newspaper. The space underneath the cardboard and newspaper will attract earthworms to your lasagna garden because it is dark and moist. Earthworms help make the waste into soil. Worms will also help keep this new soil loose.
Lay the cardboard or newspaper directly on top of the grass or weeds where you want your garden. The grass or weeds will break down fairly quickly because they will be smothered by the newspaper or cardboard, as well as by the materials you are going to layer on top of them.
Wet this layer down to keep everything in place. Water also helps waste break down.
Put a layer of browns (leaves, shredded paper) on top of the cardboard or newspaper. Put a layer of greens (vegetable scraps, grass clippings) on top of the brown layer. Layer until your lasagna garden is about two feet high.
In general, you want your “brown” layers to be about twice as deep as your “green” layers. There is no need to get this exact. Just layer browns and greens, and a lasagna garden will result. What you want at the end of your layering process is a two-foot tall layered bed. The layers will ‘cook down’ (compost) in only a few weeks.” -via “GreenThumbscedwvu.org”
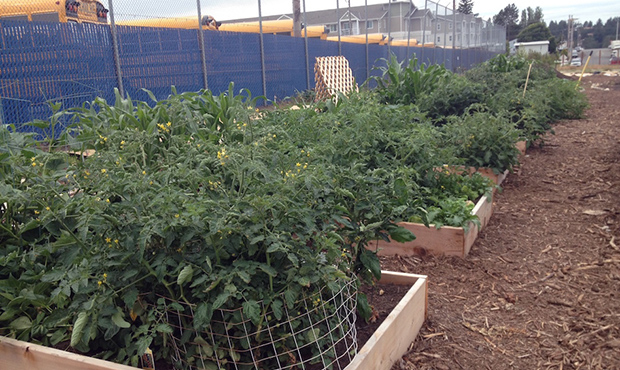
Urban farms are popping up all over the country and providing the farmers with extra income, some even enough to support their families and lifestyle. They usually consist of novice farmers and small plots that cater to providing the community members with fresh, organic produce that’s grown locally. Something people are very attracted to. From the farmers in most of these scenerios, business is booming and for some, they can’t even keep up with demand. If you’re interested in making money by urban farming read more about Mr. Swain and Ms. Tayse’s business. “Mr. Swain’s business, Swainway Urban Farm, is for-profit, and he’s been at it for seven years, making him just about the longest-tenured urban farmer in Columbus. He and his partner, Rachel Tayse, farm two backyards and grow indoors in a warehouse in Clintonville.”
“While urban land represents only 3 percent of the 2.3 billion acres in the nation, according to the USDA’s 2007 land-use report, it is home to 81 percent of the U.S. population.
Those people need to eat, and one of the hottest food trends in the past few years is buying locally produced food.”
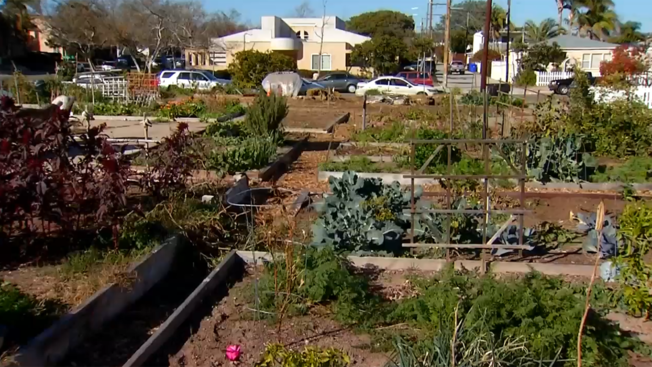
After four decades, San Diego’s Pacific Beach Community Garden has closed for good but there is hope. “…The end of the garden does not mean the members will stop exercising their green thumbs. They are hoping to section off a portion of land in De Anza Cove to create a new garden. They will also turn to their neighbors for help.
“The gardeners are the real seeds,” said Gandolfo. “Us gardeners are going to fan out into the community — whether it is De Anza in a few years, whether it’s somebody’s neighborhood, front yard/back yard in the next couple of months — and we’re the ones taking the garden to new places here in Pacific Beach.”
The gardeners are volunteering to plant and tend new gardens for any neighbor willing to donate his or her yard.”
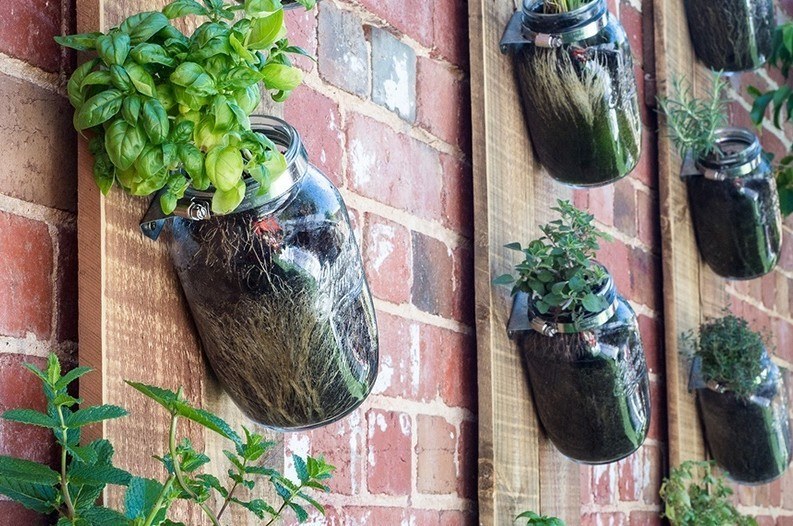
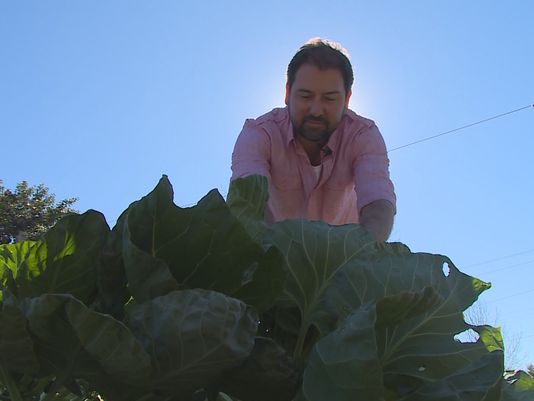
If you’re craving your own fresh winter vegetables but don’t have the space for a garden, you’re in luck.
Here are a few ways you can create your own vertical garden.
You don’t need a lot of space for many winter plants. Though some plants, like broccoli and cauliflower, take a larger space and aren’t necessarily recommended for a vertical garden. However, spinach, lettuce and strawberries can be a great start to your newfound green thumb.
There are a number of items sold at garden centers to help plant your vertical garden. Some felt hangers, much like shoe hangers, can be purchased. Hang your garden in an area where it’ll get plenty of sunlight, but where the harsh winter winds won’t do damage. The advantage to this garden – move it when a freeze is coming.
You can “upcycle” almost anything into a vertical planter. Put on your creative gloves and turn your 2-liter or 20-ounce soda bottles into a planter. We know you have those in the recycle bin, so why not recycle them yourself.
As with any garden, you’ll need to follow the seed instructions. Some plants need more space. If you’re planing something like beets or carrots, you’ll need to allow for plenty of root space, so plan accordingly. If you’re looking for leafy vegetables, soda bottles will work perfectly. Plant one per bottle and the plant will regenerate throughout the winter months, providing you with weeks of fresh salads.
Purchase or recycle your containers and locate an area to grow your garden.
Be sure you poke small holes in your container (and put something under them if on your porch) so that the plants will have plenty of drainage. If you’re purchasing a store-bought container, you’ll most likely be able to skip this step.
Buy garden soil and fill your containers with a good organic soil.
You can sow the seeds indoors in small eggshells (yes, just another way to recycle) while you’re preparing your masterpieces. Once you have the vertical garden container purchased or made, you can transfer young seedlings into the containers.
Even if you have enough room out back, vertical gardens can be a fun addition to any home. Many of these options maximize your water and minimize your overall work. So, who’s ready to garden?
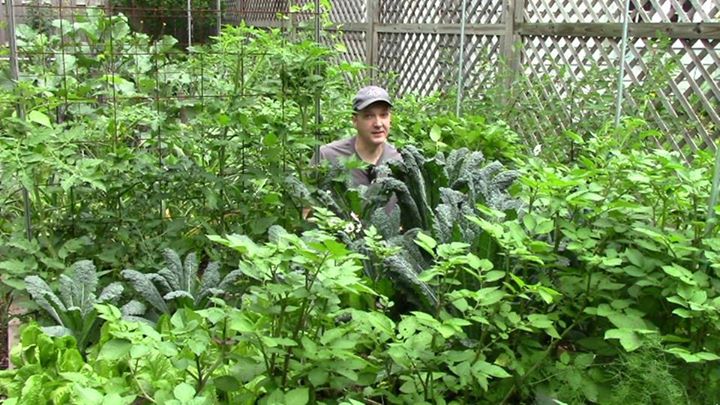
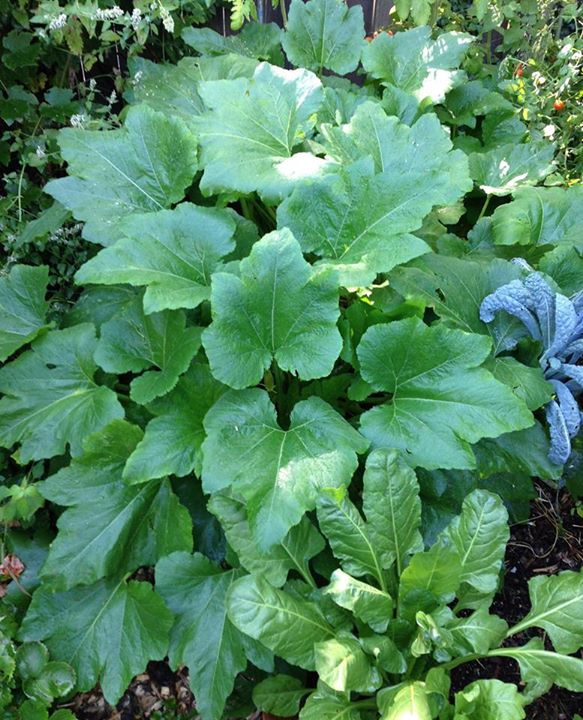
My wife Karen and I live in Chicago and love organic gardening. We started with a small vegetable garden many years ago, but over time it expanded to take over most of the backyard. Now we’re growing in the front yard too. During the summer and early fall, we don’t buy any vegetables from the store and buy very little fruit as well. We also use cold frames and hoop houses to extend the growing season, so we always have some fresh food to harvest, even in the winter.
How did you get started with your One Yard Revolution YouTube channel and Facebook page?
I started my YouTube gardening channel and Facebook page in hopes of promoting a low cost, low effort, sustainable approach to organic gardening that relies minimally on store-bought products. There has been huge a proliferation of organic gardening products in recent years. If you believe the marketing, you could easily get the impression that growing your own food requires a wide array of costly fertilizers and amendments that need to be applied year after year.
Our approach improves soil fertility with compost and mulch from free local resources like autumn leaves, grass clippings, wood chips, and used coffee grounds. We also plant a nitrogen fixing cover crop in late summer. We don’t use any store-bought fertilizers, and we get excellent results. Soil testing has proven that our approach provides more than enough organic matter and nutrients.
I’m passionate about this approach, first of all, because it works very well. But, more importantly, I think all the marketing creates false barriers. It creates financial barriers for those who don’t have the financial resources. It creates access barriers for those who don’t have access to the products. I want to advocate an approach that has few, if any, barriers.
There are also environmental issues with many organic products. For example, rock dust and rock phosphate are mined resources. Bat habitats are disrupted when bat guano is collected, and harvesting kelp from the ocean disrupts a very fragile ecosystem. Using free local resources, on the other hand, actually improves the environment by building soil fertility with material that otherwise may end up in a landfill.
I hope to advocate an environmentally friendly approach that anyone can use to grow healthy food no matter where you live and no matter how much money you have.
Did you start your YouTube channel when you started your transition to live this life style?
In my case, the lifestyle definitely came first. I’ve had a vegetable garden nearly all my life, but I didn’t start my YouTube channel until the spring of 2013.
Have you always been growing your own food? If not, what sparked your passion?
Both of my parents grew up on dairy farms in Pennsylvania, where they produced most of their own food, including vegetables. Though my father wanted to remain on the farm, my grandfather was all too aware of the economic challenges faced by small family farms and insisted my father learn a new trade and find work elsewhere.
When my parents moved to a small town to start their family, they took a little bit of the farm with them by always planting a vegetable garden. Though my approach is somewhat different than that of my parents, I learned a lot of what I know today from my experiences in our family’s vegetable garden.
My wife Karen also grew up with a garden, so it was almost inevitable that we would start our own when we bought our home 25 years ago.
Have you ever made mistakes or failed doing something? How did you overcome any obstacles?
Sure, I make mistakes all the time, but I just learn from them and move on. One great thing about growing your own food is that it’s a lifelong learning experience. No matter how much you learn, it’s still just the tip of the iceberg. This makes gardening both challenging and endlessly fascinating.
Have you ever dealt with a person who disregards your lifestyle?
Not really. I’m a vegetarian, and sometimes get teased about that, but I don’t take it to heart and it’s usually in good fun. As far as my YouTube channel goes, I’ve found that the overwhelming majority of people who leave comments are very kind, positive, and supportive. I think this says a lot about the online gardening community.
What are some of your greatest rewards with a lifestyle such as the one you live?
To me, gardening is a form of meditation. It helps me relax and keeps me grounded and connected to nature, despite the fact I live in a heavy populated urban area. It’s also something my wife and I enjoy doing together, which is great for our relationship. And because we rely on free local resources and nitrogen fixing cover crops to improve soil fertility, our gardening costs are very low and we save a lot of money on groceries. Of course, the flavor and nutritional value of homegrown produce simply can’t be beat.
What are some of the things you would like to have other people understand about living a healthier and self-sufficient lifestyle?
For someone new to gardening, the idea of growing more of your own food might seem like a daunting task. As I mentioned earlier, there are so many gardening products and practices marketed to consumers that it’s easy to get the impression that starting a new garden is very expensive, time consuming, and complicated. I’d like people to know that, while some products can be helpful, most are not needed and many are of questionable value. You can improve soil fertility with homemade compost and mulch from free local resources. You can fix nitrogen in the soil by growing inexpensive nitrogen fixing cover crops. You can all but eliminate weeding by using mulch. Simply put, my message is that you can grow a lot of food on a little land using sustainable organic practices without spending a lot of money or working very hard. This is the message I try to communicate in my videos, and I share specific strategies on how to make it a reality.
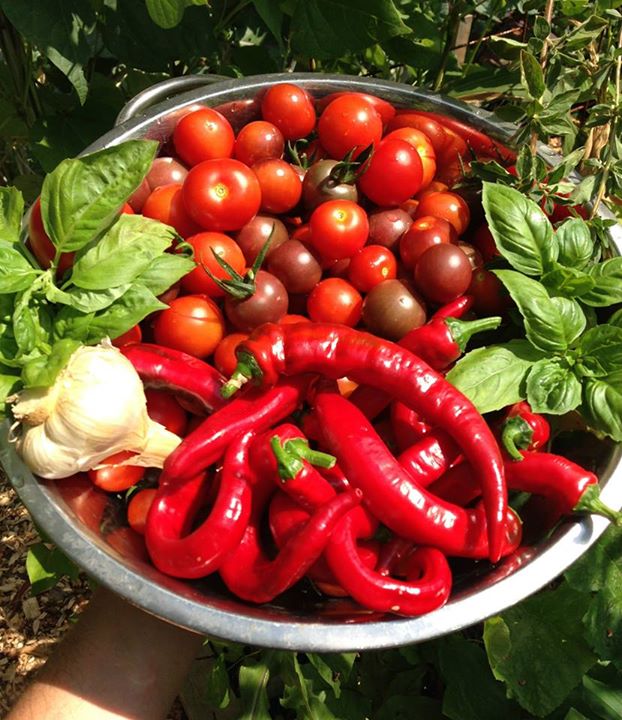
What are your favorite plants to grow in the garden?
That’s a tough one to answer, because we grow a wide variety of crops and love them all. Given our goal of working less and growing more, though, I have to say that I really enjoy growing edible perennials like strawberries, blackberries, blueberries, sorrel, Good King Henry, and sun-chokes. They come back year and year with very little effort on our part. Of course, you have to love annuals too. Our garden wouldn’t be the same without tomatoes, peppers, potatoes, kale, and squash. Like I said; it’s really hard to pick favorites.
Some people are happy with a patio tomato on the porch.
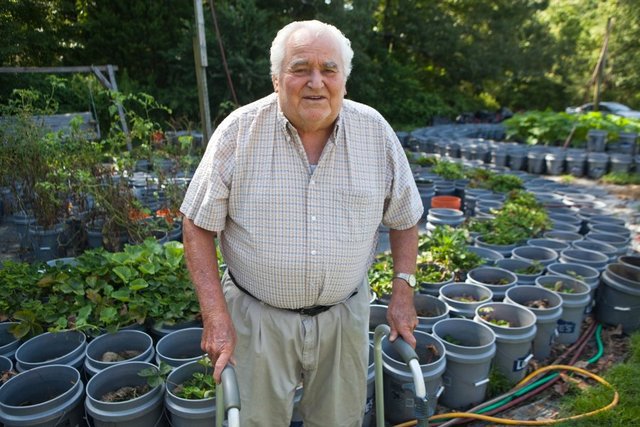
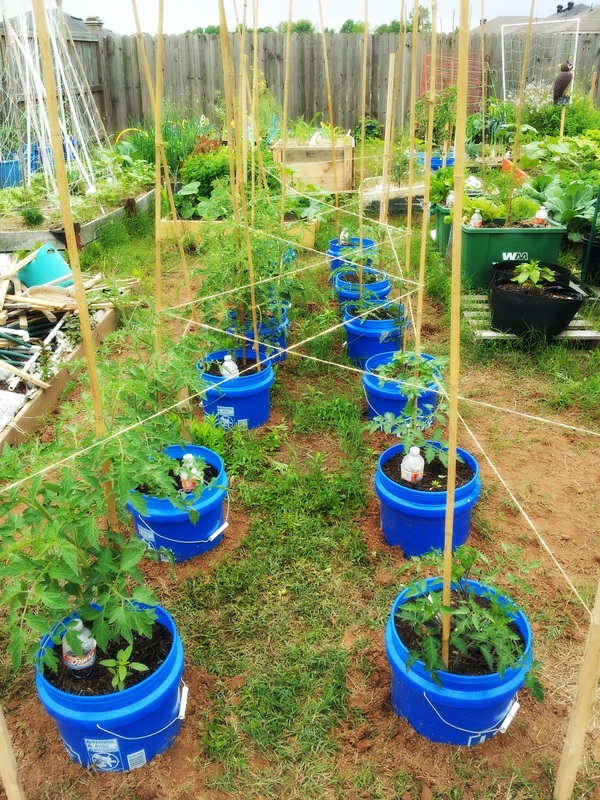
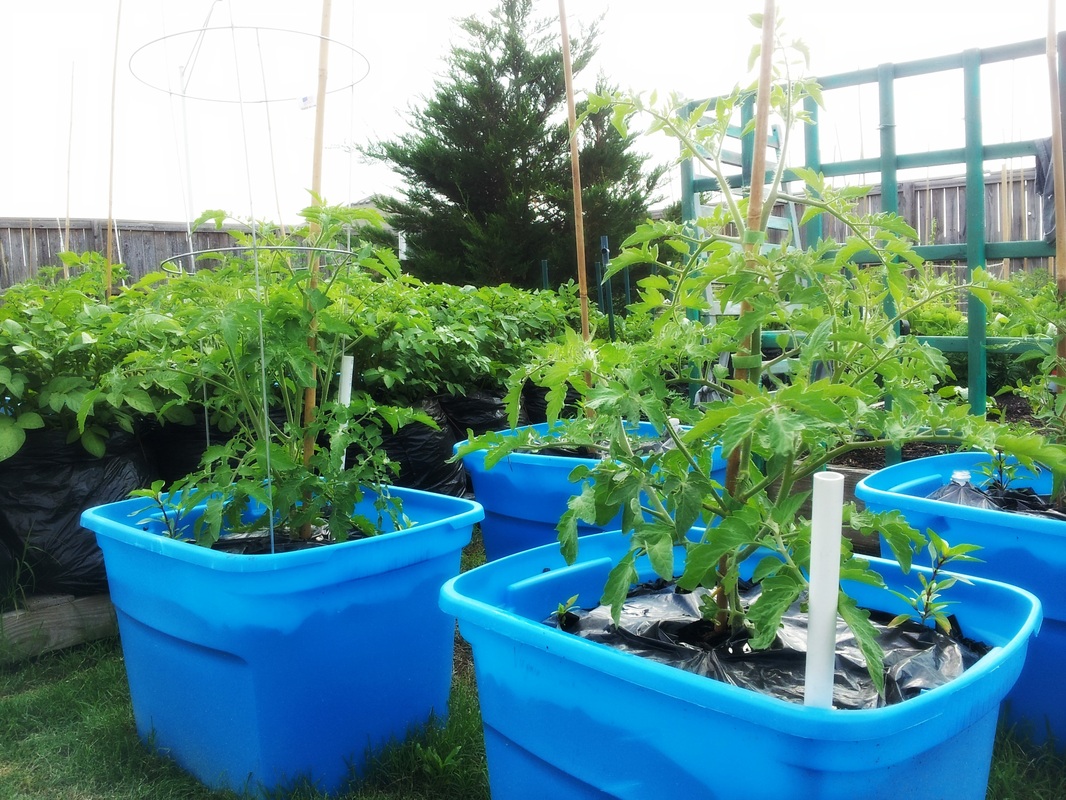
Willie Anderson, 82, took container gardening to another level; he planted tomatoes, cucumbers, corn, okra, squash, peppers and eggplants in five-gallon plastic buckets in his yard in Red Banks, Mississippi. He now has plants in more than 1,000 buckets.
Willie Anderson, 82, maintains a garden of 1,000 fruit and vegetable plants in buckets at his home in Red Banks, Miss. The garden requires no special equipment. There’s no hoe on the place, he said. And it’s totally organic. I use grass clippings, soybean stalks, cotton hulls, he said.
It’s easier to grow an entire garden if you’re planting everything in buckets, Anderson said. “There’s no hoe on the place,” he said. “We don’t need one.”
“You don’t have to have any equipment,” said his son, Ron Anderson. “You don’t have to have any utensils to farm with as far as hoes and shovels. You don’t have to have a tiller. All you do is plant, water and harvest.”
The garden is totally organic. “I use grass clippings, soybean stalks, cotton hulls — that’s the waste that comes out when they gin the cotton,” Willie said.
Ron came up with the idea of the bucket garden for his dad nine years ago. Willie always was a robust man, he said. He was in farming, raised hogs and cattle and went into the home building business with Ron and his other son, Mark Anderson. “He had a hip that deteriorated and he had to have hip surgery and replacement,” Ron said of his father. “When he had that, he was pretty much home bound and his hopes and dreams were just going down. He had cabin fever. He didn’t have anything to look forward to or to do. He couldn’t get out like he had all his life.”
Willie liked the idea of the bucket garden. “I was just tired of sitting up in the house,” he said.
Ron bought 100 buckets from Lowe’s and some Miracle-Gro potting soil. He said, “Dad, let’s try this and see if we can do this for your hobby.”
Ron punched holes in the bottoms of the buckets for drainage and put them on sheets of black plastic to keep weeds from growing around them. “We raised our own tomato plants from seed,” Ron said. “We planted one tomato to a bucket, one squash seed to a bucket, one corn seed to a bucket.”
Willie didn’t want to stay in the house anymore. “We got him a little four-wheel scooter and he’s out the first thing every morning to check his garden,” Ron said.
“You can garden in the shade,” Willie said. “It needs to get at least five hours of sunshine a day. That’s enough for the plants.”
Their first harvest was better than they expected. “We probably had about 10 cases of tomatoes that weighed 30 pounds apiece,” Ron said. “I sold them to some pizza companies in the Olive Branch area. They froze them and canned them for soups.”
Now they mostly give away the produce they don’t use. “I thought at first there might be a little money to be made in it,” Willie said. “But I don’t think there is. I just give what I grow to whoever wants it.”
They stopped using Miracle-Gro after the first year and went organic. “We don’t use any kind of chemical fertilizer and we use the same dirt year after year,” Ron said. “We plant them in the same pots every year. After people cut their grass and sack the grass cuttings on the side of the curb, my brother and myself go around with a trailer and bring home 20 to 30 sacks. He puts it around the top of the buckets. The grass fertilizes every time you water.”
To irrigate, they attach water hoses to sprinklers atop 10-foot landscape timber posts, which are stuck in the ground. They use one sprinkler per each group of 350 buckets. “All I do is turn the faucet on,” Willie said. “It wets everything down in about an hour and a half. It usually lasts about a week if it’s not too dry.”
They’ve experimented with different vegetables. “We had a cabbage big as our granddaughter,” Willie said. “I got a cantaloupe this year. It’s ripe down there now. It’s the first one we’ve been able to raise in the buckets. We haven’t been able to raise a watermelon. I don’t believe the bucket’s big enough to raise a watermelon.”
They haven’t tried everything. “We haven’t grown any field peas, but they’re so simple to grow,” Willie said. “I don’t see a problem with them.”
Plastic buckets aren’t the only container gardeners can use, Willie said. “These gardens can be grown in a plastic shopping sack like you get at the grocery store if you want to, but they’ll only last one year and you’ll have to redo it every year,” he said. “I have done it. It’ll work. But the plastic will rot out by the end of the year.”
Ron, his mother, Geneva, his wife, Gidget, the grandchildren and a hired man help with the garden. Willie basically oversees the garden.
Willie also gives the plants pep talks. “I say, ‘Now, y’all got to do better than that,’” he said.
“He does go down there and talk to them three times a day,” Ron said.
Garden writer Felder Rushing, a former Extension Service urban horticulture specialist, is a fan of bucket gardening. “I have grown veggies and herbs in five-gallon buckets in my Mississippi garden for years,” he said. “So cool. So easy. Just the right size. Can’t grow a decent tomato or pepper in anything smaller. And no worries about soil diseases.”
Rushing doesn’t stick with drab-colored buckets. “I spray paint mine to make them more cheery.”
As for Willie’s 1,000-plus bucket garden, Rushing said, “I totally agree with the sentiments of Mae West, who once said too much of a good thing is — wonderful.”
Read the full story here: http://www.commercialappeal.com/entertainment/lifestyle/home/bucket-crops-mississippi-man-takes-container-gardening-to-another-level-ep-1211661529-324126561.html
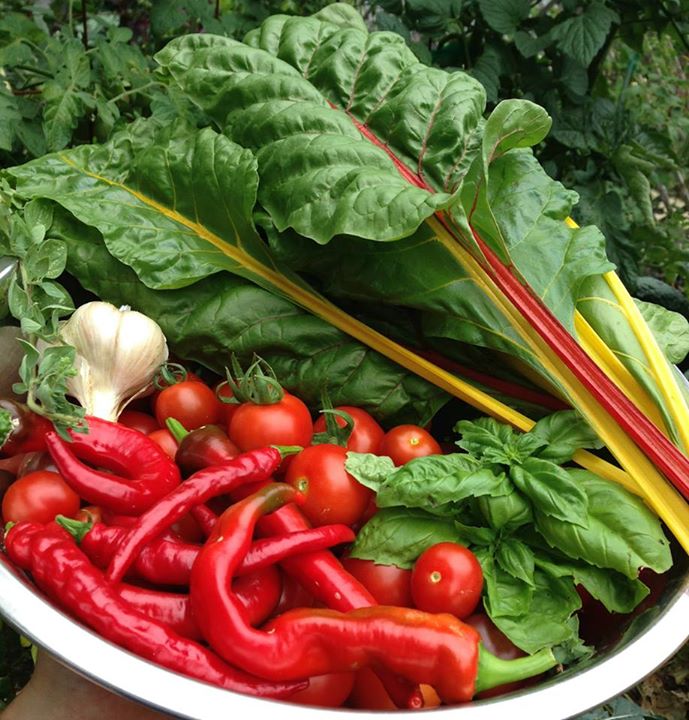
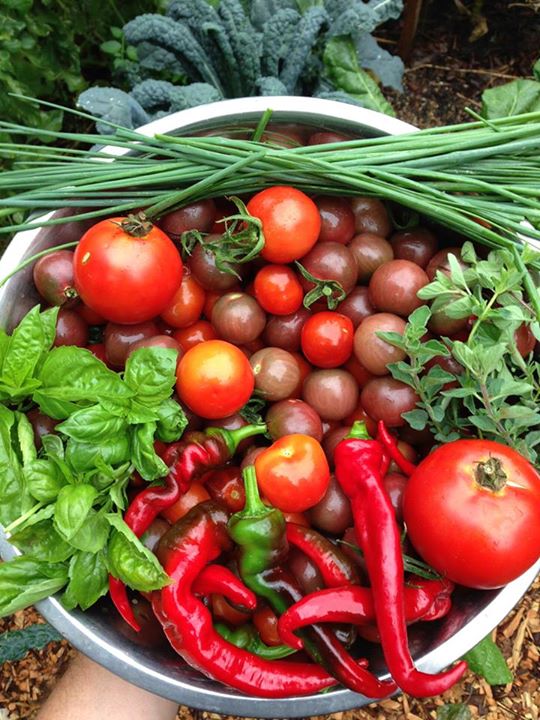
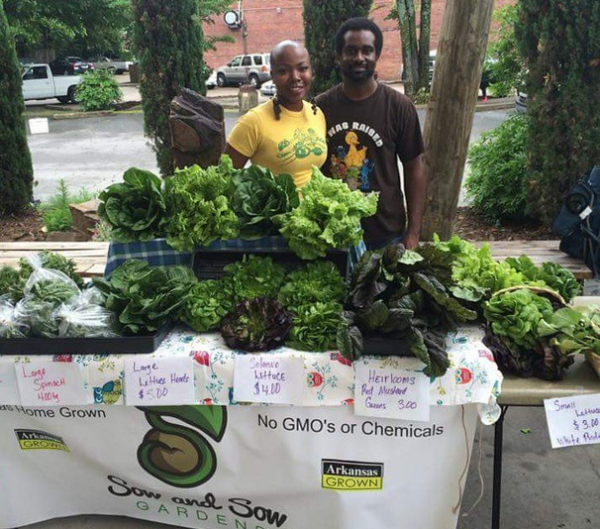
At Urban Organic Gardener, we’re all about sharing inspiring stories of how people are growing food in small spaces. A while back, we found Sow and Sow Gardens on instagram and have been following them ever since. What they’re doing is truly inspiring.
How did you get started with your blog/Instagram page?
“I got started with my personal Instagram page. I would post all kinds of things about what I was going and what troubles I was having in the garden. Then someone asked me on Instagram if I had blog. At the time, I felt like I was no expert and how could I possibly write a blog. About a year later I decided I really enjoyed growing food and why not write about it.”
Did you start your blog/Instagram when you started your transition to live this life style?
“I was let go from my job of almost 7 years and decided I wanted to help my husband out with growing food. We had two mortgages and bills. I figured that growing food would help and that it would be less of a grocery bill.Yes, I began to have many followers on my personal page who was interested in my gardening. I wanted to come up with a creative name. I asked my sisters for their help. My sister Nnenna was like “you are in the South…you know they always say thing like….you know….so and so down the street”. “Why not Sow and Sow Gardens, like sowing seeds.” It was perfect!”
Have you always been this way? If not, what sparked your passion?
“No, I was not always this way. I started learning about GMO’s about 7 years ago. I started reading the labels on things I was buying from the store. Then I started reading about more issues about the food that we were consuming into our bodies.I started telling people at work but of course they would look at me funny. I was the “Earthy One” was what they started calling me. When I started growing food, it was something amazing to see a seed pop its little head out of the dirt. It was just magic to me. It was so beautiful. It was my creation is how I saw it.I know this might sound corny but I wanted to be the change I wanted to see in the world. It has to begin with ourselves if we want to see any change come about on this planet.”
What are some of the other things you would like to have other people understand about living a healthier and self-sufficient life style?
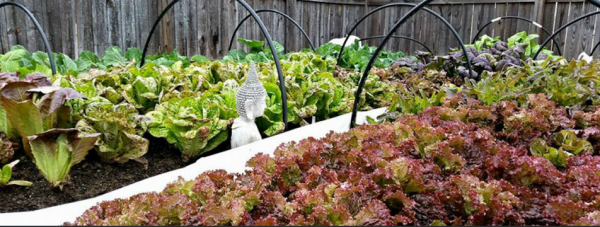
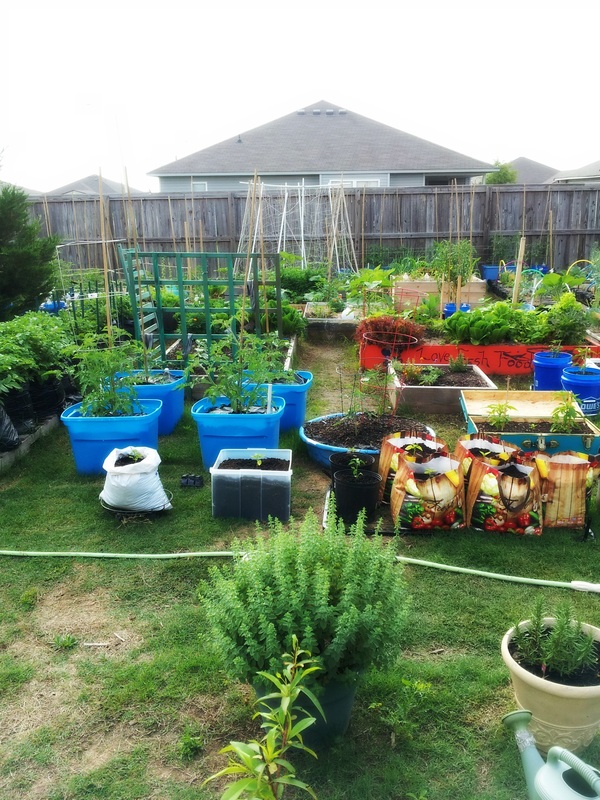
“There is nothing like growing your own food…Period. You know where it comes from and how it was grown. I feel great that I don’t have to depend so much on someone else to provide food for my family. It’s much healthier and taste better than what you will get from the stores. I also like teaching my daughter about where her food comes from and how it grows. As one can see, there have been a lot of issues on this planet when it comes the weather. California is going through a drought. I would not be surprised if the prices rose due to the drought. It’s something my family will not have to worry about . I have started 2 apple trees, goji berries bushes and artichokes. I want to have a little food forest in my backyard. Start off little and work your way up. I started growing my own food 3 and half years ago. I started with a 7×4 raised bed.”
What tips and tricks could you share with other people?
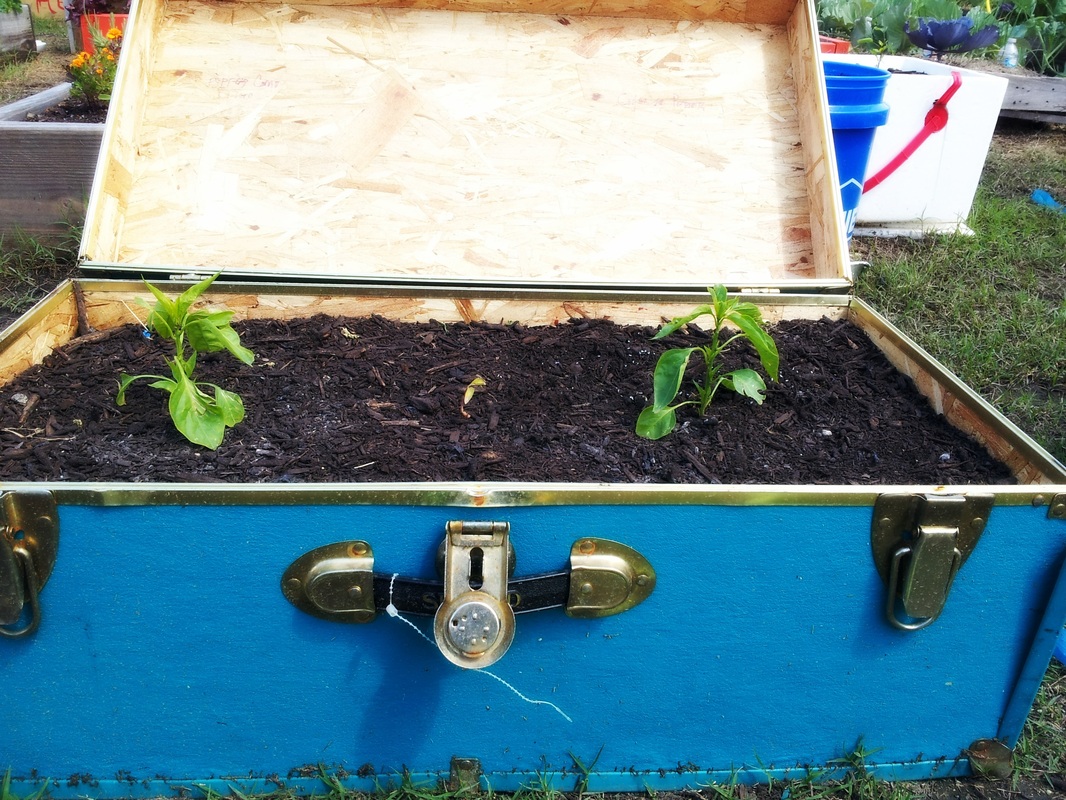
“Always see for yourself how things grow. I was told that radishes did not transplant well. I wanted to see for myself. I transplanted radishes and carrots. The radishes came out great but not the carrots. There are always different results for different growers. I also like to start my seed on paper towels. For two years I could not get pepper seeds to germinate. I was on youtube one day and put in the search engine how to germinate pepper seeds. Someone started theirs from paper towels. I gave it try and now I germinate all my seeds this way. I have the hardest time trying to germinate seeds in the dirt. “
Have you ever made mistakes or failed doing something?
“Oh my!!! Yes, I learned to NEVER put mint in the ground. I have been trying to contain that mint in the backyard. The first year, the soil was bad bad bad. I didn’t amend the soil well. Nothing would grow. I thought planting it was all I needed to do. I started researching and reading lots of books. I was on the internet and YouTube a lot. That’s how I really learned how to grow food. I have never really been able to grow tomatoes well. Looks like this year, I might have some luck. Leafy greens always grow best for me.”
How did you overcome any obstacles?
“My first and second year was hard. I was learning the whole process. I had to learn about the soil.I wanted to give up but I just kept trying because I loved gardening…my creation. I dealt with flooding last year and it ruined most of my crop. It just sat in water. So I had to find another method of growing food with lots of water involved. On my blog I showed the whole process for months of what I went through for the backyard transformation. I tried the double dig method. It’s a lot of work but it worked for me. You have to see what works for you. The double digging method was the way to go. The beds were high enough that the rain did not affect the food. The book that saved me was ‘How to Grow More Food’ by John Jeavons. For me, this is my garden bible.”
Have you ever dealt with a person who disregards your life style?
“No I haven’t met anyone. The only thing I hear from people is that they don’t like to get dirty. I love it!”
What are some of your greatest rewards with a lifestyle such as the one you live?
“It brings a peace of mind. Just walking out of my back door to get herbs to cook is a wonderful thing. We have less of a grocery bill. Knowing where my food comes is the greatest reward there is.”
To follow their journey of building a backyard food forest, you can subscribe to their blog.


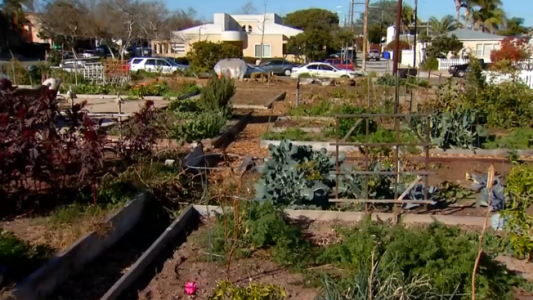 After four decades, San Diego’s Pacific Beach Community Garden has closed for good but there is hope. “…The end of the garden does not mean the members will stop exercising their green thumbs. They are hoping to section off a portion of land in De Anza Cove to create a new garden. They will also turn to their neighbors for help.