 Michelle Moore
Not all light is the same.
Plants respond differently to different colors of light.
Light on either end of the spectrum, blue light or red light, have the greatest impact on photosynthesis.
Kinds of Light
Blue light, referred to as cool light, encourages compact bushy growth.
Red light, on the opposite end of the spectrum, triggers a hormone response which creates blooms.
Grow lights producing the orange and reddish light typically produce substantial heat, however, some lights are able to produce full spectrum light without the heat.
Grow lights come in all shapes, sizes and price ranges.
As a general rule, inexpensive lights to purchase tend to be the most expensive to operate and the least effective. While price is not necessarily an indicator of performance, many of the efficient grow lights require ballasts as well as specialized fixtures.
Image of vegetable being grown indoors under artificial light is via fortikur.com.
Check out SeedsNow.com if you’re looking to grow organic vegetable and herbs from seed.
Click here to read more about what GMOs are. It’s really easy for you to grow all kinds of vegetables, herbs, and sprouts inside. All year long! Invest in a grow light and you’ll be happy.

Basic Types of Grow Lights
These lights run the gamut of performance and price range.
Incandescent Lights.
The least expensive lights to purchase cost around $30. These incandescent lights work well for specific plants where the light is placed a minimum of 24” from the plant. These lights get extremely hot so they must be used with care. Spot grow bulbs, color corrected incandescent lights, install easily and are good for use with a specific plant or a small grouping of plants. Most spot incandescent bulbs last less than 1,000 hours. Some light fixtures come with a clip handle so you can put them exactly where they’re needed.
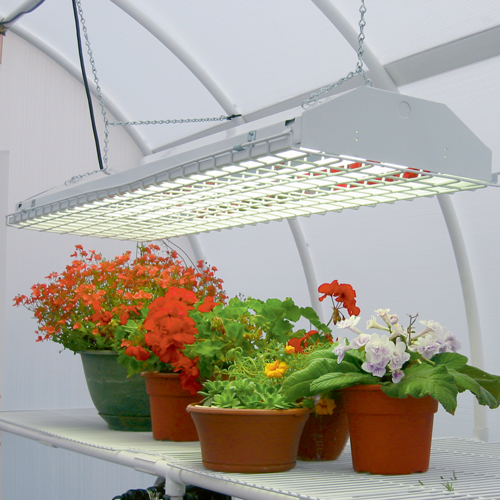
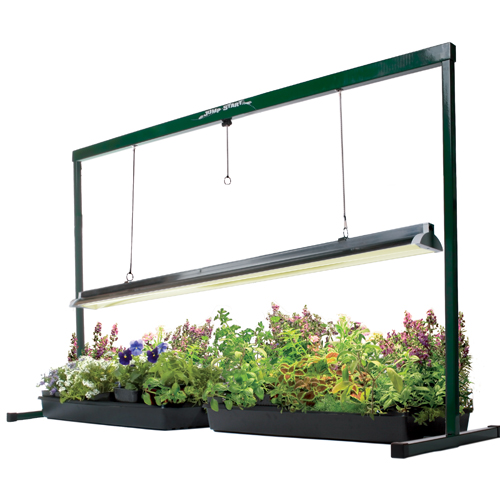
Fluorescent Grow Lights.
They are a common choice for homeowners. Fluorescent lights are reasonably energy efficient and relatively easy to install. A typical fluorescent bulb will last approximately 20,000 hours. Fluorescent light is typically on the blue end of the spectrum. Blue light encourages bushy compact growth which makes them perfect for seed starting. Blue light is also cool to the touch making it possible to place lights within just a few inches of the seedlings.
New Full-Spectrum Fluorescent Lights.
 Provide the red spectrum as well to encourage blooming.
Combining the lights in a fixture makes for even, all around growth.
The next generation in fluorescent lighting includes the new T-5 lights.
These new lights have extremely high output but are energy efficient and long lasting.
The T-5 lights triple the light output of normal fluorescent lights without increasing the wattage. Plants absorb a high percentage of T-5 lighting because the fixtures function well very close to plants. High output bulbs require a high output fixture to operate, so the bulbs and normal fluorescent fixtures will not work together.
LED Lights
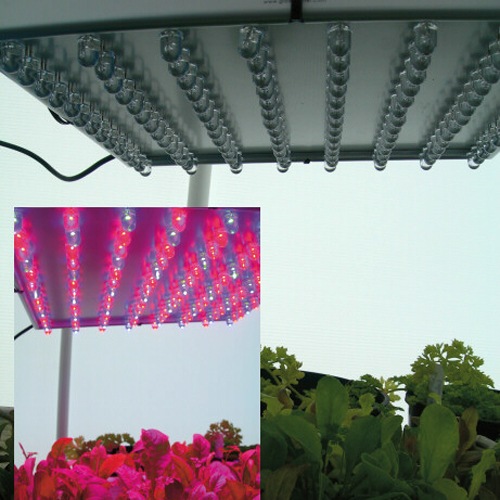 The newest type of grow lights use LED technology.
One major advantage to the LED lights is the small size.
LED lights are only a few inches in diameter and are easy to mount.
In some greenhouses, LED lights may be the only practical light option.
Hanging most grow lights requires a strong greenhouse structure and a place to hang the lights.
LED lights weigh a fraction of other lights and are easy to configure where needed. According to LED manufacturers, LED grow lights maximize blue and red light to provide and excellent balance for plants.
They do not have much green-yellow light. Since humans see green-yellow light best LED grow lights appear dim to our eyes. This is an exciting new technology that will be interesting to watch as it develops.
The Best Grow Light Option
Now that I’ve given you a good rundown on greenhouse lighting options, it’s also important to mention darkness.
Almost all plants benefit from a period of six hours or more of darkness.
It’s a good idea to know how much light your plants need, but unlike commercial growers, hobbyists often have a wide variety of plants so they need to take a broad approach to lighting.
Fluorescent lights offer excellent overall lighting options.
Other Considerations
If you chose to use any type of fluorescent lighting, you will need to account for plant growth.
Fluorescent lights perform best when positioned very close to plants.
As plants grow into the light, it is important to raise the fixture.
Generally only the plants touching the lights will burn, but be prepared because they grow quickly.
Adjustable hangers are a good solution. These hangers move easily allowing you to make quick adjustments.
If you’re looking for non-gmo seeds that grow well using hydroponic systems, click here.
Your Turn
Are you currently using grow lights to grow indoors? What kind? What are you growing?
Do you plan on growing indoors using grow lights?
Let me know in the comments below.


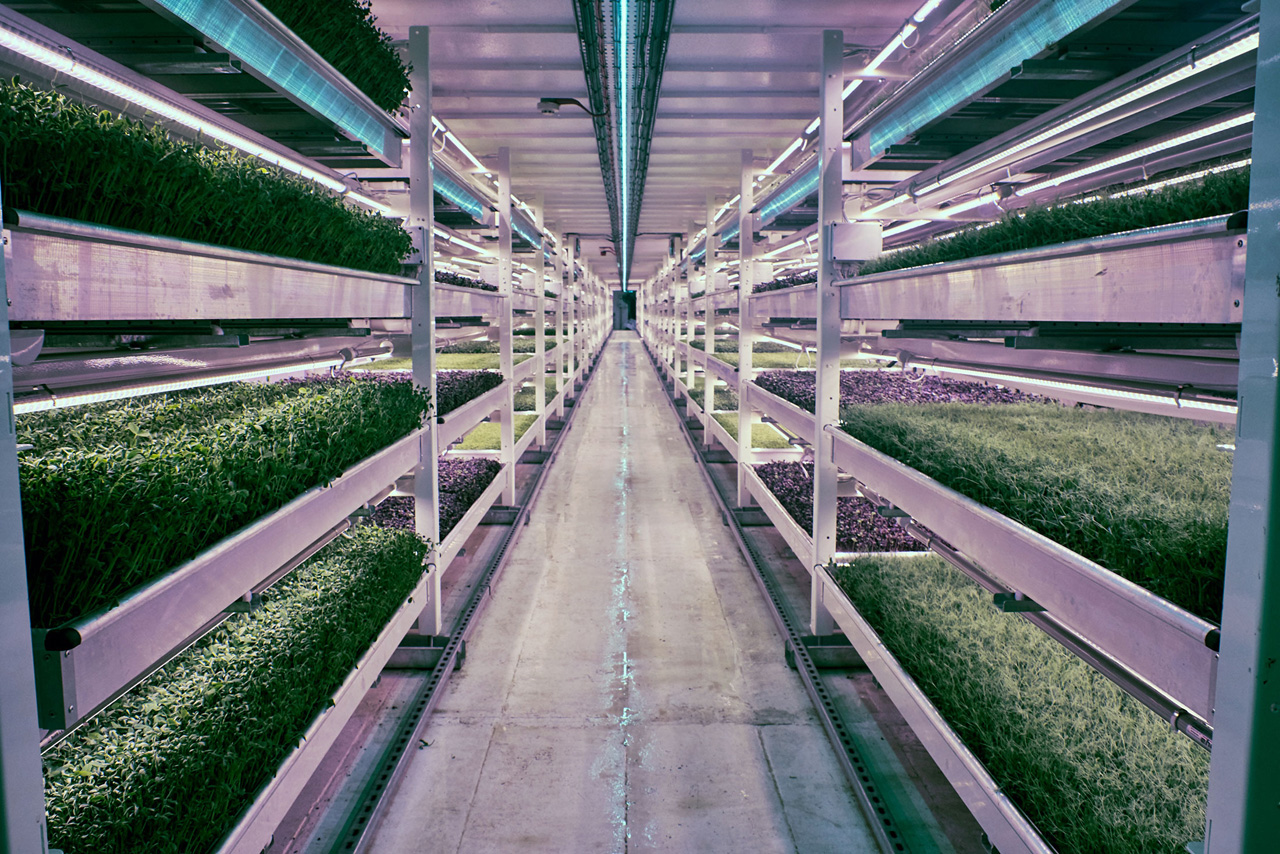 Deep below the streets of London, something is growing in tunnels that once kept people safe from World War II bombs. One hint: It’s leafy.
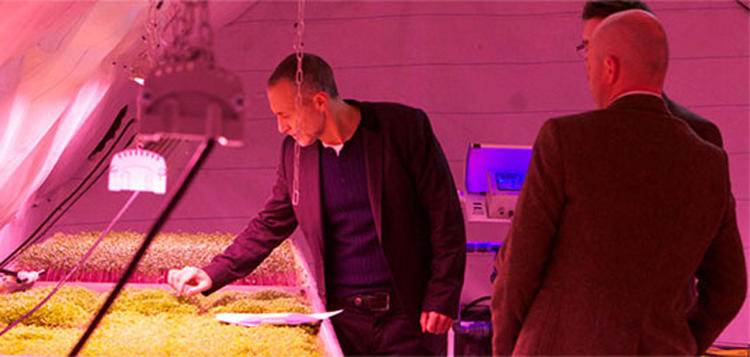 An old bomb shelter is also pest-free, as well as weather free, and there’s never a frost. That means no pesticides. And because the farm is hydroponic, all the nutrients remain in the tanks, instead of running off into the soil and then into rivers.
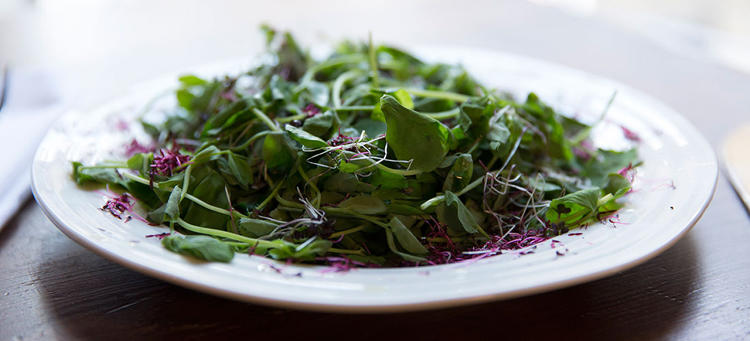 Growing Underground is a company that makes “kilometer zero” eating possible in London, by growing salad in LED-lit, underground factories right beneath the customers’ feet.
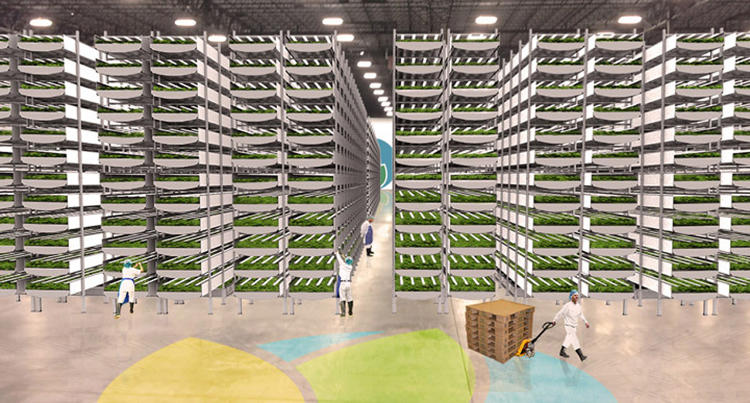 The Growing Underground farm sits 100 feet under Clapham in South London.
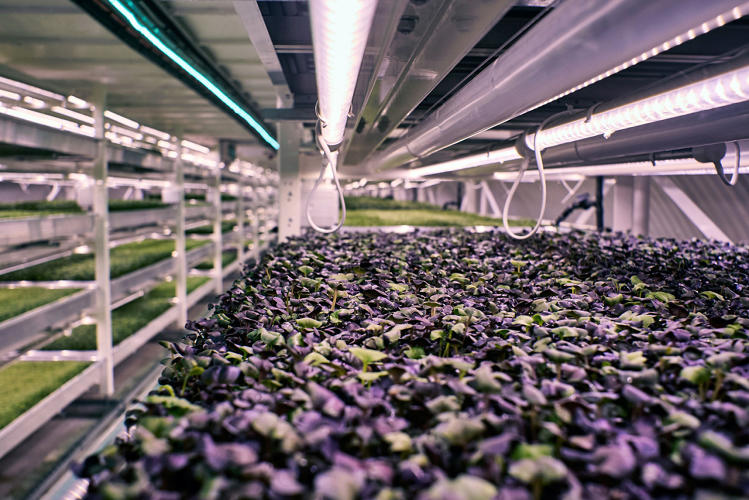
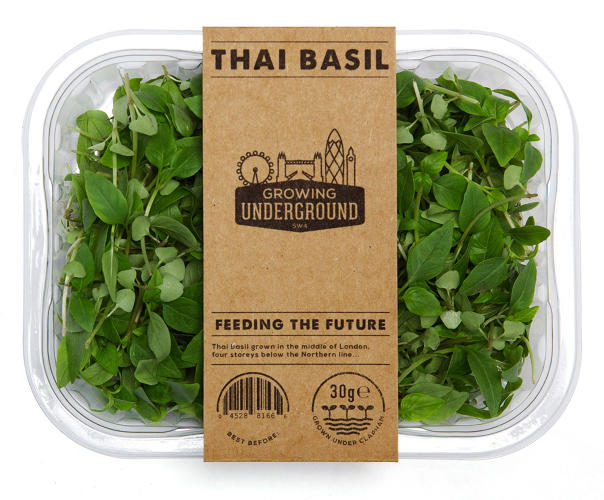 It uses hydroponics and low-energy lighting to grow salad, including mizuna, watercress, Thai basil, radish, pea shoots, mustard leaf, and red vein sorrel.
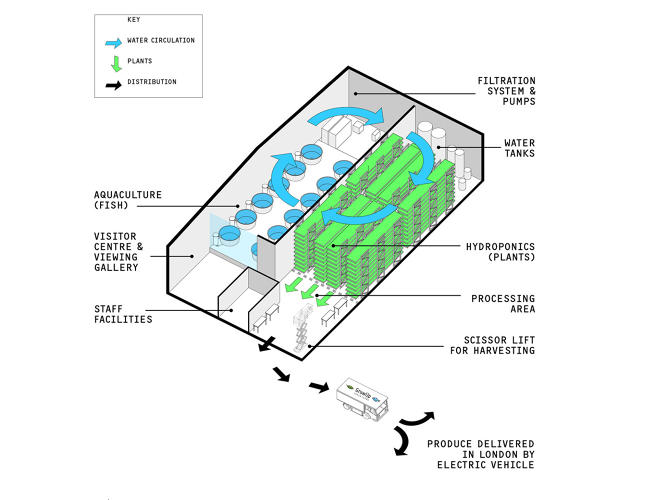
 Being underground has many advantages. One is food miles, or the lack thereof. Transport makes up a significant proportion of the cost of food, both financially and environmentally, so growing in a city center cuts that cost almost to zero.
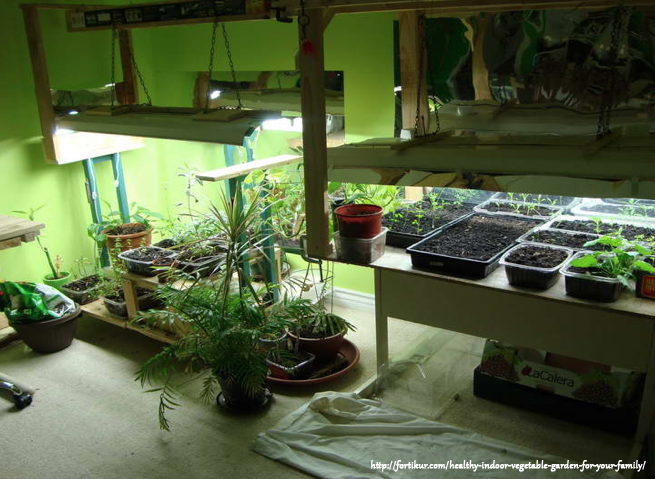

 By Michelle Moore
 You’ve scouted out the
  Today I am going to share basic indoor seed starting tips…

 Today I am going to show you the easiest way that you can start to grow your own food.