How to Grow Broccoli Sprouts at Home! SUPER HEALTHY!!!

Original source of this post: www.howweflourish.com

Growing Broccoli Sprouts at Home

There is a great blog we recently came across, howweflourish.com.  She recently wrote about why and how everyone should be growing and eating broccoli sprouts.  The results are overwhelmingly positive.

DID YOU KNOW?  Broccoli sprouts are 10x – 100x higher in some cancer fighting compounds than the actual mature vegetable!

She mentions in her article,  …”this past spring, we purchased the seeds for our garden from SeedsNow. I love this company because all their seeds are non-GMO as well as being raw, untreated, pure heirloom, non-hybridized varieties. This means you can save all your seeds from the plants you grow for next season!

But anyway, while I was there, I noticed that they also sell seeds for growing sprouts. I had just finished reading The Elimination Diet, where the praise the benefits of broccoli sprouts, so I thought I would check it out. I picked up a bag of the sprouts and anxiously awaited my delivery. Remember, I was waiting for my garden seeds AND the broccoli sprouts! It was an exciting day at the mailbox.”

Click here to read the full article about why and how to grow organic broccoli sprouts:

Instructions for Growing Broccoli sprouts:

  1. Add 2 tablespoons of broccoli sprouting seeds to a widemouthed quart jar.
  2. Cover with a few inches of filtered water and cap with the sprouting lid.
  3. Store in a warm, dark place overnight. I use a kitchen cabinet for this.
  4. The next morning, drain the liquid off and rinse with fresh water. Be sure to drain all the water off.
  5. Repeat this 3-4 times a day. Continue to store your seeds in a warm, dark place. After a few days, the seeds will start to break open and grow. The biology major in me is absolutely enamored with this process!
  6. Eventually, the sprouts will be an inch or so long and have yellow leaves. Now you can move the sprouts out into the sunlight.
  7. Continue to rinse them 3-4 times a day until the leaves are dark green. Now they are ready to eat!
  8. This whole process will take about a week. Patience is key!
  9. Once they are ready, replace the sprouting lid with a standard mason jar lid and store in the refrigerator.
  10. Serve on top of salads, stirred into soups, or however strikes your fancy.
Schema/Recipe SEO Data Markup by Yummly Rich Recipes

Urban Gardeners Can Harvest Quite a Crop From Small Spaces

Original post can be found at: VoaNews.com

When her family moved to Washington last year, Miles-Cohen started a vegetable garden, inspired by some of her family memories.

“When I was a kid,” she recalled, “my aunt had a garden and she grew all sorts of staples; greens, potatoes and onions. I’ve always loved to sort of get my hands dirty in the soil.”

Now she plans family dinners around her garden harvest. “We have tomatoes and eggplant and okra, sweet peppers and all kinds of greens you can imagine,” she said proudly. “I had to become more creative with recipes. I spend a lot of time on the Internet trying to look up recipes for the vegetables that have been really prolific, like the eggplant.”

Be creative

Miles-Cohen gets help twice a month from gardening coach Natalie Carver, from the garden design company Love & Carrots.

“Here we’re growing out of raised beds,” Carver pointed out. “So there is this structure in the soil, and we really try to plant every square foot. A lot of our favorite summer vegetables, all of our tomatoes and basil, all the things that people want out of their garden, they need lots of sun.”

Planting vegetables in small spaces — urban gardening — is a growing trend, said Meredith Sheperd, who founded Love & Carrots.

“People are interested in where their food comes from these days,” Sheperd said. “They are interested in eating really healthy. They might not trust what they’re buying in the grocery store anymore, so they want to grow it themselves.

“I read a statistic that something like 70 percent of Americans are gardening these days and it’s growing at a rate of 20 percent since 2009. So it’s really just taking off. It has been historically young women who are mostly interested in gardening, but I think young men are catching up.”

Sheperd admitted that urban farming has its limits, but insisted that it doesn’t have to be limiting. She helps her clients find creative ways to grow their favorite vegetables, no matter how small their gardens are.

“If you have a wall that’s nice and sunny, we’ll put a nice, sturdy trellis on the wall and grow something like beans or cucumbers or peas — make use of the vertical space,” she said. “Then have another thing spilling over the front of the garden.

“On a balcony, we’ve used containers. We’ve even used 5-gallon buckets, if people are tight on a budget, to grow tomatoes or cucumbers or something like that. You just have to make sure it can drain and fill it with good soil and keep it watered and healthy.”

Fresher, cheaper

Kaliza Hutchensin grows her vegetables in a tiny garden in front of her townhouse. She said she gets the best flavor and variety, and the food is cheaper.

“I don’t go grocery shopping for vegetables at all. A hundred percent of my vegetables come from my garden,” she said. “I only like to plant what I can eat. Every year I learn what I’ve wasted, what I used practically. In a busy home, where both of us are working, I mostly try to create meals around what I’m growing.”

Hutchensin, who was born in Zambia and grew up in the United States, said her small garden means a lot to her.

“My dad was a farmer, so that was the major reason why I was looking to settle down in a place [where I could have a garden],”she said. “I still enjoy being in an urban environment, but I also missed out on feeling [like] being a part of nature, the environment.”

Her vegetable garden adds color to her home’s entryway and helps her family eat better.

Window Farming: A Do-It-Yourself Veggie Venture

Original post can be found at: NPR.org

The first window farm in Brooklyn, from the inside and from the outside.

Homegrown Harvest: Britta Riley and Rebecca Bray tend to Brooklyn’s first window farm. This form of urban agriculture is catching on in cities around the world, as downtown farmers go online to share techniques for growing greens indoors.

If you have a green thumb, a window and a serious Do-It-Yourself ethic, you too, can be a farmer … even in your downtown apartment building. Spring is here, and for urban dwellers with no access to soil, hydroponic gardening is a way to grow fresh veggies indoors.

“Window farming,” as it is called, is catching on in New York City and beyond. Window farmers use recycled 1.5 liter water bottles, clay pellets, plastic tubing and inexpensive fish tank air pumps to create their indoor gardens. There are now 4,000 registered users at windowfarms.org. Farmers are tending to their greens everywhere from the U.S. to Italy, Israel and Hong Kong.

A simple window farm system is a column of upside down water bottles, with plants growing out of holes cut into the sides. An air pump is used to circulate liquid nutrients.
WindowFarms

Last year in Brooklyn, N.Y., Britta Riley, 33, raised $27,000 for her window farms project through an online micro-donation web site. She’s a true Do-It-Yourselfer.

“I grew up on a ranch in Texas,” Riley says. “So we always had to hack together what we needed to fix fences and so forth.”

Riley’s project partner is Maya Nayak, 29, a professional gardener. Nayak has been growing herbs in her own window farm in her ground floor apartment. A sign in her window advertises windowfarms.org — and plenty of people have paused to check it out.

“We had to put up a curtain,” she explains, “because people come up and look. And you’re, like, ‘Wow, this is my living room.'”

The people staring in from the street see a window filled with vertical columns of plants. Vegetables and herbs grow with the help of sunlight and a little electricity — but no soil.

The window farms Web site provides instructions on how to put together a system that grows three plants. The materials will cost about $30 — and not all of them are traditional gardening supplies: water bottles, an aquarium air pump, air valve needles (like the kind you use to pump up a basketball), and a hanging system designed for displaying art.

Riley says that putting recycled consumer goods to use is an important part of the DIY ethic.

“We’re kind of showing that we can actually get really, really far using things that we already have available to us as consumers,” she says.

The simplest window farm system is a column of upside-down water bottles connected to one another. Plants grow out of holes cut into the sides. An air pump is used to circulate liquid nutrients that trickle down from the top of the column and make their way to the plant roots.

Window farms have been used to grow strawberries, cherry tomatoes and peppers. Riley’s favorite is bok choi.

“Buttercrunch lettuce grows great and lots of herbs,” Nayak says. “Anything leafy and green, essentially. You can’t grow carrots. I mean, you can’t grow root vegetables. Potatoes, garlic. Those things don’t work.”

Urban farmers use the Internet to exchange ideas for improving the window farms technology. It’s a process Riley calls “R&D-I-Y” or Research and Develop It Yourself. One window farmer figured out a way to silence the gurgling sounds these window farm systems make — and he shared his solution with the rest of the indoor gardening community.

“He just drilled a few holes into a vitamin bottle and stuck it over the end and all of a sudden it completely silenced the system,” Riley explains. “And then he posted that for everybody else and all of a sudden we have a new solution that’s cheap and that other people can replicate somewhere else.”

In the coming months, Riley and her colleagues will focus on how much energy it takes to run the air pumps and compact fluorescent light bulbs that are turned on when access to sunlight is a problem. Riley says that in addition to the environmental benefits of growing your own food at home, there are aesthetic wins as well.

“It’s just fun to have food growing in your own apartment,” Riley says. “Especially during the winter months you’ve got this lush bunch of green lettuce that’s growing in the window and kind of freshening the air in your apartment and it actually just looks pretty.”

And it’s about to get easier. For people who are excited about window farming but not so gung-ho about starting from scratch, Riley says her group will soon begin selling window farming kits.

Grow Fresh Vegetables This Winter With a DIY Vertical Garden

Original article can be found at: “WideOpenCountry.com

If you’re craving your own fresh winter vegetables but don’t have the space for a garden, you’re in luck.

Here are a few ways you can create your own vertical garden.

You don’t need a lot of space for many winter plants. Though some plants, like broccoli and cauliflower, take a larger space and aren’t necessarily recommended for a vertical garden. However, spinach, lettuce and strawberries can be a great start to your newfound green thumb.

There are a number of items sold at garden centers to help plant your vertical garden. Some felt hangers, much like shoe hangers, can be purchased. Hang your garden in an area where it’ll get plenty of sunlight, but where the harsh winter winds won’t do damage. The advantage to this garden – move it when a freeze is coming.

Pinterest
Pinterest

You can “upcycle” almost anything into a vertical planter. Put on your creative gloves and turn your 2-liter or 20-ounce soda bottles into a planter. We know you have those in the recycle bin, so why not recycle them yourself.

As with any garden, you’ll need to follow the seed instructions. Some plants need more space. If you’re planing something like beets or carrots, you’ll need to allow for plenty of root space, so plan accordingly. If you’re looking for leafy vegetables, soda bottles will work perfectly. Plant one per bottle and the plant will regenerate throughout the winter months, providing you with weeks of fresh salads.

Pinterest
Pinterest

Instructions

  1. Purchase or recycle your containers and locate an area to grow your garden.
  2. Be sure you poke small holes in your container (and put something under them if on your porch) so that the plants will have plenty of drainage. If you’re purchasing a store-bought container, you’ll most likely be able to skip this step.
  3. Buy garden soil and fill your containers with a good organic soil.
  4. You can sow the seeds indoors in small eggshells (yes, just another way to recycle) while you’re preparing your masterpieces. Once you have the vertical garden container purchased or made, you can transfer young seedlings into the containers.
  5. Even if you have enough room out back, vertical gardens can be a fun addition to any home. Many of these options maximize your water and minimize your overall work. So, who’s ready to garden?
Decoist

{Fall & Winter Gardening} Growing Food in 1, 2, and 3-GALLON Containers

2

Fall and winter gardens are possible, even when growing in containers. Stick with these cool-weather crops and planting suggestions for success. Don’t wait.  Now is the perfect time to order your seeds online and start planting! Believe it or not, September – October are great times to start these seeds listed below ….

First, we’re going to break it down by container size.  If you go to a local garden center you’re going to come across the same thing.

1-gallon, 2-gallon, and  3-gallon containers are all great for growing food.  You’d be surprised.

Here’s what you can grow in them:

If you’re using a 1-GALLON CONTAINER:

  • Beets (you can fit about 2- 3 beets in this size container)
  • Carrots (3-4)
  • Celery (1)
  • Collards (1)
  • Kohlrabi (1)
  • Leeks (1)
  • Lettuce (1-2)
  • Mustard Greens (2)
  • Bunching Onion (2-3)
  • Radish (3-4)
  • Spinach (2)
  • Swiss Chard (1)
  • Turnips (2)

– – – – – – – – – – – – – – – – – – – – – – – – – – – – – – – – – – –

If you’re using a 2-GALLON CONTAINER:

You can plant all the same things as you could using a 1-GALLON CONTAINER with the addition of these larger varieties:

  • Broccoli (1)
  • Cabbage (1)
  • Kale (1)

– – – – – – – – – – – – – – – – – – – – – – – – – – – – – – – – – – –

If you’re using a 3-GALLON CONTAINER:

Try even planting these large varieties:

  • Brussels Sprouts (1)
  • Cauliflower (1)

– – – – – – – – – – – – – – – – – – – – – – – – – – – – – – – – – – –

Note: These varieties listed above are for Fall and Winter gardening.  So keep in mind that all these varieties tolerate the cold weather pretty well.  You don’t want to be planting pepper and tomatoes at this time of the year.  Trust me.  Been there.  Done that.

– – – – – – – – – – – – – – – – – – – – – – – – – – – – – – – – – – –

MORE INFO: Check out Sources for Buying Non-GMO Seeds.  Ordering seeds online is easy to do and you get a  wider selection of things to choose from. Find out more here and see how you can Start Container Gardening and How to Use Self-Watering Containers

– – – – – – – – – – – – – – – – – – – – – – – – – – – – – – – – – – –

No excuses.  You need to be growing at least one thing this season!

How to Control Powdery Mildew, the Easy Way

This post and its content/images are from SeedsNow.com, click here to view the full post.

Powdery mildew. You’ve probably had it plague one of your plants at some point or another during your years of gardening.

Powdery mildew is one of the most widespread and easily identifiable plant fungal diseases. From vegetable gardens to rose gardens, ornamental trees and shrubs, almost no type of plant is immune.

You’ve probably seen it many times. White or gray powdery spots appear, most of the time covering the entire leaf surface. It’s also found on plant stems, flowers and even fruit. Fortunately, the symptoms of powdery mildew are usually worse than the actual damage. Rarely is it fatal to the plant. Advanced stages can cause plant foliage to yellow, curl or turn brown and eventually cause the plant to stop producing leaves or flowers. Most of the time, it’s just an unsightly nuisance.

Conditions that favor mildew formation include dry foliage, high humidity, low light and moderate temperatures. Here’s some things you can do to help curb powdery mildew from ruining your plants.


*Make sure your plants have good air circulation around them

*Place plants where they will get 6+ hours of sunlight each day

*Grow disease resistant varieties

*Avoid over fertilization. New growth is more susceptible. Try using slow release fertilizers.

Baking Soda (sodium bicarbonate), is possibly the best known of the home-made, organic solutions for powdery mildew. Most effective when applied in the early stages or before an outbreak occurs.

There’s no CURE for Powdery Mildew, but you can control it. Try adding a tsp. or so to a spray bottle and add water. When the weather is dry, spray your water and baking soda mixture onto the leaves that are affected. Repeat when it rains. The ph level will create an unsuitable environment for the mildew spores to reproduce and spread.

View the original post here: http://www.seedsnow.com/blogs/news/14507825-how-to-control-powdery-mildew-the-easy-way

Benefits of coffee grounds for plants and garden

This post, content, and images are originally from http://tgcva.org

Obviously, coffee beans contain a lot of calcium, sugar, copper, magnesium, carbohydrates, and other vitamins inside. Some studies found the acid levels in the beans are very good for some plants that need acid, such as tomatoes, avocadoes, also various other fruit plants. Even the beautiful roses are also like coffee.

coffee grounds fretilizer for tomatoes plant

tomatoes

Moreover, coffee beans also contain nitrogen, potassium and phosphorus, which is essential for fertilizer. The function of nitrogen is to change sunlight into energy. Phosphorus helps energy entered into the plants through roots and cells, while potassium will keep moisture your plants through photosynthesis. The worms in the soil also like coffee. Coffee that you sprinkle on the ground will be eaten by worms then they will produce a substance containing nutrients thereafter.

coffee grounds compost

The benefits of coffee grounds for your plants you need to know as follow:

Fertilizer

Use the waste of coffee grounds as fertilizer for crops as well as prevent pests on plants. Spread the coffee grounds to the soil to help the plants are protected from pests and can grow faster and better.

other benefits of coffee for plants

Pest Control 

Brewed coffee grounds with hot water, then let stand until it cool. Pour this mixture of coffee grounds and water to your plants, to avoid pests. Do it regularly.

reuse coffee grounds in the garden

Repel Ants, Slugs and insects

In addition to insect and plant pests, ants, slugs also damage the flowers in your garden. Use coffee grounds to repel them. Spread the coffee grounds randomly on the way of ants and slugs passing through. The strong aroma of coffee will make them not return and damage your plants and flowers.

grounds coffee to repel ants and insects

coffee ground to repel slugs

Lastly, not all plants like coffee. So, do not give coffee to aloe vera, radish, lavender, peppers, and watercress.


Mom. Wife. Dreamer of self-sufficiency. Meet Naturally Loriel

This interview is originally from SeedsNow.com (source: http://www.seedsnow.com/blogs/news/28929665-featured-homesteader-blogger-naturallyloriel-com)

How would you quickly describe yourself to others?

Mom. Wife. Dreamer of self-sufficiency. Lover of sweets. Knack for storytelling. Chicken & cat lady. =)

How did you get started with your blog?

I got started with my blog, NaturallyLoriel.com, because I had just found out information on feeding babies that totally contradicted the information I was given by my doctor — my son was 9 months old at the time. From there, it was a domino affect and I began researching and questioning every single thing I was doing, eating, and buying. After about 4 months of steady research, I began talking about it with my close friends and family. In March of 2011, three different people in the same week suggested that I start a blog. I took that as a sign and so I did. 🙂

Did you start your blog when you started your transition to live this life style?

Yes and no. At first my blog was about real food and learning about GMOs. At the time, I was living in California and I was heavily involved in the Prop 37 campaign so a lot of my blog geared towards that. As you may probably know, once you become passionate about the food you eat, you start to realize that the best way to control what you are eating is to grow it. Now Naturally Loriel is more about the journey to living a natural life and everything that comes with it — real food recipes, gardening, chicken raising, DIY, and more.


Have you always been this way?

I’ve always been conscious about the earth but it never occurred to me how MUCH there was to *really* know about life. My mom always had a garden when I was growing up but as a child, I was never interested in it. My continuous journey to living a natural life began those first few months before I decided to start my blog. I really began being interested in building a thriving backyard homestead when I moved to Florida and realized my options for fresh food were limited. I knew that it was up to me to create healthy food. Plus, I’ve always been somewhat of a rebel so the idea of growing my own fresh food and raising chickens for eggs is like a huge middle finger to big corporations like Monsanto… which excites me.


FEATURED PHOTOS FROM HER INSTAGRAM


What are some of the other things you would like to have other people understand about living a healthier and self-sufficient life style?

A few things I’d like people to know is that most likely you won’t receive instant gratification. I’m in my third season of gardening and it has been a struggle — between the bugs, the weather, the fungus, more bugs — it seems like I never win. And actually, sometimes I wonder why I still try but I guess it’s because growing my own food and showing my son what real food grown in a garden from love tastes like is absolutely worth trying over and over again.

Living a healthier lifestyle is about trying, trying, and trying again and sometimes it’s certainly anything but easy. It’s about learning to lean on other people for advice, it’s about researching, and ultimately, I think it’s about teaching you to enjoy the process and slow down a little. Our world is moving so fast right now but moving towards a self-sufficient lifestyle takes time and patience.

What tips and tricks could you share with other people?

Honestly, I’m not sure I have any tips or tricks to share on gardening because I’m much of a beginner and haven’t had a successful garden season I could rave about. This spring I thought it would be abundant but I put the garden in too late and the heat has just been brutal. I’m ready for the fall though and I’m pretty confident I’m going to get a good harvest (at least that’s what I keep telling myself)!


Have you ever made mistakes or failed doing something?

HA! Yes, I have totally made mistakes or failed at doing something. One thing that is constantly a battle for me (and my husband) is my lack of watering the garden therefore keeping my plants alive. If it’s not because I forgot to water, my garden seasons have flopped because of the bugs that I deal with in Florida. Though, with each failed garden season, I am more prepared for the next one.

How did you overcome any obstacles?

Since I’m terrible at remembering to water my garden, I made sure I put my garden beds near my chicken coop. It has helped a lot since I have to change out the chickens’ water every day, but there are still times that I forget simply because I have a lot on my plate.
I am also starting a garden journal to record the things I learned and the solutions I’ve come across to help me remember for the next season.

Have you ever dealt with a person who disregards your life style?

Yes, and I think it is totally normal. 6 years ago, my whole mindset was different. I was ignorant but it wasn’t my fault and I think this is the case with lots of other people. When you think about it, it’s hard and scary to essentially unlearn everything you were taught, so I can see why people have a hard time with going against what mainstream says.
When I first began to make switches, mostly close family members couldn’t understand and I admit, I would get frustrated, upset, and hurt. I would try and preach and give facts but nothing ever changed their minds. It wasn’t until I started just living my life the way I wanted to, that people started to notice and come around. I’ve also learned that some people won’t ever change so it’s not worth using my energy to worry about it and to just keep moving on and focusing on my ultimate goal.

What are some of your greatest rewards with a lifestyle such as the one you live?

I could go on and on about the amazing rewards I get with this lifestyle but I’ll try and keep it somewhat short. In a few words, this lifestyle has taught me patience, gratitude, motivation, excitement, and appreciation for what it takes to grow and raise my own food. For example: by the time I actually account for all the money I put into my chickens, my eggs probably cost me $15-20 a dozen but I never doubt for one second that it’s worth it.

Out of all the rewards, one of the biggest of living this lifestyle is making it possible for my son to grow up with a backyard homestead. I think the problem with our world right now is that most of us have been completely disconnected from our roots. In my opinion, as a society, we’ve all lost the appreciation and knowledge of what it takes to grow real food (veggies, meat, and dairy) and would rather resort to convenience. Most of us don’t realize that the convenience comes with a huge cost that impacts our environment, and ultimately impacts the future of our children.

In my eyes, our children are suffering because they don’t know where their food comes from. That’s why it’s so important to me to continue what I’m doing for my child’s sake and to keep trying each year even if I’ve failed at gardening. It’s imperative for him to see that in order to get an egg that nourishes our body, we need to make sure our chickens are fed, hydrated, and cared for. It’s only until then that a child can see the full circle and learn to appreciate what it takes to have food that makes them feel good.

It’s only until a child sees the patience, handwork, and dedication it takes to start a plant from a seed, water it, love it, and see it grow that they can appreciate their food and truly know the difference between something home grown and something from the store. Ultimately, I want him to know that the good things don’t always come easy, hard work pays off, and there is nothing more gratifying than harvesting something you grew or raised with your own two hands.

How to Build a Tee-Pee Vine

This post originally was found on SeedsNow.com


Vine tee-pees are a fun way to encourage children to spend more time in the garden. They will add a whimsical touch that even the adults will appreciate and are not only fun to look at but are extremely functional. Because they save space in the garden by using vertical gardening techniques, you’ll be able to grow more food in less space, and who doesn’t love that?

You can construct your own vine tee-pee on a weekend with minimal materials, often ones that are free or you may already have on hand. This is a great project to get the kids involved with because they’ll enjoy creating a fun space for them to read, play and make-believe in.


Step 1: Start by selecting your building site.
Depending on what you’d like to grow on your tee-pee, make sure to position the structure in the appropriate, full sun or partial shade location.
Step 2: Choose the material you’ll use to construct your tee-pee.
These tee-pees can be made using free materials such as old branches from a nearby tree, which makes them even more desirable! Free garden projects are always a bonus. You can also use bamboo or other wooden stakes that you may have access too. In the picture above, you can see how even an un-used swing set can be transformed into a vine tee-pee.
Step 3: Build the tee-pee and secure to ground.
You’ll probably need an extra set of hands for this part, as you stand all of the pieces upward creating the tee-pee’s shape. Once you have them all in place, secure the top of the tee-pee together using strong twine or rope. Then secure the bottom of the tee-pee to the ground using garden stakes. You can drive metal stakes into the ground and drill the wooden branches or poles to them so it will be more secure. You don’t want this to fall over or be blown over especially if children will be playing in or around it.
Step 4: Wrap your tee-pee in twine.
Using garden twine or yarn, wrap the sides of the tee-pee so that the vines will have more to grab onto. This will help the tee-pee fill in faster and more evenly.
Step 5: Choose what to plant at the base of the tee-pee poles.
You can grow a mix of perennials and annuals, vining fruit, or spring and summer vegetables on your tee-pee.

Peas, Pole Beans, Nasturtiums, Squash (vining), Cucumbers, & Melons are all wonderful varieties to plant around your tee-pee and will thrive on a structure like this.

How To Grow 168 Plants In A 6 X 10 Space With A DIY A-Frame Hydroponic System

This source of this post, content, and photos is from goodshomedesign.com

The techniques you can use for making gardening far easier than it actually is are not that many and in most cases not that accessible in terms of costs or work put into getting it. In order to succeed, you have to think outside the box! This hydroponic system is that one clever way to grow plants on a small surface area with little effort. In the project featured on this webpage you can see how a homemade vertical A-frame hydroponic system can surely help you grow your garden plants. Actually, the hydroponic system is one great method for growing herbs or other small plants, like radishes, lettuces or strawberries; for the last type it is way more attractive because you won’t have to stand on your knees and on the ground, but just pick them while standing up. View the following video tutorial in order to make a working hydroponic system. Start growing 168 plants on a 6 by 10 surface!

vertical-hydroponic-system-1

vertical-hydroponic-system-5

vertical-hydroponic-system-4.1

vertical-hydroponic-system-7

vertical-hydroponic-system-9

Seattle Mom Quits Her Job to Become a Full-Time Homesteader

5698ec41-af8c-474c-bbb0-71ed984cc706

Most of us may have thought once or twice about throwing in the towel, walking up to our boss and calling it quits.

Maybe you’ve gotten to a point in your life where what’s important to you now isn’t what was important to you when you first started your career.

We all have moments in life when we need to re-evaluate what we’re doing with our time and energy. Sometimes you just need to overcome your fears and do what your gut is telling you to do.  The results just might surprise you.

Here’s a story about how one Seattle mom decided to close her business of over 10 years and started homesteading full time on their 1/2 acre urban farm.

This is her story about how she was able to not only make ends meet without the income she was missing, but how she actually started saving money & became self-sufficient.

Screen Shot 2015-04-30 at 10.46.00 AM

5 Container Gardening Tips for Beginners (+ Giveaway!)

Julie from homereadyhome.com just published a great article highlighting important Container Gardening Tips (for Beginners).  Click here to view the original post: http://homereadyhome.com/5-container-gardening-tips-for-beginners/ Here’s a quick preview of what she has has to say about container gardening:

hersteragiveaway4

1. Don’t “grow” overboard.  :)

“Container gardening requires a time commitment. You’ll need to be more hands-on (ie. watering and fertilizing) with plants in pots than plants in the ground. Your container garden will require daily attention so you want to make sure you don’t spread yourself too thin by having too many plants.” … read more

2. Choose the right container.

“Drainage holes are a must. Only consider pots with holes or pots you can drill holes into. Select a container with a broad surface area. Decide what you’ll grow and that will help you to determine how deep your container should be. Root vegetables (think: carrots) and tall plants (like, tomatoes, vines and fruit trees) do better in deep pots. Fast growing crops like herbs and leafy vegetables are fine in a shallow container.” … read more

3. Buy potting soil.

“You may be tempted to fill your container with the free dirt from your backyard, but don’t do it. Dirt from the ground doesn’t work well in containers because it’s dense and heavy. It turns into a hardened clump in your pot and your plants won’t do well. You need soil that is light, drains water quickly but also holds moisture at the same time.” … read more

4. Seek out sunlight.

“Many vegetables need at least 6 hours of sunlight a day, so the more sun you can provide the better. If, like me, you have a lot of shade at your location, no worries. There are still some edibles you can grow. For example, chives, kale, leafy greens, lemon balm, mint, parsley, spinach, swiss chard, peas and radish all tolerate partial shade.” … read more

5. Water your plants.

“Avoid under-watering and be sure you aren’t over-watering your vegetables. How do can you be sure?  I usually wait for the plants to look slightly wilted, then I water. You can also stick your finger in the soil about an inch down and see how it feels. If it’s dry, it’s time to water. My favorite tools for watering my container garden are a watering can and my spray wand that attaches to the hose.  ” … read more

How to Source Non-GMO Seeds

how-to-source-non-gmo-seeds-naturally-loriel-seedsnow-683x1024
Source: NaturallyLoriel.com

Naturally Loriel recently published a blog post on a very important topic:  How to Source Non-GMO Seeds.

She says, “You begin to learn which food companies deserve your support and try to find a local farmer’s market in your area. You realize it’s so important to meet and shake the hands of the farmer that produces your food. Unfortunately though, you’re not as lucky as Lauren is, and the farmer’s markets in your area royally suck. The only other logical solution is to grow your own food.”

Click here to read the original blog post: http://www.naturallyloriel.com/how-to-source-non-gmo-seeds/

Minnesotans Don’t Care About the Snow! Still growing strong.

ows_141875704417544

Season-extending structures are helping some Minnesota gardeners defy winter.

Even in late November, Dawn Pape’s newest garden was a welcome sight for winter-weary eyes.

In her Shoreview yard, under a blanket of snow, is a polycarbonate-topped, 2- by 8-foot box — or “cold frame.” Brush aside the show, lift the lid, and inside was an improbable vision: healthy spinach, kale, salad greens and other veggies growing in the frigid ground.

“It’s so uplifting to see green when it’s kind of bleak outside,” said Pape, a master gardener and garden-book author, who was still harvesting around Thanksgiving — and hoping for at least a few more weeks of homegrown produce. “If I can make it to Christmas, I’ll be pretty happy,” she said.

Cold-weather gardening is not for everyone, but a hardy few are giving it a try.

Some are market gardeners who erect plastic-covered shelters (often called hoop houses or high tunnels) so that they can produce food earlier in the spring and later in the fall. Urban agriculture consultants Cherry Flowers and Tim Page of Page & Flowers (www.pageandflowers.com) grow vegetables in high tunnels at their home in St. Paul and at an apartment in Minneapolis that serves as their office. They sell their produce at the Mill City Farmers Market.

“In the spring, you can get a jump on greens, even in March, and have them ready for the May farmers market,” Flowers said.

Pape is growing on a very small scale, just for her family’s table.

“I’ve read about it [cold-frame gardening] for several years and decided to try it,” she said. She found a kit online (at www.gardeners.com) that was the same size as one of her existing garden beds, ordered it and installed it in the fall, surrounding it with straw bales for extra insulation.

Cold-frame gardening has its limitations in Minnesota, she’s discovered. “The harvest’s not as plentiful” as during the regular growing season. Plant growth is minimal. “You’re not really gardening, just sort of picking. It’s basically a refrigerator.”

But Pape enjoys the challenge of pushing the growing season to its outer limits. “It’s thumbing your nose at Old Man Winter,” she said.

Read the full article here: http://m.startribune.com/lifestyle/homegarden/285986551.html

WHAT?!! 66 Things You Can Grow At Home?? In Containers?!?!?!?

Growing your own food is exciting, not only because you get to see things grow from nothing into ready-to-eat fruits and veggies, but you also don’t have to worry about the pesticides they might contain, and you definitely cut down on the miles they—and you—have to travel.

If you’re up to the challenge—and it really isn’t much of one—growing your own food can be so rewarding. And so much cheaper! Just be sure to choose the right planter or container, learn how to maintain it properly, and go find yourself some seeds! (Or starter plants.)

Here’s a starter list of all the crazy things even urban gardeners, without space for a garden, can grow at home.

1. Apples can be grown in a container; you can also grow them on the balcony or other small space using a technique called espaliering.
2. Kumquats
3. Avocados (plenty of extra tips online if you search)
4. Blackberries
5. Blueberries (sometimes helpful videos are available online)
6. Pomegranate
7. Cherries
8. Figs
9. Pears
10. Dwarf oranges
11. Grapefruit
12. Tangerines
13. Meyer lemons
14. Limes
15. Bananas (look for container gardening tips online)
16. Pineapple
17. Papaya
18. Guavas (several varieties)
19. Hops—yes, as in the ”spice” ingredient in beer. Turns out they’re easy to grow!
20. Aloe Vera
21. Strawberries
22. Tea (well, herbal tea)
23. Quinoa!
24. Tomatoes
25. Summer squash
26. Other squashes, like acorn and pumpkin
27. Hot Peppers
28. Sweet peppers
29. Cucumbers
30. Small cantaloupe
31. Jenny Lind melon (an heirloom cantaloupe)
32. Golden Midget Watermelon
33. Basil
34. Oregano
35. Parsley
36. Rosemary
37. Chives
38. Catnip
39. Thyme
40. Sage
41. Parsley
42. Kale
43. Mesclun greens
44. Spinach
45. Swiss chard
46. Lettuces (plenty of options there, from micro-greens to head or loose-leaf)
47. Mustard greens
48. Collard greens
49. Arugula
50. Carrots
51. Beets
52. Potatoes
53. Sprouts
54. More sprouts: mung bean and lentil sprouts
55. Wheatgrass
56. Kohlrabi
57. Turnips
58. Rutabagas
59. Celeriac
60. Parsnips
61. Jerusalem Artichoke
62. Sugar snap peas
63. Rhubarb (not ideal in a container, but it can work)
64. Mushrooms (again, more tips online if you look)
65. Pole Beans
66. Aaaand… asparagus, although some disagree that it does well in a container. Try it if you’re ok with a risk!

Source: http://planetgreen.discovery.com/home-garden/sixtysixthings-growhome-containers-withoutgarden.html

How To Make An Awesome Aquaponics System [VIDEO]

It’s obvious Ann Forsthoefel of “Aqua Annie” is excited by aquaponics, the growing of plants fed by nutrients from fish, which in turn provide a source of food when they reach maturity. “There are so few inputs compared to growing crops in the soil,” she said. With her gardens, she’s constantly building up the soil that is depleted at the end of each growing season. The beauty of aquaponics, she said, is that there isn’t that constant work because the fish are giving nutrients to the plants. Read her full post on Cooking Up a Story: http://cookingupastory.com/aquaponics

7 Reasons to Join the Urban Homesteading Revolution

Screen Shot 2014-11-06 at 11.27.57 AMby

1. Homegrown food is safer, more nutritious, and tastes better.

When the latest salmonella or e-coli outbreak dominates the headlines, it’s comforting to know exactly where your food comes from and how it’s raised. And because vitamin content is depleted by light, temperature, and time, freshly picked produce grown near your house is more nutritious than conventional produce, which is transported an average of 1,494 miles before it reaches the grocery store.

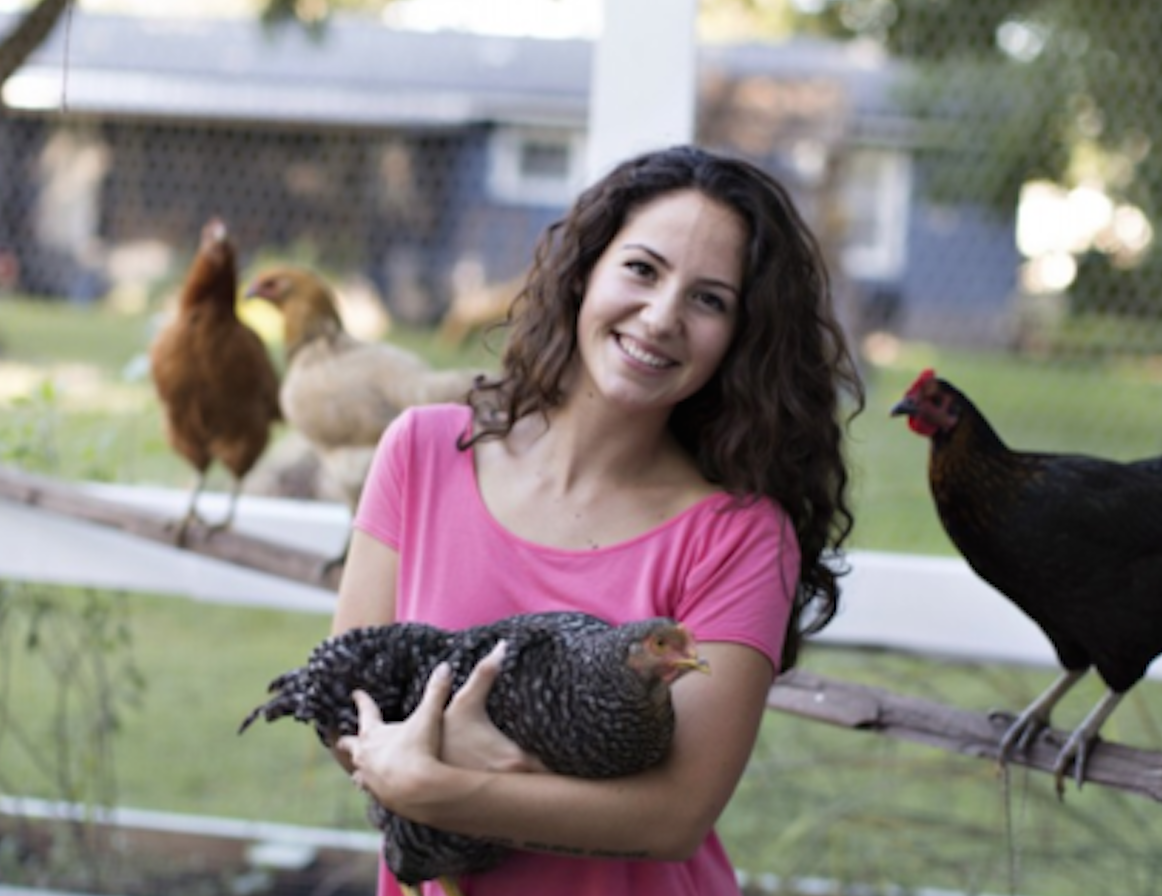
An even more delicious reason to celebrate homegrown food is the flavor. Gourmet chefs use the freshest ingredients they can find for a reason. The first time I cooked one of the eggs laid by our hens, I couldn’t believe how large and yellow the yolk was or how delectable it tasted. And it’s easy to appreciate novelist Barbara Kingsolver’s zeal for sun-ripened garden tomatoes. “The first tomato brings me to my knees,” she writes. “Its vital stats are recorded in my journal with the care of a birth announcement.”

2. Urban homesteading encourages healthy movement.

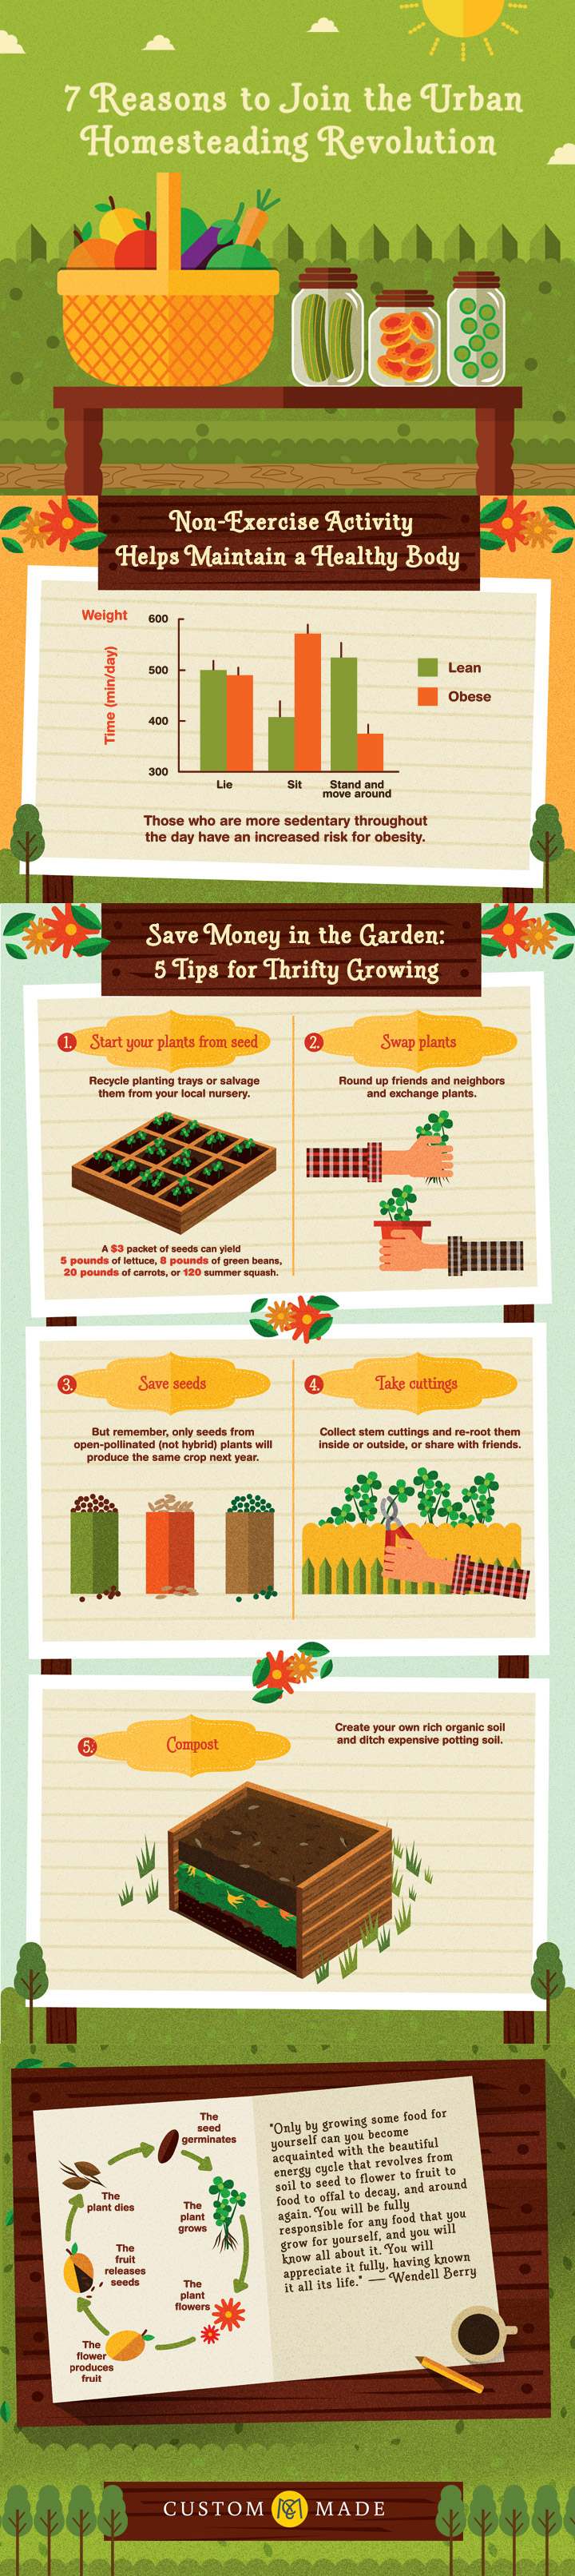
When I started gardening and making more things around the house and yard, I noticed a side effect: I felt better. It’s not surprising. Digging the dandelions out of a raised bed, brewing an India Pale Ale, and peeling potatoes fall in line with the sort of daily activities most important for maintaining a healthy body weight, according to research conducted by Dr. James Levine at the Mayo Clinic. In Levine’s study, people were fed an extra thousand calories a day. Those who did the most daily non-exercise activity (as opposed to deliberate exercise for fitness) gained the least weight.

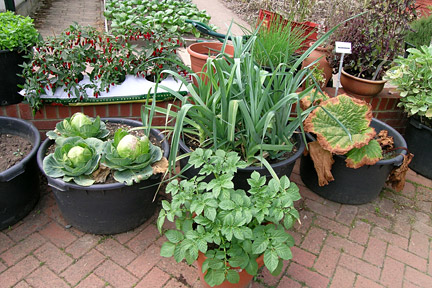
3. Urban homesteading helps families connect with nature and the seasons.

Growing up in Colorado, I was fortunate to spend a lot of time hiking and camping. Gardening has given me an even more intimate connection with the natural world, since now I must work with it as a co-creator. And it has given my two young sons a wonderful relationship with plants and seasonal rhythms. They love the garden and beg to help plant seeds, pull weeds, and harvest. Every time one of them asks me if it’s pea or fig season yet, or recognizes an edible plant in someone’s yard, I smile. Those may seem like simple things, but for me as a kid, produce was something that was shipped across the country and delivered to a refrigerated section of the grocery store.

4. Urban homesteading is thrifty. 

It’s no coincidence the urban homesteading boom coincided with a worldwide economic recession. If you build your soil, save seeds, and tend your garden well, you can save hundreds of dollars on organic produce each season by growing your own. Keeping chickens can also save you money. We estimate that our eggs cost $3.35 a dozen (in organic chicken feed) at the most, compared to $5 to $7 for similar eggs at the health food store. However, we were lucky to inherit our chicken coop, so others may have to include that expense as well.

Cooking from scratch saves us the most money. It’s not just that making stock, microbrews, and bread products from bulk ingredients is cheaper than buying them. As we’ve become better chefs, we’re also not as apt to go to restaurants, which used to be a huge drain on our finances.

5. Turning a lawn into a homestead makes productive use of land and supports healthier ecosystems.

In the memoir Paradise Lot, Eric Toensmeier and Jonathan Bates recount how they transformed their backyard—one-tenth of an acre of compacted soil in Holyoke, Massachusetts—into a permaculture oasis where they grow about 160 edible perennials. What was once a barren lot is now habitat for fish, snails, frogs, salamanders, raccoons, opossums, woodchucks, bugs, and worms. “Imagine what would happen,” Toensmeier writes, “if we as a species paid similar attention to all the degraded and abandoned lands of the world.”

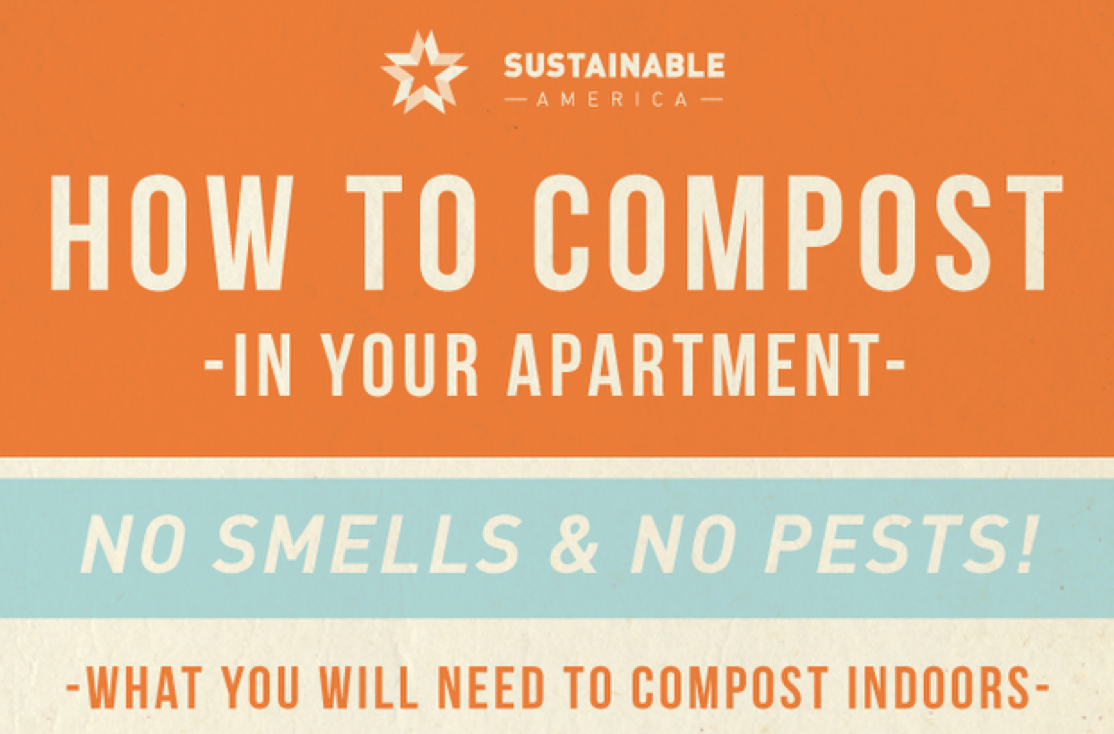
Most of us don’t have the skills or desire to garden on the scale that Toensmeier and Bates do. But by planting a few vegetables, herbs, or fruit trees, we create habitats for birds, butterflies, and pollinators. And by composting kitchen waste, chicken manure, and fallen leaves, we improve the ecosystem that supports all life.

6. Gardening and creating things boosts the spirits.

Author Matthew Crawford traded his job at a Washington think tank for a career fixing motorcycles because working with his hands made him feel more alive. “Seeing a motorcycle about to leave my shop under its own power, several days after arriving in the back of a pickup truck, I don’t feel tired even though I’ve been standing on a concrete floor all day,” Crawford writes.

We’ve all experienced the thrill that comes from making or fixing something. In her book Lifting Depression, neuroscientist Dr. Kelly Lambert explains that association. “When we knit a sweater, prepare a meal, or simply repair a lamp, we’re actually bathing our brain in ‘feel-good’ chemicals,” she explains. Lambert contends that in our drive to do less physical work to acquire what we want and need, we may have lost something vital to our mental well-being—an innate resistance to depression.

I can attest to what Lambert says. Almost nothing is as satisfying as appraising a finished scarf or jar of sauerkraut, or cutting the first slice off a loaf of homemade bread. I have no doubt that creating something with my hands every day—even a meal—is imperative for my mental health.

7. Urban homesteading encourages families to live, work, and buy more intentionally.

These days, before we buy something impulsively, my husband and I are more likely to ask ourselves some simple questions. Can we make, fix, or do this ourselves, and is it worth the time and energy? Sometimes the answer is no. For me, canning and making clothing are not worth the effort. But just asking these questions makes our family more intentional about how we live and work, and what we buy.

As a society, we’re often encouraged to make decisions based on two variables: time and labor. When it comes to household tasks, it’s usually seen as preferable to save both time and labor. While making a stew will take longer and require more physical work than buying a can, the process is enjoyable and good for the body. In addition, the homemade variety is healthier, tastes better, and brings greater satisfaction. Equations look different when you add in all of the variables.

I hardly think of my family as urban homesteaders anymore, because the parts of the lifestyle that once seemed foreign and daunting, such as gardening, composting, and cooking from scratch, are now routine. They help us stay connected and make our lives feel richer. It’s powerful to produce some of what we need to survive, especially food.

7 Reasons to Join the Urban Homesteading Revolution

7 Reasons to Join the Urban Homesteading Revolution
Infographic by CustomMade