How To Make a Chalkboard Paint Pot

This is guest post by Becky Striepe
from Glue and Glitter

Growing food is sort of a non-stop adventure, isn’t it?

Just when everything’s planted and flourishing…

…the change in seasons means it’s time to start your garden over with a new round of seeds and seedlings.

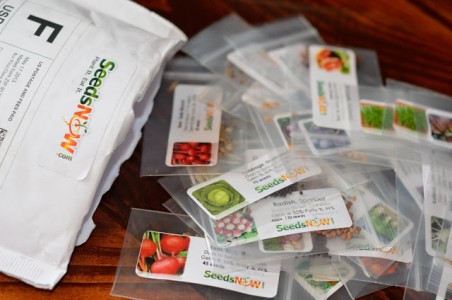
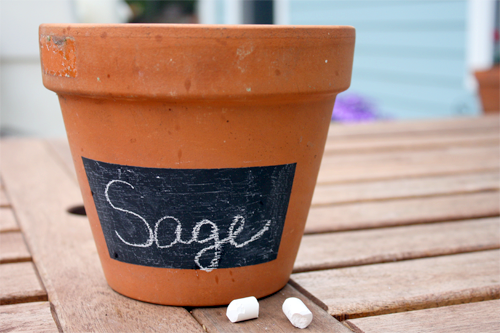
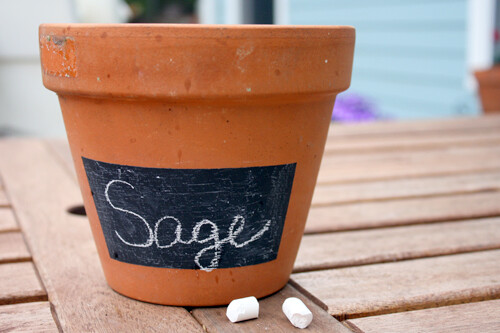
Like Mike has mentioned before, you might think you’ll remember what you planted where, but unless you label your pots, chances are you’ll end up with at least one or two mysteries sprouting up.

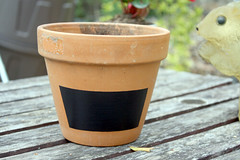
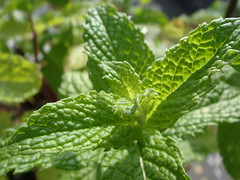
A container garden is no different. Rather than having to keep track of a bunch of plant markers, you can use chalkboard paint to create a changeable label for your potted herbs and veggies. It’s easy as pie!

Here’s how to make your own chalkboard paint pot

    Materials

  • Chalkboard paint. You can pick up a pint at the store or make your own.
  • A terra cotta pot. Use a dry rag to wipe it clean of any debris.
  • A paint brush. Something medium-sized will do.
  • Masking tape or decals. I went with a plain rectangle, but you can use decals if you want your chalkboard label to have a fun shape, like a heart or a star.
  • Chalk. White will do, or you can use fun colored chalk!
    Directions

  1. Tape off your design. If you’re doing a square, you want to be super careful to keep the top and bottom edges parallel to the top and bottom of the pot. That might mean ever so slightly curving the tape as you go around. Take your time with this step. When you’re all done taping, take an extra minute to make sure it’s smoothed down really well, so you won’t have any smudges.
  2. Shake up your chalkboard paint really well. Not only does shaking keep the color even, but it distributes the tiny grains that make chalkboard paint writeable.
  3. Grab your brush, and paint! I gave my pot 2 coats, leaving about 10 minutes drying time in between. It will take 2 or 3 coats to get it looking nice and even.
  4. Don’t wait too long to remove your tape, or you’ll risk removing the paint along with it. Maybe 10 or 15 minutes is a good waiting time after you finish your last coat. To remove the tape, very slowly and carefully peel it away from the pot, being careful not to let any painty parts of the tape touch the pot, since you won’t be able to get that paint off of the porous surface once it’s on there.
  5. Let your pot dry overnight, then take a piece of chalk and rub the side all over where you painted to prime your chalkboard label. Wipe off the excess with a clean rag, and you’re ready to write on your pot!

About Becky

Becky Striepe is a vegan crafter living in Atlanta, Georgia. Her mission is to make vegan food and eco-friendly crafts accessible to anyone who wants to give them a go. She’s also site director at Eat Drink Better, a site dedicated to exploring sustainable, ethical food choices. You can follow Becky on Twitter or find her on Facebook and Pinterest!

Images courtesy of Glue and Glitter on Flickr.

5 Signs That Cabbage Worms are Attacking Your Garden

By Justin Emig
Associate Brand Manager, Safer Brand

For most of the country, Spring has DEFINITELY sprung…

…and with the onset of Spring, comes the onset of our unwelcome garden pests.

The garden pest that has caused the most concern for organic gardeners in recent years has been the cabbage worm.

There are several ‘types’ of cabbage worm which include the Imported Cabbage Worm, Cabbage Looper, Cabbage Webworm, and the Leaf Miner.

Regardless of the type, us interested in keeping an organic garden just want them gone!! Here are 5 signs that you might be infested with our green pests and best of all, how to get rid of these ferocious vegetable eaters.

Here are 5 signs that your garden might be infested with cabbage worms. — Tweet This.

Signs you have cabbage worms

1. You are growing their favorite food

As you can guess from their name, cabbage worms primarily attack plants in the cabbage family, but are not exclusively cabbage feeders. Plants that cabbage worms find the most tasty are:

  • Broccoli
  • Cauliflower
  • Brussels sprouts
  • Collards
  • Kale
  • Turnip greens
  • Radishes
  • Other cabbage greens

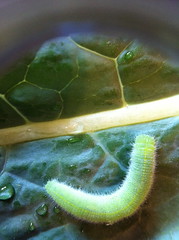
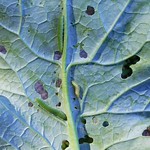
2. You have holes in your plants

Since cabbage worms are such voracious eaters, as little as 2 or 3 worms on your plants can spell disaster for the overall health of your broccoli or other plant.

Common signs will be holes in your leaves. A simple google search can connect you to many pictures of cabbage worm damage.

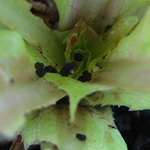
3. You notice dark green droppings on your leaves

A tell-tale sign that you are becoming infested with cabbage worms are their droppings. When you start to notice dark green droppings on your leaves, inspect the underside of your leaves as that is where cabbage worms tend to lay their eggs.

4. A lot more butterflies present

Since caterpillars are in essence the larvae stage of caterpillars, if you start to notice more butterflies hanging around your garden, chances are, you have an infestation of cabbage worms or if you experience one of the previous symptoms, it might be too late.

5. Time of year = Spring

Spring is the time of the year that cabbage worms have awaken from their Winter slumber and are now in search of food and laying their eggs.

Organic control of cabbage worms

If you have experienced this infestation in the past or for those proactive gardeners who are getting prepared for the already started 2012 gardening season, the most common and popular organic control for cabbage worms revolves around the use of bacillus thuringiensis or BT.

This natural bacteria eliminates cabbage worms through ingestion. One of the most popular BT products is Safer® Brand Caterpillar Killer with BT and is available in an 8oz concentrated formula or in Safer® Brand Garden Dust which is a powder formula and is OMRI® Listed.

Your turn

In the comments below, let me know if you have noticed cabbage worms in your garden.

Photos courtesy of
Top: OSU Master Gardener on Flickr
Holes: florence_craye on Flick

White Powdery Coating on Leaves? Yup, That’s Powdery Mildew

There is a white chalky substance on the leaves of your plants.

Your container garden looks like Pablo Escobar and his boys had a party in it…

…What happened?

Don’t worry that white powder is not cocaine, it’s powdery mildew.

You’ll notice that the powdery coating is on both sides of the leaves and will eventually start to spread.

Those leaves will eventually turn yellow and die. It can also cause the leaves to twist and turn.

Your container garden looks like Pablo Escobar and his boys had a party in it. What happened? — Tweet This

Vegetables commonly affected by powdery mildew

  • Cucumbers
  • Peas
  • Squash
  • Tomatoes

Dealing with powdery mildew

If you are first starting to plant, then one effective way to prevent powdery mildew is to allow for air circulation by pruning the leaves, especially at the bottom. This is because excess moisture is a common cause.

Once powdery mildew strikes, you can combat it with a homemade spray using baking soda and water.

There are also organic fungicidal sprays that you can use as well to help, such as Safer Brands Garden Fungicide.

[vimeo clip_id=”40127360″ title=”0″ byline=”0″ portrait=”0″ width=”525″ height=”393″]

Win a Safer Brand Organic Insect & Fungicide Gift Pack

Lucky for you I am now running a contest on Facebook (through April 12, 2012) that includes the Garden Fungicide as part of a gift pack. Check it out and enter today.

Your turn

After you’ve entered the contest, in the comments below let me know which plant of yours has been affected with powdery mildew.

Image courtesy of Jeff Kubina on Flickr.

Mycorrhizal Fungi: The Secret to Healthier Plants

You’ve seen me mention Thrive, a sponsor, before and asked me about their line of products.

Thrive is a liquid mycorrhizal fungi for your garden.

The analogy that I like to use is that it’s a probiotic for your plants.

It helps to set them up with a healthy root system, so they can better absorb nutrients.

Before I get into more detail about mycorasdfajfla (because I know that’s how you are pronouncing it), let’s learn how to say it.

Here is the phonetic pronunciation: mahy-kuh-rahy-zuhl

Much better. Let’s move on.

What is Mycorrhizal Fungi?

I asked Heather, the Marketing and Customer Service Specialist over at Thrive, a few questions and here’s what she said about mycorrhizal fungi.

What is mycorrhizal fungi?

Mycorrhizal fungi is an all-natural, beneficial fungus in the soil. It provides the necessary nutrient channels to a plant and it’s roots.

What’s the benefit of using mycorrhizal fungi in your garden?

Elongates, strengthens root systems and makes them more drought resistant. Because THRIVE uses a liquid Mych you can use it throughout the lifetime of the plant, versus most dry versions that you can only apply when you plant or re-plant vegetation. (ie –you can use THRIVE on 15 yr old houseplants, on ANY vegetation at any point indoors/out).

Mych needs to reach the root system, so if it is in a liquid formula as it is in THRIVE products, you can apply it at any time versus only at planting/repotting.

How do you use it? Does it replace fertilizer?

THRIVE is an all-natural, no harsh chemical product. So you cannot over-treat with THRIVE (but of course you can over-water your vegetation!)

THRIVE is not a fertilizer, but a root stimulator and soil conditioner, helping your plants overall health. It is safe to use with a fertilizer or plant food that you currently use.

Is it safe to use? Are there harsh chemicals and pesticides in it?

THRIVE contains no harsh chemicals and is an all-natural blend of beneficial bacteria and Mycorrhizal Fungi. When used as directed, it is safe to use around children and pets immediately after application.

Is THRIVE certified organic?

We are in the latter stages of becoming OMRI approved (Organic Material Resource Institute).

How often should THRIVE be applied to plants?

Because it is not a harsh based chemical formula, the more you use and the more often, the faster results you will notice! We recommend weekly to start, and then bi-weekly after your vegetation has taken off.

When is the best time to use it?

During the growth season. But it can be used all year around and will only help your plants and vegetation.

Can it be used on seedlings?

Yes – it is great on seedlings – check out our weekly drawing for a free kit with ElDorado Heirloom Seeds.

THRIVE will make all vegetation grow, even weeds, so caution to where you apply it!

Want to learn more about mycorrhizal fungi? Then check out this article from Thrive about how mycorrhizal fungi works.

Don’t forget it’s: mahy-kuh-rahy-zuhl

Thrive samples and free shipping

Thrive is offering free shipping on all orders and also offering free samples, go their site and take advantage of the offer.

Then head over to their Facebook page, tell them that I sent you and thank them for the samples!

3 Reasons Your Garden Will Fail This Year

Spring is here… getting lots of messages about starting your first container garden.

You are excited and nervous. And for good reason. You’ve lots to do in the next couple months!

Why your garden will fail

The 3 reasons your garden will fail this year.

  • 1. You want to grow a farmers market in your small space.

You want to grow tomatoes, eggplants, cucumbers, peppers, kale, onions, garlic, strawberries and a billion other things.

A lot of those veggies require a bit more time and energy to grow. I’m not saying it’s impossible to grow them, just that to grow all of them when you are starting out might not be the best idea. You get an A for the enthusiasm, but you are just starting out. Chill out a bit.

Start by buying sampler seed packs only $0.99 cents over at SeedsNow.com. They’re 100% NON-GMO.

Growing your own food is overwhelming to start. So why try to grow a farmers market on your balcony?

Growing your own food is overwhelming to start. So why try to grow a farmers market on your balcony? — Tweet This

Scale it down a bit.

  • 2. You read about companion planting

You read in a gardening book, magazine or on some site that you can increase your yield, protect against bugs and that companion planting was smart to do. Now you wanna cram hundreds of plants into one container.

Companion planting is a good practice to employ, but if you are new to the container gardening game, keep it simple. Why introduce other variables into the equation?

Get one crop in a container down first, then introduce others into the mix.

  • 3. You only get 4 hours of sun, but want to grow tomatoes –>

How did I know this? Because everyone wants to grow tomatoes.

If you want to grow tomatoes and don’t get enough sunlight, you will likely fail. This is why it’s so important to determine the amount of sunlight your space gets and grow what suits those conditions. If you get less than 5 hours, then grow some of these shade loving veggies.

3 sources to buy your vegetable seeds


Don’t set yourself up for failure

One of your big concerns in starting out is making sure that you are doing everything right because you are scared of failing.

That’s why I want you to minimize your failure and avoid those three mistakes. I’m not saying those ideas are and dumb and ridiculous, but to start out…they kind of are.

Your turn

I know that you were planning one of these mistakes to start this year. In the comments below, ‘fess up and let me know which one you had planned and will be avoiding.

What’s the Hardest Part About Starting Your Container Garden?

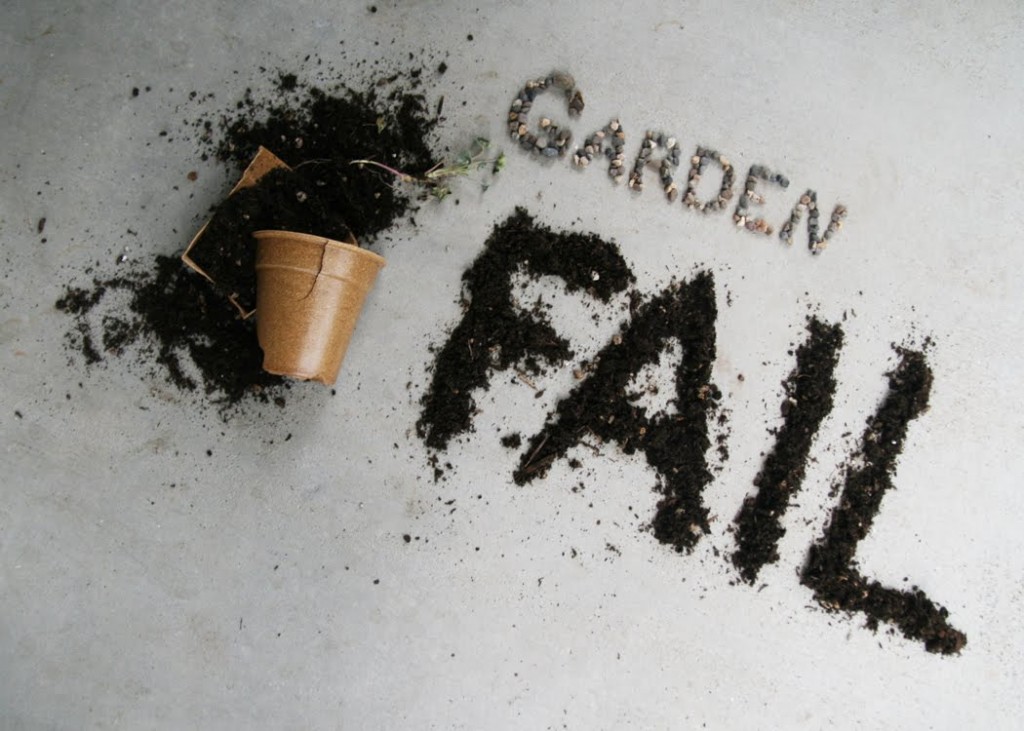
You want to start container gardening, but there is one thing that’s stopping you?

What is it?

I’ve been asking for your feedback over the last few weeks through surveys and on the Urban Organic Gardener Facebook page.

The reason for asking is because I’m starting to develop an online vegetable container gardening training course for you that will empower you to easily start growing your own food.

Based on what you have told me, the hardest part about starting…is just that. It’s starting.

Reasons why you aren’t starting your container garden

  • It’s too overwhelming.
  • Fear of failure.
  • Not knowing where to start.
  • I have a black thumb and history of killing plants.
  • I have no idea what I’m doing.
  • I want to know exactly what to do.

Any of those sound familiar to you?

[vimeo clip_id=”39600494″ title=”0″ byline=”0″ portrait=”0″ width=”525″ height=”393″]

Your turn

In order to help you start growing your own food without the confusion and provide the best value for you with this this training, in the comments below let me know what else are the hardest parts about starting your container garden?

Photo courtesy of Music2Work2 on Flickr.

What’s the Difference Between Genetically Modified, Heirloom, Hybrid, Non-Hybrid, and Open Pollinated Seeds?

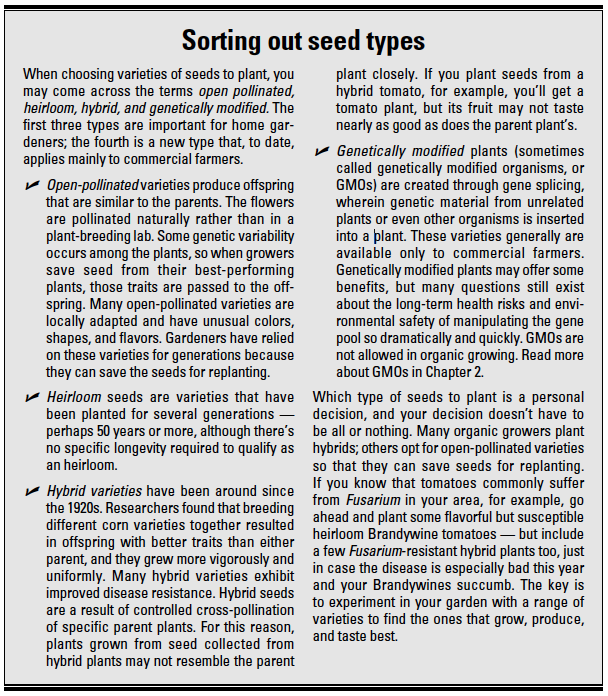
What’s the difference between an heirloom and hybrid tomato?

Are open-pollinated seeds good or bad?

These are all questions that you have asked me.

You already have reputable sources to buy your seeds.

Here’s a simple explanation of the different types of seeds.

Here’s a simple explanation of the different types of seeds. — Tweet This

Different seed types

To help with the clarification, I asked SeedsNow.com, who sells 100% NON-Genetically engineered seeds – all of which are heirloom/non-hybridized and open-pollinated varieties. Here is what they said:

Genetically modified seeds

Genetically modified seeds (GM) have been genetically altered/engineered in a lab somewhere and have had specific changes introduced into their DNA by applying genetic engineering techniques. The interesting thing about GMO seeds is that gardeners are not able to save the seeds after harvest and must buy seed every year from large seed corporations, such as Monsanto.

3 sources to buy your vegetable seeds

Heirloom seeds

They are typically open to debate, but some would argue that any seed that has been passed down for generations, usually for 50+ years, is called an heirloom seed. Heirloom seeds are also non-hybrid and open-pollinated.

Hybrid seeds

When someone talks about a hybrid seed variety it typically means the seed has been cross-bred with another variety to try and enhance its results. For example, one might try and cross breed it with another variety that has disease resistance. The problem with hybrid seeds is that when a gardener tries to save the seeds from that variety it typically reverts back to its wild parent and will never really know what will grow.

Non-hybrid seeds

On the other hand, non-hybrid seeds have not been ‘crossed’ with any other strain. Non-Hybrid seeds are the most natural and purest form of seed anyone can find.  Anyone can save the seeds after each harvest and be assured they will grow the same every time.

Open-pollinated seeds

Means the plants are pollinated by insects, bees, birds, wind, and other natural ways. The good thing with open-pollinated plants is that it will continue to reproduce new generations of those plants.

Your turn

Help spread the knowledge by sharing this post with friends and family. Then in the comments below, let me know what kind of seeds you have started.

Best Culinary Herbs to Grow in Your Shade Container Garden

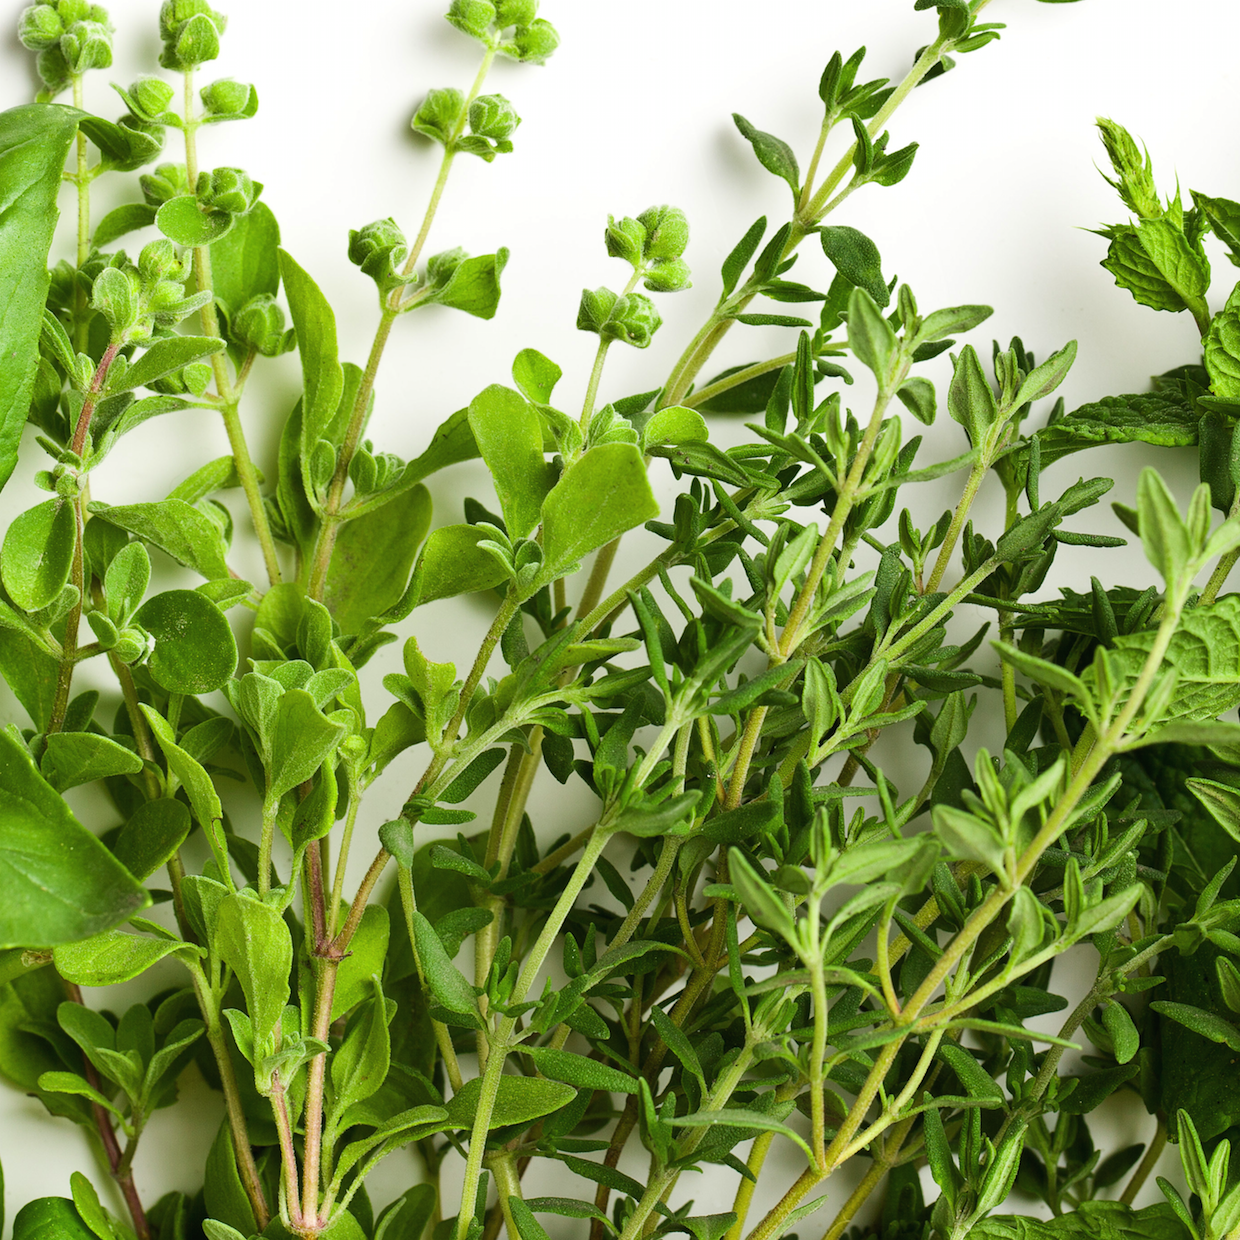
You were all happy to start your herb garden.

You picked out your location and determined how much sunlight it gets.

Your happiness turned to sadness when you realized that you only get 3-4 hours of sun.

Those dreams of an herb garden were dashed. At least you thought so. In that shaded space, you can still grow your herb garden.

Common herbs that grow well in the shade

There are a few dozen herbs that will grow well in the shade, but I’m not going to list all of those for you.

Why not? Because having feverfew, lady’s mantle and lovage aren’t very practical to grow when you are starting out.

My goal is to provide you with practical herbs that you know what to do with and can use, such as:

Those aren’t the only ones, but they are the most common and useful. There is nothing wrong with borage and sweet woodruff, but I don’t think that’s what you are going to start with.

Your turn

Share this post with family and friends to help them start their herb garden. Then in the comments below, tell me the herbs that you are growing in the shade.

Photo courtesy of Murugananth C on Flickr

Best Container Vegetables to Grow in the Shade

You’ve scoped out your garden space…

…and determined how much direct sunlight it gets.

Your garden gets less than 6 hours and you feel hopeless.

Sorry to break it to you, but that means you can’t grow tomatoes.

Don’t worry there are other vegetables you can successfully grow in that space.

Shade loving vegetables

The following vegetables will do just well in containers and the shade:

The following vegetables will grow in small/medium sized containers  — and —  they like being in the shade. – – Tweet This

Helping you to succeed in your garden

The purpose of this list is to serve as a guide in helping you to minimize the mistakes you make and set you up for success in your garden.

If you want to, experiment in your garden. See if other vegetables do well in the shade. No one will get hurt if you do.

[vimeo clip_id=”39164990″ title=”0″ byline=”0″ portrait=”0″ width=”525″ height=”393″]

Your turn

Share this post with those in your life that use the excuse of not getting enough sunlight to start growing their own food.

Once you do that, then leave a comment below to let me know which of these shade loving veggies you plan on growing.

Photo courtesy of Public Domain Photos on Flickr.

Seeds You Don’t Want to Start Indoors

We’ve talked about indoor seed starting and it’s advantages.

While it may be advantageous to start some seeds indoors, it’s not wise to do so with all seeds.

The general rule of thumb is if it grows underground, plant it directly.

Stick with that and you should be good.

Save yourself the hassle and plant these seeds directly in your containers.

Save yourself the hassle and plant these seeds directly in your containers. — Tweet This

  • Beans
  • Beets
  • Carrots
  • Dill
  • Garlic
  • Onions
  • Peas
  • Radishes

[vimeo clip_id=”39030373″ title=”0″ byline=”0″ portrait=”0″ width=”525″ height=”393″]

Your turn

In the comment below let me know which of these will you be planting directly in your containers this year.

Photo courtesy of B.D.’s world on Flickr

How Many Plants Per Container?

You are getting ready to start your seeds.

Or you might be making your wish list of seeds to buy… 3 sources to buy your vegetable seeds.

…but you’re not sure how many can fit into a container.

That’s exactly what some of you told me that you were going through.

You don’t want to have a tray filled with 30 nicely labeled kale seedlings and only three containers to put them in.

That would be a waste of your time and money.

To help you out, I created a simple to follow chart.

Know how many plants per container

From the survey you filled out a few weeks ago, I took the vegetables that you said you wanted to grow and noted approximately how many of that plant can fit into a 12″ container.

Download the chart (pdf).

Now you can know how many seeds to start or plants to buy in seconds.

I chose 12″ because that’s the same size as the 5-gallon containers used to make self-watering containers.

This doesn’t necessarily mean the highest yield, it’s just the approximate amount of plants per container.


Your Turn

Did this information change how many plants you planned on having? After you downloaded the chart, in the comments below let me know how many containers you will have in this year and what you will grow in them.

Photo courtesy of MissMessie on Flickr.

What is The Power of OMRI®

This post was written by SaferBrand.

Not all ‘Organic’ Products are created the same…

With the rise of organic gardening, comes the rise of products claiming to be the ‘best’ organic gardening solution.

The retail landscape in organic gardening is daunting…

…there are countless products all claiming to be organic or natural and solve the problem you are experiencing in your organic garden.

It seems that every chemical company has a set of organic products they are trying to convince you to buy.

How are you to know what products are truly organic and able to cure your problem without leaving potentially harmful residuals?

Seems every chemical company has a set of organic products they are convincing you to buy. — Tweet This

This where OMRI® comes in…

OMRI® is the Organic Materials Review Institute and products that bear the OMRI® Listed seal have gone through a battery of tests.

OMRI® tests the raw materials used in product production, the production process and facility and the end result, among other tests to validate if the product meets their strict standards, needed to wear the OMRI® Listed seal.

Why do most products on the shelves at your local garden center not have an OMRI® Listed seal?

That is because those products can not obtain the prestigious seal. If you want a truly organic product, you need to look for the OMRI® Listed seal before purchasing.

Just as you would look for the USDA Organic seal prior to purchasing organic produce, the same applies to your organic chemicals, but with the OMRI® Listed seal, being your governing seal of approval.

Safer® Brand and OMRI® Listed products

Safer® Brand boasts more OMRI® Listed products then any other company.

By far!!

Safer® Brand possesses over 50 SKUs that possess the OMRI® Listed seal where the next closest competitor possesses 6 SKUs.

Not only does Safer® Brand have more OMRI® Listed products then any other company, Safer® Brand was the first company to patent Insecticidal soap.

A staple in organic gardening. Safer® Brand continues to innovate in organic gardening by being the first company to patent a true 3-in-1 product, as well as the first and only company to patent an organic insecticidal soap, organic pyrethrin, and neem oil combination (EndALL™).

The next time you are looking to eliminate unwanted pests in your organic garden…rely on OMRI® and rely on Safer® Brand to eliminate the pests, without leaving potentially harmful residuals.

Your Turn

Share this post with your friends and family that are looking to rid their garden of pests without using toxic chemicals.

Buying a Seed Starting Tray: 5 Things to Look For

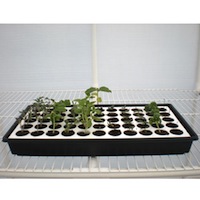
You want to start your seeds…

…but you aren’t into the diy seed starting projects.

It’s all good and I understand.

If you want to buy a seed starting tray, but not sure what to look for, then read this.

I want to help you to get a quality seed starting tray and provide you with the information that will help you to buy one.

If you want to buy a seed starting tray, but not sure what to look for, then read this. — Tweet This.

5 things to look for in a quality seed tray

  • Good Drainage

Make sure your seedling tray has good drainage so your seeds don’t rot. There should be holes at the bottom of each cell.

  • The Substrate

The soil or plugs should have good water retention qualities and be porous for vigorous root growth.

  • Easy Transplanting

You should be able to easily stick your finger under the seedling cell and pop up the seedling when you are ready to transplant.

  • Convenient Transporting

A seed kit that comes with a sturdy bottom tray makes it easy to move your seeds from place to place. 

  • Reusable

A reusable seed starter is always best for you pocket book and the environment!

This list is courtesy of The Greenhouse Catalog. Check out their selection of seed starting supplies.

[vimeo clip_id=”38469411″ title=”0″ byline=”0″ portrait=”0″ width=”525″ height=”393″]

Win a seed starting tray

If you are reading this post before 11:59pm EST on March 15, 2012, you can win a Smart Float Seed Tray from the Greenhouse Catalog by clicking here.

Your turn

Are you starting your garden in a seed starting tray? Let me know in the comments below.

Plant These Herbs & Veggies to Attract Beneficial Insects to Your Urban Garden

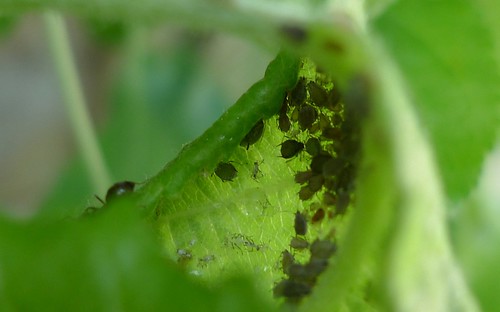
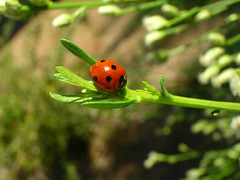
You have insects in your urban garden…

…and are looking for practical advice and a non-chemical way to treat them.

I’m with you on that.

Some of the worst advice that I’ve received about controlling insects is to buy beneficial insects and release them into the garden.

Really?

Ladybugs have better things to do then what our urban gardens have to offer.

Instead of buying beneficial insects, grow herbs and veggies that will attract them.

Instead of buying beneficial insects, grow herbs and veggies that will attract them. — Tweet This

A Practical Solution to Attracting Beneficial Insects

Grow something that will serve two purposes. One for you to eat and one to attract the beneficial insects.

This isn’t a post of every single plant that will attract every single insect. Those aren’t useful.

It’s a post that will attract two beneficial insects that will help out most urban gardeners – ladybugs and lacewings.

Both of them will take care of aphids and other soft-bodied insects.

What You Can Plant to Attract Ladybugs & Lacewings

Here is a short list of herbs and veggies that you can eat and use to attract these good guys:

  • Coriander/Cilantro
  • Dandelion
  • Dill
  • Fennel
  • Lady bugs will also be attracted to Marigolds

There are billion other flowers that can be planted to attract these and other beneficial insects, but want to help you really maximize your small space.

[vimeo clip_id=”38064242″ title=”0″ byline=”0″ portrait=”0″ width=”525″ height=”393″]

Your Turn

Which of these plants will you start growing to attract these beneficial insects to your urban garden?

Photo courtesy of marakawalv on Flickr

Tiny Green Bugs on Your Plants: Must Be Aphids

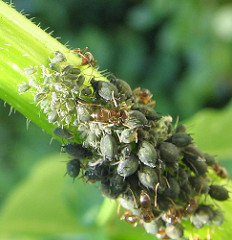
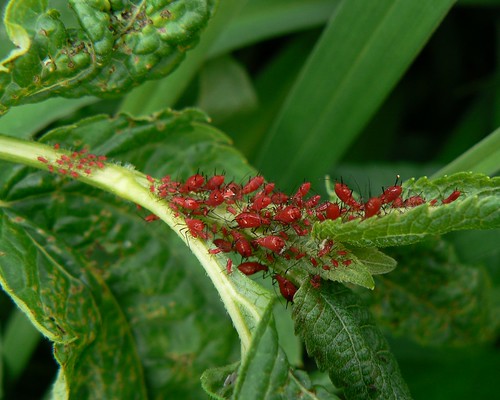
Noticing tiny green bugs on your plants…
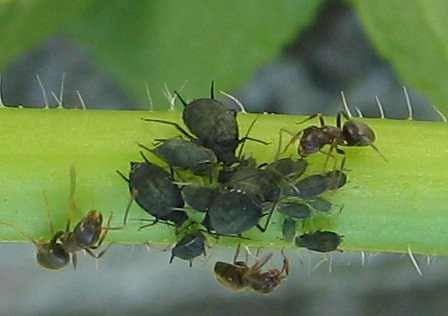
..But not sure what they are?

Those annoying little bastids are aphids.

There a billion different varieties of them, but what’s that matter to you?

You just need to know what the are.

In the rest of this post, I’ll share some characteristics, pictures and ways to get rid of them.

Here we go…

Those annoying little green bastids in your garden are aphids. — Tweet This

Characteristics of Aphids

  • The larger ones are 10mm. That aint’ very large.
  • You’ll find them on the underside of leafy greens.
  • They hang out in clusters.
  • Besides green, they can be black, brown or pink.
  • Aphids are soft bodied.

Pictures of Aphids to Help Identify

How to Get Rid of Aphids

Since aphids are soft-bodied you can squish them, but that isn’t a great use of time. Here are three other options for you.

Keep your container garden ant free. Fern from Life on the Balcony wrote a post on how this is a preventative method because ants help to shuttle aphids around. She goes into further depth on this post on her site.

Make a homemade spray. Boil up some water with onions, garlic and cayenne pepper. Let it steep for a bit, then spray down the aphids and undersides of leaves.

Buy an organic pesticide. One solution for an organic pesticide is from Safer Brand (one of my sponsors). Their EndAll organic insect killer will help to solve most of your insect problems and is OMRI listed.

Before you say how it’s going to kill the beneficials as well, I asked them the same question and here was their response.

EndALL is also safe to use around beneficials as if you follow the usage site instructions, you will not harm beneficial insects. Pure neem oil has a history of harming bees if sprayed directly but if you treat in morning and late evening, bees do not feed during those times and will not be harmed. We use azadiractin in our EndALL product which is an extract of the neem seed and is much more gentle then straight neem…but with the same efficacy

[vimeo clip_id=”37922700″ title=”0″ byline=”0″ portrait=”0″ width=”525″ height=”393″]

Your Turn

Now that you can identify those little green bugs on your plant, in the comments below let me know which of your veggies aphids have attacked and how you are going to get rid of them from now on.

Main photo courtesy of Newtonia on Flickr.

Advice for Successfully Starting Vegetable Seeds at Home

By Michelle Moore
Owner of The Greenhouse Catalog

There is nothing like new life in spring…

…and starting seeds is one of the best ways to enjoy the start of the season.

Unlike transplants, seedlings are fragile and require newborn-like attention:

The right media, temperature, light, water and food.

To a new gardener, meeting these needs may seem like a challenge.

But with a little knowledge and the right equipment, success is easy and just a few short days or weeks away.

With a little knowledge and the right equipment, seed starting success is easy. — Tweet This

Note–before you even start

It is important to select the right seeds. There is nothing wrong with planting seeds that are more than a year old, but if you are trying seed starting for the first time and need a confidence boost—stick to current year seeds for the best germination rate.

What You’ll Need for Seed Starting Success

Media: The best seed-starting media holds moisture and air. Seedlings need to stay moist, but not wet, and need to have plenty of aeration. You can purchase specially formulated seed starting mix, use coco-pith, or a number of seed starting cubes for the best results.

Temperature: Seeds need warmth, so don’t put your seed trays in a drafty area. Add bottom heat for even better and faster roots to development. Seedling heat mats are an excellent investment.

Light: Most seedlings germinate best in light. A sunny window may be enough light, but the addition of a small grow light can make a tremendous difference in a healthy start. Plants receiving too little or too much light tend to get leggy and don’t make for the best transplants. T-5 or LED grow lights are extremely energy efficient and do not take up much space. They also don’t create a lot of heat, so seedlings won’t dry out as quickly.

Water: Seedlings dry out quickly, so it’s easy to overwater them. The best methods include frequent but gentle misting, or bottom watering. We love the Smart Float tray. It provides an excellent media and the sturdy Styrofoam base floats on the water, so seedlings are never over or under watered. Additionally, the Styrofoam insulates tender seedlings and the white base reflects lights back to plants.

Feeding: Once plants have their second set of leaves, they are ready for food (generally within 72 hours of spouting). A high-quality organic fertilizer, diluted to ¼ strength for the first feeding, works well. Continue feeding at ½ strength until seedlings are ready to transplant.

Happy planting and be sure to check all of the seed starting supplies at The Greenhouse Catalog.

About Michelle Moore

Michelle Moore is the owner of the Greenhouse Catalog where she has worked with greenhouses for 20 years. Michelle writes and lectures about greenhouse gardening as an Oregon State University Master Gardener and member of Garden Writers Association. Michelle and her husband live in Oregon, but they enjoy hints of summer all year in their greenhouse! Become a Greenhouse Catalog fan on Facebook to get year-round gardening tips and advice.

Your Turn

Share this post with your friends and family to help them successfully start their seeds this year.

Photo courtesy of janeyhenning on Flickr

5 Items to Start Your Seeds In

You’ve scouted out the location for your garden

Figured out how much sunlight your space gets

And have decided what you are going to grow.

Now it’s time to finally get your seeds started and aren’t sure what to use. That’s why, I wanted to share 5 items that you can start your seeds in.

Strawberry containers. If you are growing fruit bearing vegetables, you can reuse strawberry containers to start your seedlings in.

Toilet paper rolls. Toilet paper is something that we all use and wind up tossing into the trash when done with them. If you are feeling crafty, you can turn your toilet paper rolls into seed starting pots.

Newspaper pots. You can either make these on your own by following these directions or buy a kit that allows you to easily make them.

Expanding seed pellets. If you aren’t feeling so crafty, you can buy seed starter pellets from an online seed company like SeedsNow.com

Seed starting kits. If you really want it to all be done for you, then you can purchase a seed starting kit that comes with everything that you need. You can buy ones that have heating mats, greenhouse covers and pellets.

Your Turn

Whether you are a DIY kind of person, or want to buy a ready to go kit, one of these five (5) options will help you to get your seeds started.

What are you going to use to start your seeds this year?

Photo courtesy of annethelibrarian on Flickr.

4 Seed Labeling Options, So You Don’t Forget What You Planted

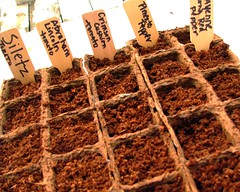
You’ve started your seeds (3 sources to buy your vegetable seeds), and didn’t label them…

…there’s no need to because you know you’ll remember.

Wrong.

We all tell ourselves that and sure enough we always forget what we planted and when we started them.

Label your seedlings. You think you are going to remember what you planted where, but you won’t. — Tweet This

That’s why this is one of my basic seed starting tips for beginners.

On the labels you can write as little or as much information that you’ll like such as the exact type of seed, date started and approximate time to germination.

Now I’ll share five (5) options to allow you to easily label and identify your seeds. These will range from the simple to a bit more fancy.

4 Ways to Label Your Seedlings

1. Rocks

Rocks are simple and inexpensive ways to label your seedlings and then use in your garden. I’ve used these on my balcony garden as a garden marker.

Collect the rocks from your own yard or “borrow” them from your neighbors. To decorate them, you can simply write on them or decorate them to make them more stylish. The choice is yours.

When writing the name of the seed on the rock, I’d recommend being a bit more generic because you can’t erase what’s on the rock and want to be able to use it again.


2. Popsicle Sticks

You can get popsicle sticks from your local craft store in bulk at a cheap rate.

Much like the rocks, you can be as simple or as fancy as you’d like. They can easily be slipped into the soil to label the seedlings.


3. Clothes Pins

This is an idea that I got from Becky at EatDrinkBetter. She used clothes pins to label her seedlings.


4. Plant Label Sets

If you just want to buy something and have it done for you already, then you can buy plant label sets from an online garden supply company such as The Greenhouse Catalog (a sponsor of mine).

These come in a many designs from the simple plain white to fancier designs with pictures and other information.

Your Turn

With these four options, you have plenty of choices to make sure that your seedlings are labeled this year. I’ll be sharing other creative ways to label your seedlings in the future, so be sure to subscribe to keep up to date.

What are you going to use to label your seedlings?

Image courtesy of Circulating on Flickr

Indoor Seed Starting Tips for Beginners

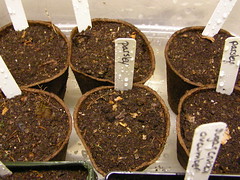
Today I am going to share basic indoor seed starting tips

…along with common mistakes and how to avoid them.

It will be a good starting point if it’s your first time, and reminder for those of you who have done this before.

The main reason that you are going to want to start your seeds indoors is so that you can get a jumpstart on the season and to the harvest quicker.

I’ll say that again —

Start your seeds indoors, so you can get to the harvest quicker. — Tweet This

4 Basic Tips for Starting Your Seeds Indoors

Start Your Seeds on Schedule
Seed packets come with a lot of information on them. Most of which gets ignored. If you look closely, the seed packet will tell how approximately how many days until the seed will sprout and be ready to be planted. It will also let you know when is the recommended time to plant outdoors. Do a little bit of math and figure out when you should get those seeds started.

Know What You Planted
This sounds ridiculously obvious, but often gets overlooked. We think we’ll remember and don’t label them and sure enough as soon as we walk away, we forgot. Happens every time. Don’t take the lazy way out and just label them from the start.

Give the Seeds Even Sunlight
The tendency is often to keep the seeds in one position and just water them. When you do that, you’ll notice your seeds start to develop a lean to them. That’s because they are stretching towards the sun. To prevent that rotate the seed tray every few hours. That should help to straighten them out.

Know Your Seed Source
You are going to want to make sure that you are buying from a seed company that cares as much about your health and environment as you do.

[vimeo clip_id=”37359992″ title=”0″ byline=”0″ portrait=”0″ width=”525″ height=”393″]

4 Common Seed Starting Mistakes and How to Avoid Them

I asked Michelle Moore, owner of the year round gardening supply company The Greenhouse Catalog (one of my sponsors), about common indoor seed starting mistakes and how to avoid them. Here is what she said:

Over or Under Watering
“Using a media like coconut pith or coir is a wonderful way to control the moisture content-especially if you water from the bottom,” said Moore. “The coir wicks water as needed so seeds don’t get soggy. Don’t forget to add diluted fertilizer within 72 hours after the first leaves appear.”

Growing in Low-Light Conditions
“South facing windows may work well, as long as the spot isn’t drafty and daylight lengths are greater than 12 hours,” suggested Moore. “Supplementing with grow lights (up to 18 hours of light) will speed up growth. Make sure to read the directions for each grow light as it’s a common mistake to place the light source too far away from the plants.”

Temperatures Too Cool for Root Growth
“Cool temperatures on the surface encourage compact growth, but roots need warmth,” said Moore. “Adding bottom heat with a seedling heat mat encourages healthy root growth, which makes for healthy plants. Make sure to use a media that won’t dry out too quickly with bottom heat.”

Not Starting Enough Seeds
“It’s also a good idea to plant more seeds than you will need,” recommended Moore. “This will allow you to pick the healthiest starts to plant.”

Your turn

Now that you have some basic tips and mistakes to avoid laid out, in the comments below let me know what vegetable seeds you’ll be starting indoors and when.

Image courtesy of normanack on Flickr

3 Sources to Buy Your Vegetable Seeds

You are growing your own food because it’s best for your health and the environment.

When you are first starting out, knowing where to buy your seeds from can be intimidating.

It’s difficult to tell the difference between the companies, types of seeds and who is owned by which company.

seedsnow-452x300

My goal is to not only help you maximize your space when growing, but also to help you save time in the process.

In the past I’ve looked up seed companies to see which ones provided non-gmo seeds and had no ties to companies that I didn’t support.

All I came across were huge lists with lots of descriptions. They didn’t save me any time. You’ve likely come across the same lists.

Seed Companies You Can Trust

That’s why I wanted to compile a quick list of seed companies that you can buy from. Again this is a quick list because an exhaustive one wouldn’t save you any time.

SeedsNOW.com

SeedsNow is a family owned business right in Los Angeles that provides 100% Pure GMO-FREE Non-Hybridized/Heirloom seeds. All their seeds are raw and always un-treated. Without getting into the specifics, the seeds they have are the most natural most pure form of seed you can get.  Knowing that their site doesn’t offer any hybrid seeds is a really good thing for me.  With their heirloom open-pollinated varieties I know that I’ll be able to save my seeds after harvest. Can’t do that with hybrid or GM seed!

One of the things that I like most about SeedsNow.com is that they have seed sampler packs starting out at  99¢. At those prices you can afford to try growing a lot of different things.   A lot of people don’t know this but their “sampler” packs actually have the equivalent amount of seed (or more) than regular sized packs form other companies.

They have a huge variety of NON-GMO seeds for you to start growing your own food. Definitely a site worth checking out:  www.SeedsNow.com

You can get 10% off your SeedsNow.com purchase by using the code URBAN10.

Botanical Interests

Botanical Interests is one of the larger seed supply companies that you might’ve seen in your local health food store.

One of the things that they are most well known for is the art on their seed packets.

Their seed packet collection is also quite extensive. You can spend hours pouring through their catalog.

Seed Savers Exchange

I have never used Seed Savers Exchange before, but a lot of you have recommended them before, so I added them to the list.

These three companies should give you a good start for buying your seeds online. Yes, there are dozens of other companies that can be added to this list, but that wouldn’t save you much time.

Your turn

Have you purchased from any of these companies before? Who else would you add to this list? Let me know in the comments below.