Video: Cutting Copper Pipe for the Self Watering Containers

After days of back and forth, I decided to go with copper pipe instead of the vinyl tubing in the self watering containers. Wasn’t very clear on the benefits of one over the other because read lots of pros and cons on each of them.

For using copper pipe, came across a few articles that spoke about leaching into water.

Came across the same articles for vinyl tubing.

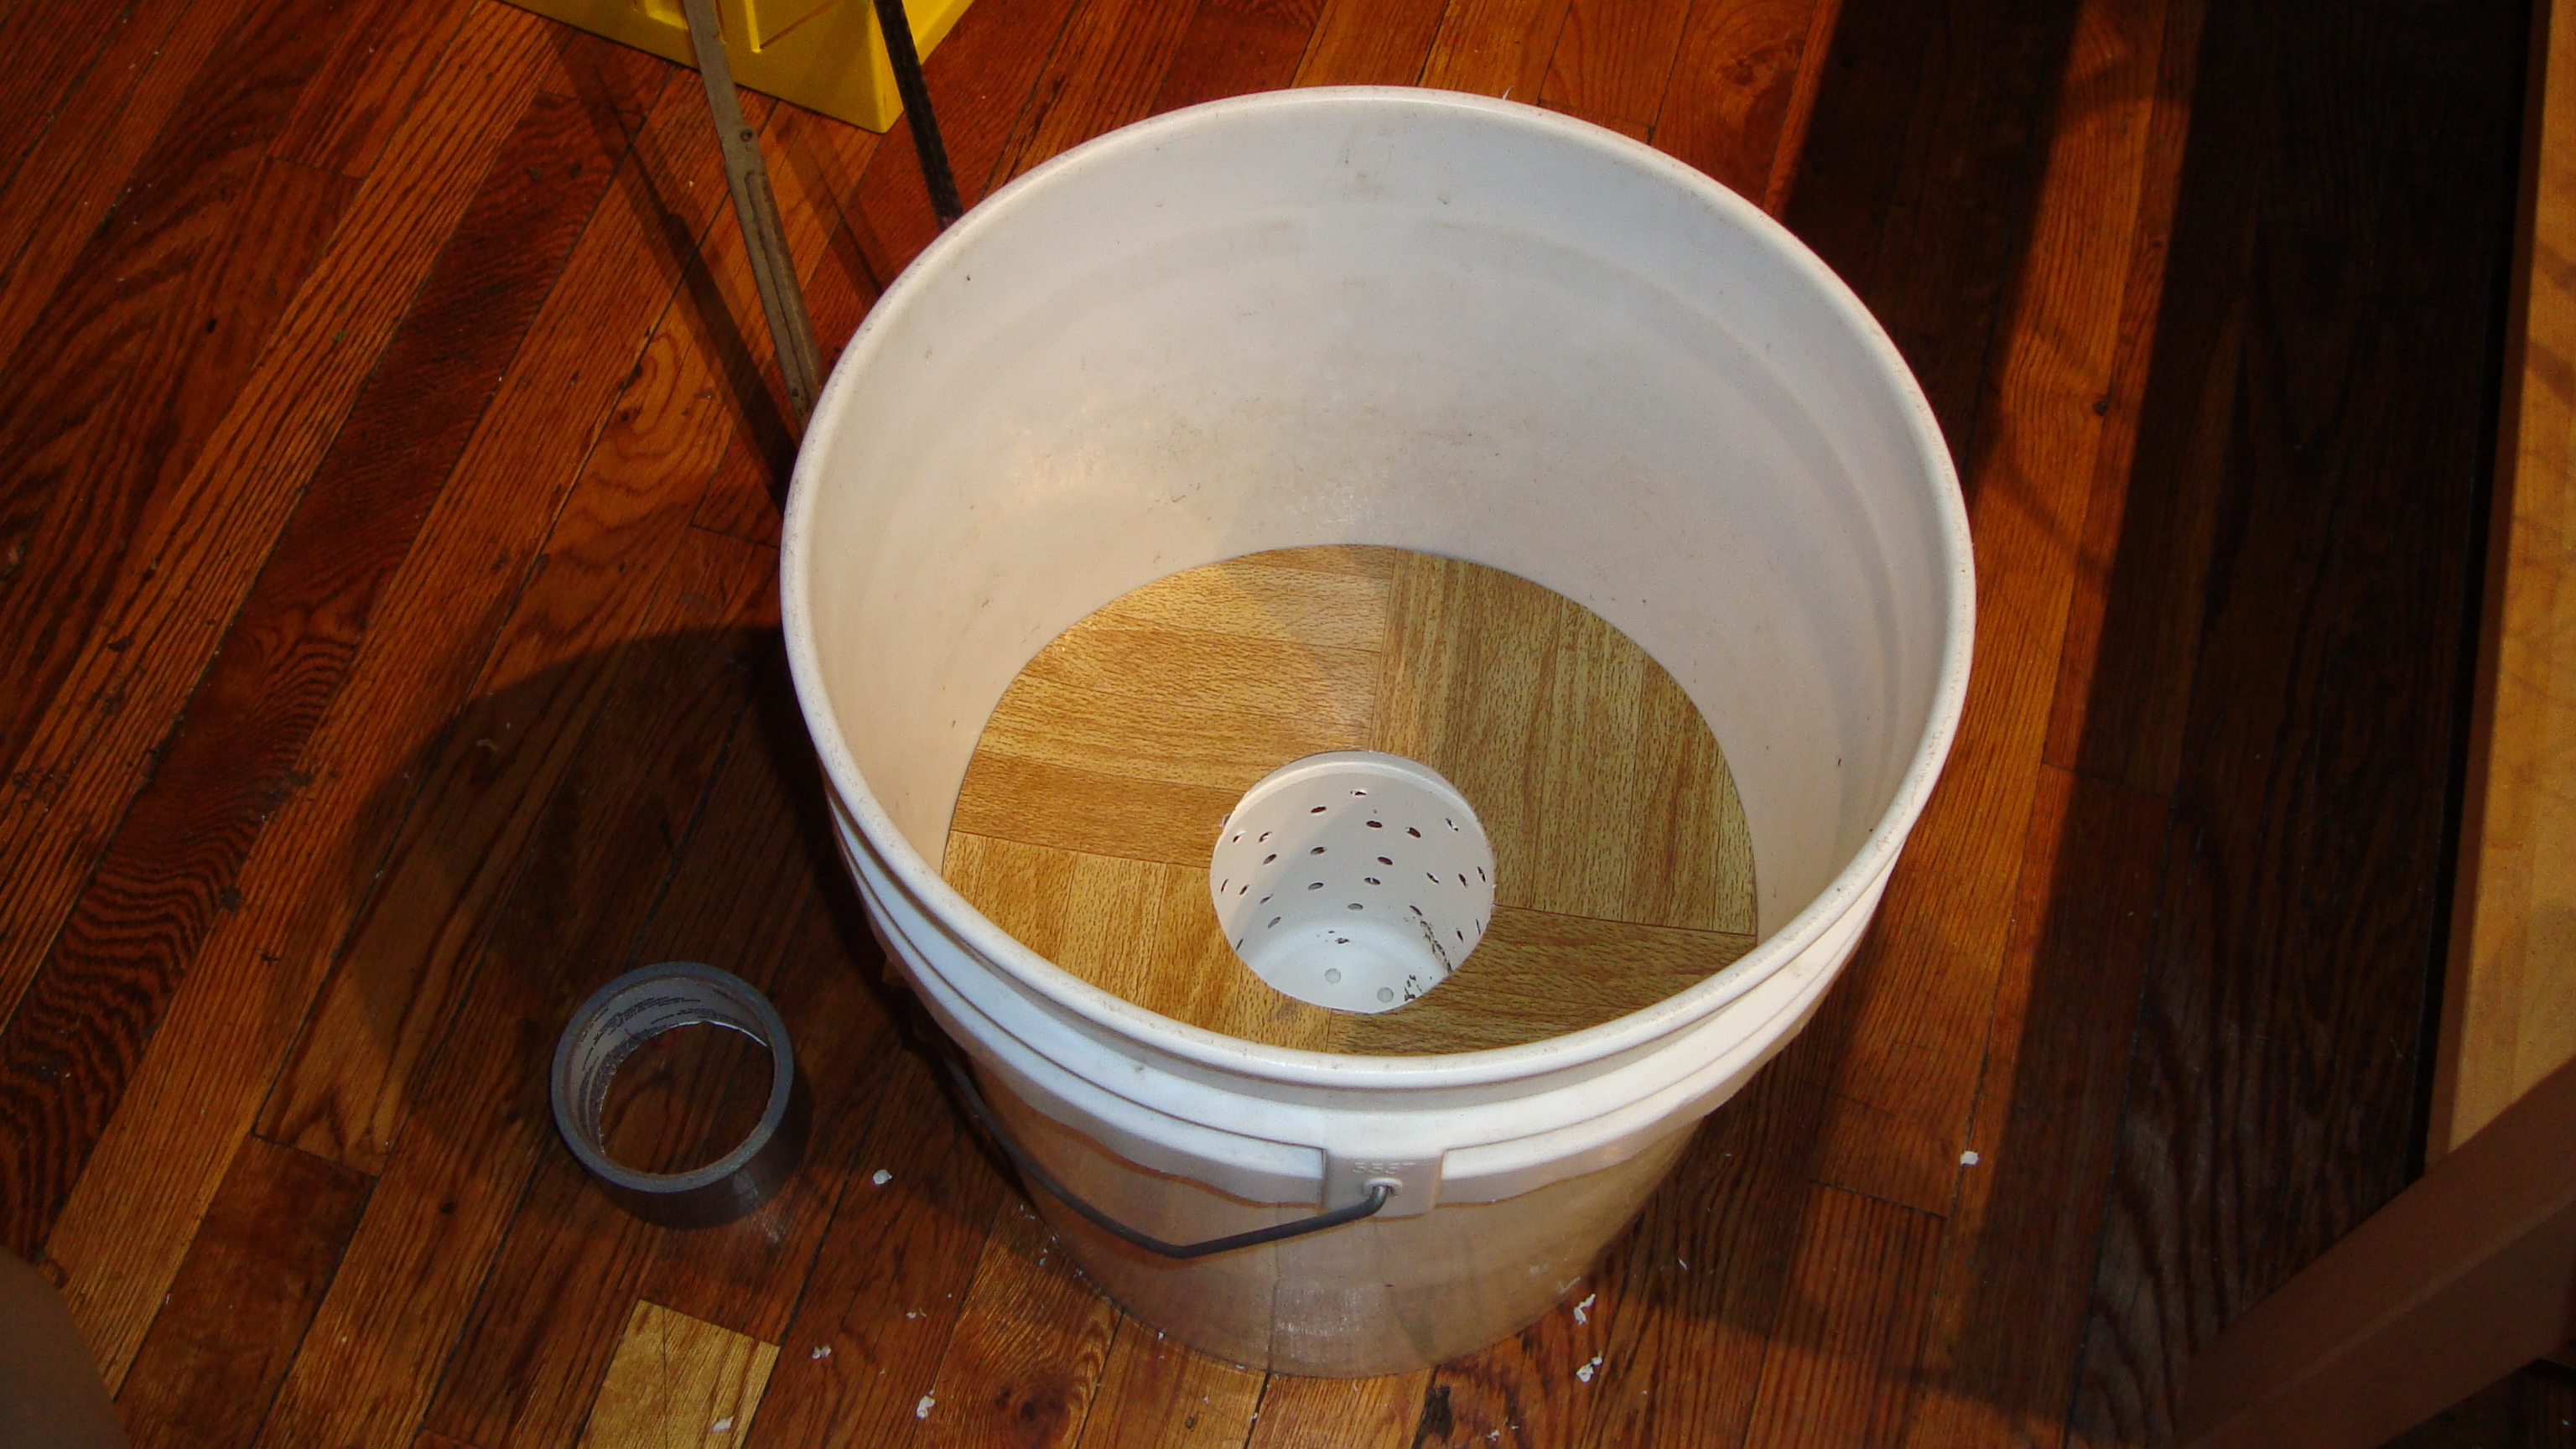
Since I was going with the vinyl tiles for the insert, I felt better about choosing the copper pipe.

httpv://www.youtube.com/watch?v=vxXZ1vMyFdI

In shopping around for the pipe, the ranges varied greatly from $25 to $65 for uncut L copper pipe. The handyman at the hardware store said it was better suited for water.

I bought two ten foot pieces and tied them on top of my grandmothers car. Yes, I tied them. The back seats in her car don’t go down. Not sure how, but the pipes and I made it back safely. Then I went to town and cut up the pipe.

    Tools required

  • Hacksaw
  • Marker
  • Glove (I’d recommend a vice instead)
  • Table
  • Tape measure
    Materials required

  • Copper pipe

Each of the buckets are about 13 inches, so the first pipe I marked off every 15 inches to cut off. The other pipe, I marked at about 20 inches.

The first lesson that I learned was to make sure that the hacksaw is tightened. If not, it’ll pop off.

Now I need to ration out the cut pipe to my apartment and grandmothers. Still need to figure out what I’m going to grow and where. There is that looming.

Building My First Self Watering Container Insert

I took my first crack at making the insert for the self watering container today. The hardest part was cutting a square into circles that would fit snuggly into the bucket. Yes, I just said snuggly.

    Tools that I needed:

  • Razor blade
  • Scissor
  • Pen
  • Thumbtack
  • Rope or string
  • Something to measure water
    Materials:

  • 5-gallon bucket
  • Coin cup to use as my wicking basket
  • 1 12″x12″ vinyl tile
  • Drill with 1/4″ bit
    Steps in making the insert:

  • Put the cup in the container and fill with water. Stop when the water reached the top of the cup. Was about 9 gallons.
  • Next I traced the top and bottom circumference of the bucket onto the tile.
  • Cutting out the circle of the tile wasn’t as easy as this website implied. Eventually I cut out the circle with the help of a scissor.
  • Once the big circle was out had to cut the circle out in the middle for the wicking basket. This was fun.
  • Now I had to trim down the outer circle so that it would fit into the bucket. Used the scissor for this. It was much easier than the razor blade.
  • Then I had to drill holes in the cup. I used a 1/4″ bit and drilled a bunch of holes to allow the soil to soak up the water and feed the roots.
  • It was then put all together and a 1/4″ hole was drilled in the side of the bucket just under the insert for overflow of water.

First step in building the self watering container bucket was to put the coin cup in the bucket and fill until the water reached the top of the cup. It measured at about 9 gallons.Building a self watering container insert - Next I traced the top and bottom circumference of the bucket onto the tileCutting a circle was difficult. I put a thumbtack in the middle of the cirlce and measured out the radius. The string was cut to that length and razor was tied to the end. I was hoping this would get a good cut. Not so much.Eventually got the circle cut out. Now had to do the same thing for the inner circle.Trimmed down the outer circle so that it would fit into the bucket. Used a scissor for this. It was much easier than the razor blade.Using the scissor made thing easier and faster. The insert fit nicely into the bucket. Next step is to drill 1/4 inch holes into the cup.Drilling the holes in the cup to make it into a wicking basket.A bunch of 1/4 inch holes were drilled into the cup. These will allow the soil and roots of the plants to absorb the water.A 1/4 inch hole was drilled into the side of the self watering container just below the insert. Once water starts leaking from it, I'll know that the container is filled.The first self watering container is nearly complete. Just need the pipe.

One insert down, many more to go. There has to be an easier way to cut the circles.

Getting the Layouts of My Vegetable Gardens


Took the day off from work today to spend the day with my gram and to negotiate the land space with her. Before I headed out to her, I measured out the space of my fire escape garden. Not too bad about 36″x”12″. That should be enough for about three buckets without getting in the way. Just need to figure out how many soda bottle planters we can fit.

Then I hopped on the L train and headed into Canarsie. During the train ride, I continued to read the Self Watering Container book. After some b’sn and catching up, we headed outside to scope out the land. I knew her backyard was big, but it is f’n huge.

Here's a shot of some of the backyard. Couldn't get the whole thing in the shot. She's been living there for over 60 years.

Here is the first plot that I was able to negotiate along the fence. The space is about 14' x 2'. Those milk crates are about 80 years old.


I also have this entire plot of concrete which is 9' x 6' and on the cinder blocks.


The good news is that I got a lot of land to work with and the bad news is that I got a lot of land to work with. Not sure if the bucket in bucket will work, especially for the double bins. Those are going to be at least $15 each. Need to look into other possible solutions and still fit my criteria of being affordable and as environmentally sound as possible.

This also got me thinking that I want to expand out further. Gotta call the ‘rents this weekend to see what I can work out with them.

Recycling Buckets to Build My Containers

As you can see, by this time I am expert at getting buckets. Once I get my Flip Video camera I’ll have to record and educate you on my ways. For now just be in awe of my splendor.

I’ve also been doing more reading into building the self watering containers and what can be used. As of now, I am going to go with the bucket in bucket or the plastic tote in plastic tote approach. Those seem to be the ones that best suit my needs.

Reading More on Self Watering Container Gardens


First off, I scored my first bucket last night. On the way back from the movies (I checked out Anvil and highly recommend to any 80s metalheads out there). I saw one laying out next to a dumpster, so I snagged it. Soaked it over night in some baking soda and vinegar. Like new. My Gram sure is smart.

Besides being a ridiculously gorgeous day outside today, it was a productive one as well. Picked up the Incredible Vegetables from Self Watering Containers book from the library.

I went to the park, laid out in the grass and started to plow through it. It all seemed simple and doable. I liked that. The thing that I didn’t like about the book is the most important part of how to build the insert for the self watering container was completely left out. Luckily, I came across those other resources on self watering containers last week.

The entire back section listed all of the vegetables that can be grown in the containers – beets, carrots, onions, leeks, all kinds of greens (i love me some greens), cauliflower, broccoli, peppers, squashes, turnips…you get the point.

With this knowledge, I headed back to the Farmers Market at Union Square to see what plants I were available to buy. This time my trip wasn’t as disastrous as the last one.

I spoke to someone at Silver Heights Farm who answered my questions about shade, sunlight and watering. She also gave me their catalog since they don’t bring everything with them to the market. They have about 1.5 million different kinds of tomatoes.

To top off this day, I scored two more buckets.

New Plan: Gardening in Containers & Upside Down


Attribution-NonCommercial License by your idea

After some research, I got more info on the self watering containers. The Homegrown Evolution had a great resource on Self Irrigating Planters posted on April 5.

One site that I checked out, Instructables, had a few different variations. One using 2 liter soda bottles and plastic totes. I like it cheap and green. Fits the criteria.

Before I got too far ahead of myself, I had to talk to my roommate to see if he’d let me put these containers out on the fire escape since it’s out of his window. Luckily, he and I are cool with each other and had no problems with it.

Now I am addicted to checking out how I can recycle materials to grow things for this project and found a way to make an upside down hanging planter for herbs.

Also reserved Incredible Vegetables from Self-Watering Containers from my local library.

This project is back on. Don’t call it a comeback.

Ideas on Container Gardening

For the past few days I’ve been lamenting in my stupidity of building a window garden in a spot that gets no sun. Smart move on my part. Good job.

But things done changed. I was trolling around on this here internet for what I can possibly grow or do. I came across the idea of self watering planters. Most importantly this video:

httpv://www.youtube.com/watch?v=aZUCxBHeq04

The basic concept of self watering containers is that the water is on the bottom of the container and the soil above. There is a separator between the two and a small basket that allows the plant to get the water. So ultimately, the plants are “drinking” the water when they are thirsty, which is what occurs naturally. So the plants drink when thirsty and get fed, instead of us forcing water on to them. Not much of the water even makes it to the roots.

Looks pretty simple. Looks environmentally friendly because most of the materials are reused plastics or garbage. Looks cheap. As Freedom Williams would say, “Thing that make you go hmmm.”

Need to look into this further…