Why Joining the Urban Agriculture Movement Will Make You Healthier

Source of this contest is from usnews.com by Corinne Ruff

-1
Common Good City Farm produces food for low-income neighborhoods in the District of Columbia.

Nearly a decade ago, neighbors living near an abandoned elementary school in LeDroit Park in the District of Columbia described the area as a “thriving, open-air crack market.” But today, the once dangerous lot is flourishing with leafy greens, medicinal herbs and sour cherries.

Common Good City Farm
Entrance to Common Good City Farm.

“Our community has gentrified rapidly, and that creates some tension, but us being a safe place where people can interact is helping to facilitate conversation,” says Rachael Callahan, executive director of Common Good City Farm.

As she walks around the half-acre farm on paths of mulch that cover the old-school baseball field, she proudly points to ripening fig trees and red-veined rhubarb. “Our main goal is food production,” says Callahan, adding that at 5,000 pounds annually, the farm produces the most food for low-income neighborhoods in the District. In 2007, a community task force worked with the District to gain access to the land and transform it into the vibrant farm that attracts about 500 volunteers each season.

The nation’s capitol isn’t the only city lacking food security. More than 2.3 million people live in food deserts, or urban areas that do not have access to fresh produce, according to the U.S. Department of Agriculture. This issue contributes to poor diet, obesity and illnesses like diabetes. Urban agriculture initiatives – producing food in a community for the community – are one solution working to relieve these problems and increase healthy living one garden at a time.

Common Good City Farm is one of thousands in the country to join the growing urban farming movement.​ ​With the help of financial incentives from state governments, urban farms have sprouted up from coast to coast, gaining support in major cities such as Chicago, Detroit and Los Angeles. From 2007 to 2013, 13 states and the District of Columbia passed legislation to authorize zoning for urban farms and create councils that promote local food economies, according to the National Conference of State Legislatures.

Why Local Matters to Your Health

​In 2014, the USDA reported a total of 8,268 farmers markets nationwide, an increase of 76 percent since 2008. That increase was partly due to demand for more local food.

The mission of many urban farms, like Common Good City Farm, is to sell their harvested produce at farmers markets to low-income residents​​, Callahan says.

As a gardener and researcher of human rights for adequate food and nutrition, Anne Bellows, professor of food studies at Syracuse University, says these ​urban farms play an important role in retaining public health.

Cheery tree
Cherry tree at Common Good City Farm.

“It’s important to understand and be aware of what the huge multitude of benefits are,” she says. “The food and the nutrition are important, but also very critical are benefits like access to green, quiet, safe space where other people are meeting and working – some place that is a refuge.”

In her research ​on the health benefits of urban agriculture, she found that a five- to 10-day lag time between produce transportation and consumption can result in a 30 to 50 percent loss of nutritional value. In other words, instead of buying tomatoes from a supermarket that imports them from hundreds of miles away, Bellows says urban farms provide a local option that give consumers better tasting, more nutritious food.

​Urban farms also offer local education programs that teach community members how to cook vegetables to retain the most nutrients. On many of these farms, like Common Good City Farm, volunteers can earn a free bag of fresh produce every week by spending a few​ hours planting, weeding or harvesting at the farm.

Read the full article here: http://health.usnews.com/health-news/health-wellness/articles/2015/06/23/why-joining-the-urban-agriculture-movement-will-make-you-healthier

Why Are My Plants Turning Yellow? [INFO-GRAPHIC]

why-are-my-plants-yellow-safer-brand

How to Read Your Plant’s Yellow LeavesEven the most talented and educated gardeners will have to deal with yellowing leaves at some point or another. And that statement rings truer for those who maintain urban gardens and indoor plants since potted plants have a hard time getting the necessary nutrients they need for sustenance.That’s why Safer Brand put together this infographic that makes it easier than ever to see some reasons your plants might be yellowing, and more importantly, what you can do to make them wholly green again.
If some of the leaves on the plants in your urban garden are turning yellow, ask yourself the following questions:
Am I watering my plants too often?First things first: Make sure you’re not overwatering your plants. If you notice that your plants’ leaves look yellow and wilted – and the soil it’s resting in looks fairly damp though you’ve not watered it recently – you might have a problem with soil drainage. If that’s the case, it’s probably time for you to re-pot your plants.Am I not watering my plants enough? If your plants’ leaves look brittle and are yellowing, you might have problems relating to dehydration. You should make sure that your plants get at least one inch of water each week. It might be worth setting calendar reminders to let you know when it’s time to quench your plants’ thirst.

Are my plants exposed to enough sunlight? Drooping leaves that are losing their color can also serve as a signal for plants that aren’t getting enough sunlight. If you suspect your plants may be yellowing from a lack of exposure to the sun, at least it’s a really easy fix – just reposition your plants in such a way that ensures they get more sunlight.

Are my plants getting the nutrients they need to be healthy? Plants require 13 essential nutrients to remain healthy. If you’ve noticed that the tips of a plant’s leaves and their center veins are becoming yellow, for example, it might indicate that it has a nitrogen deficiency. There’s a simple fix: Add organic compost to the soil – coffee grounds will due, but you could always use manure if you like – and you should be good to go.
So if the leaves of your plants are yellowing, just remember that not all hope is lost. Find the fix for what’s ailing your plants with this graphic, and they’ll be green once again before you know it.

Benefits of coffee grounds for plants and garden

This post, content, and images are originally from http://tgcva.org

Obviously, coffee beans contain a lot of calcium, sugar, copper, magnesium, carbohydrates, and other vitamins inside. Some studies found the acid levels in the beans are very good for some plants that need acid, such as tomatoes, avocadoes, also various other fruit plants. Even the beautiful roses are also like coffee.

coffee grounds fretilizer for tomatoes plant

tomatoes

Moreover, coffee beans also contain nitrogen, potassium and phosphorus, which is essential for fertilizer. The function of nitrogen is to change sunlight into energy. Phosphorus helps energy entered into the plants through roots and cells, while potassium will keep moisture your plants through photosynthesis. The worms in the soil also like coffee. Coffee that you sprinkle on the ground will be eaten by worms then they will produce a substance containing nutrients thereafter.

coffee grounds compost

The benefits of coffee grounds for your plants you need to know as follow:

Fertilizer

Use the waste of coffee grounds as fertilizer for crops as well as prevent pests on plants. Spread the coffee grounds to the soil to help the plants are protected from pests and can grow faster and better.

other benefits of coffee for plants

Pest Control 

Brewed coffee grounds with hot water, then let stand until it cool. Pour this mixture of coffee grounds and water to your plants, to avoid pests. Do it regularly.

reuse coffee grounds in the garden

Repel Ants, Slugs and insects

In addition to insect and plant pests, ants, slugs also damage the flowers in your garden. Use coffee grounds to repel them. Spread the coffee grounds randomly on the way of ants and slugs passing through. The strong aroma of coffee will make them not return and damage your plants and flowers.

grounds coffee to repel ants and insects

coffee ground to repel slugs

Lastly, not all plants like coffee. So, do not give coffee to aloe vera, radish, lavender, peppers, and watercress.


Mom. Wife. Dreamer of self-sufficiency. Meet Naturally Loriel

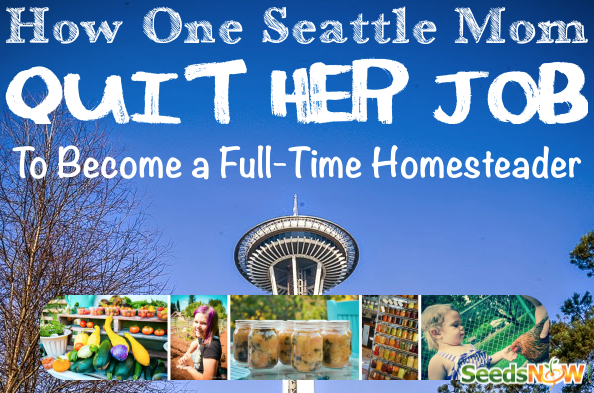
This interview is originally from SeedsNow.com (source: http://www.seedsnow.com/blogs/news/28929665-featured-homesteader-blogger-naturallyloriel-com)

How would you quickly describe yourself to others?

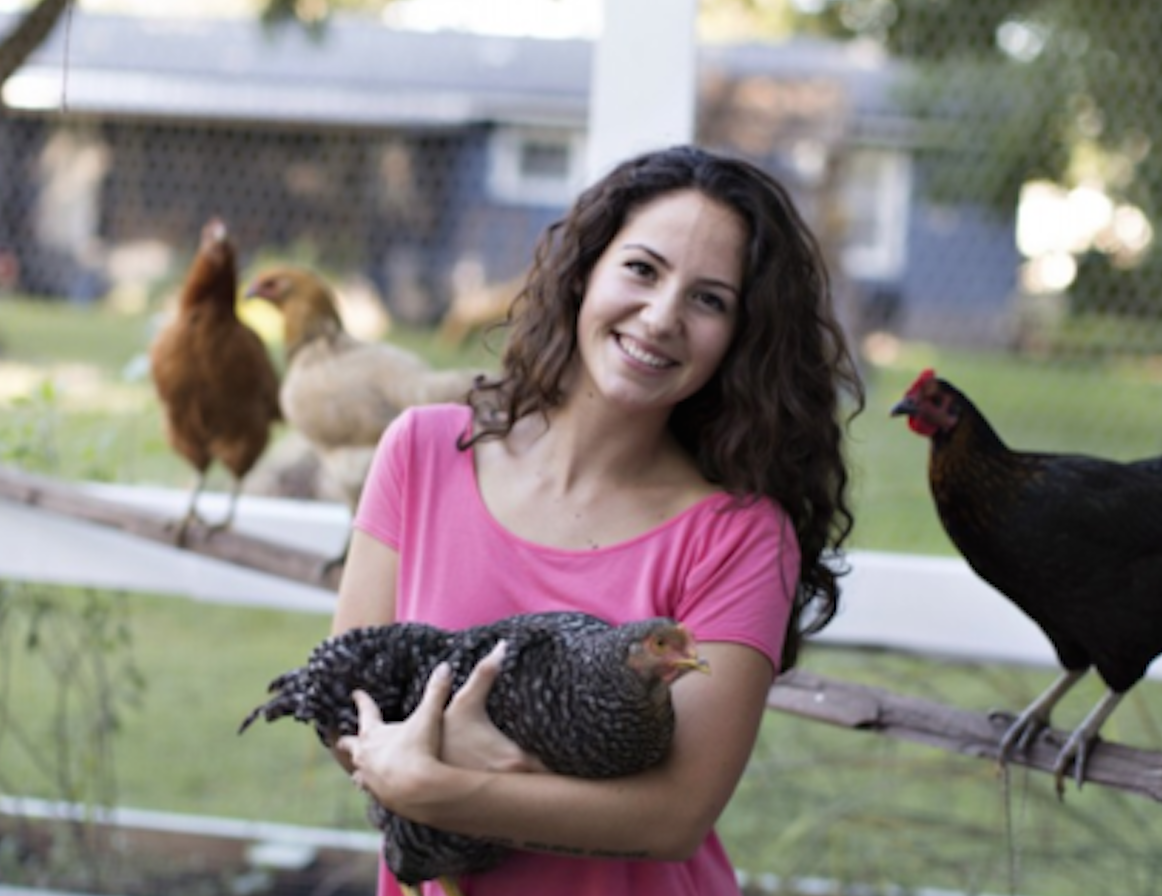
Mom. Wife. Dreamer of self-sufficiency. Lover of sweets. Knack for storytelling. Chicken & cat lady. =)

How did you get started with your blog?

I got started with my blog, NaturallyLoriel.com, because I had just found out information on feeding babies that totally contradicted the information I was given by my doctor — my son was 9 months old at the time. From there, it was a domino affect and I began researching and questioning every single thing I was doing, eating, and buying. After about 4 months of steady research, I began talking about it with my close friends and family. In March of 2011, three different people in the same week suggested that I start a blog. I took that as a sign and so I did. 🙂

Did you start your blog when you started your transition to live this life style?

Yes and no. At first my blog was about real food and learning about GMOs. At the time, I was living in California and I was heavily involved in the Prop 37 campaign so a lot of my blog geared towards that. As you may probably know, once you become passionate about the food you eat, you start to realize that the best way to control what you are eating is to grow it. Now Naturally Loriel is more about the journey to living a natural life and everything that comes with it — real food recipes, gardening, chicken raising, DIY, and more.


Have you always been this way?

I’ve always been conscious about the earth but it never occurred to me how MUCH there was to *really* know about life. My mom always had a garden when I was growing up but as a child, I was never interested in it. My continuous journey to living a natural life began those first few months before I decided to start my blog. I really began being interested in building a thriving backyard homestead when I moved to Florida and realized my options for fresh food were limited. I knew that it was up to me to create healthy food. Plus, I’ve always been somewhat of a rebel so the idea of growing my own fresh food and raising chickens for eggs is like a huge middle finger to big corporations like Monsanto… which excites me.


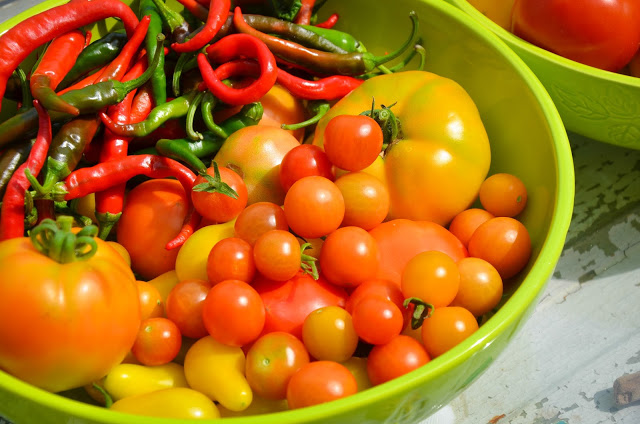
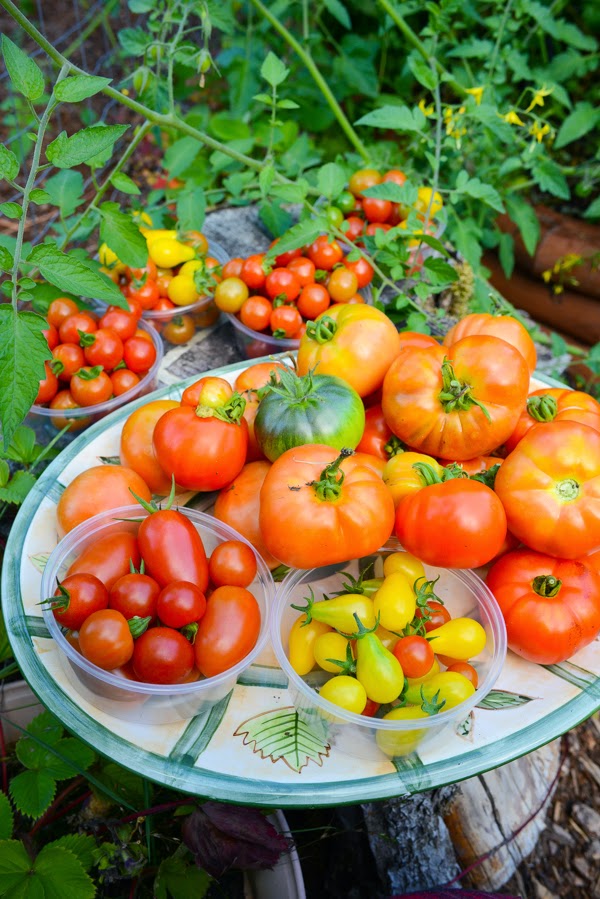
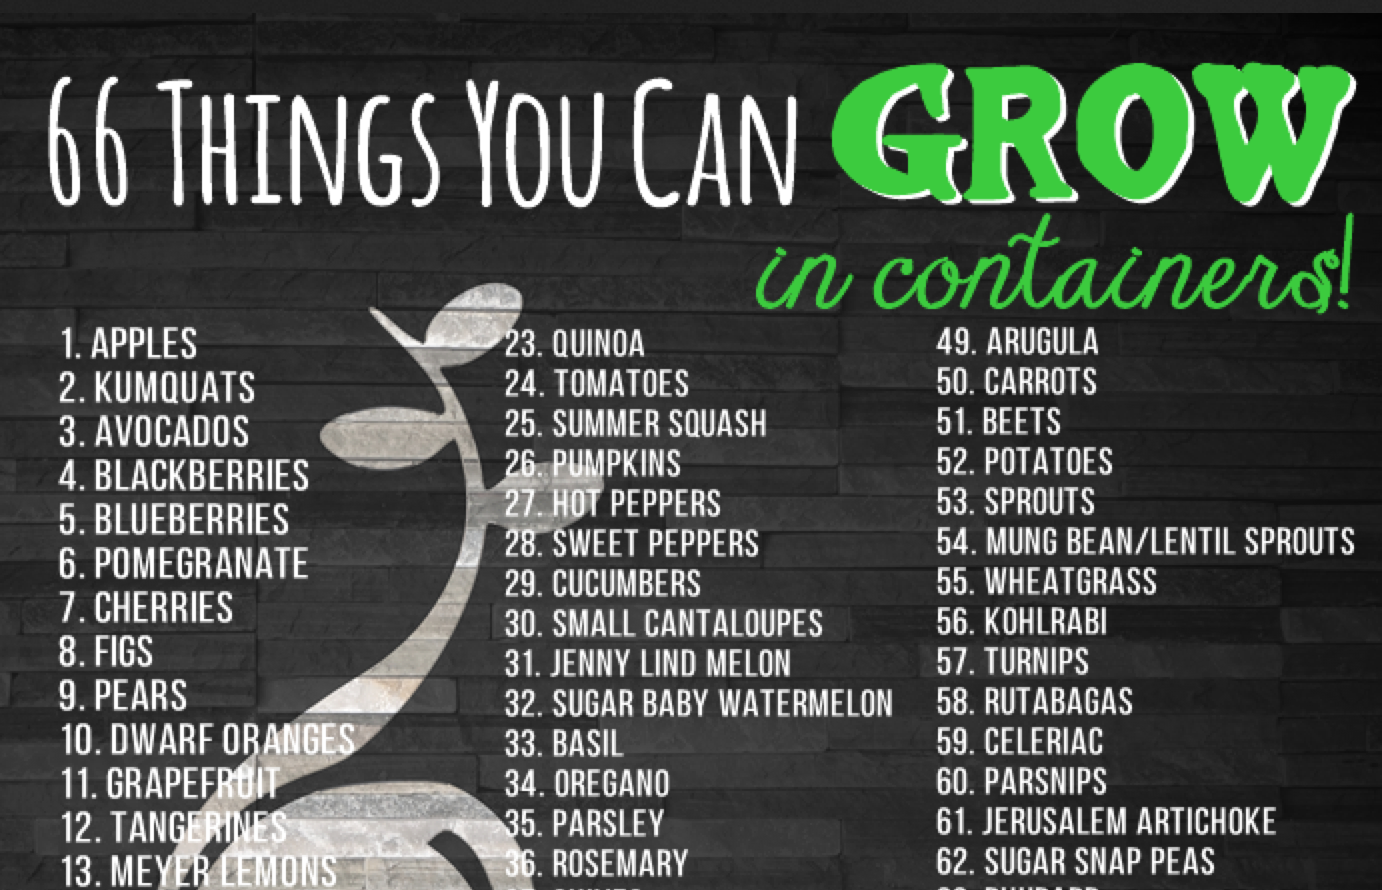
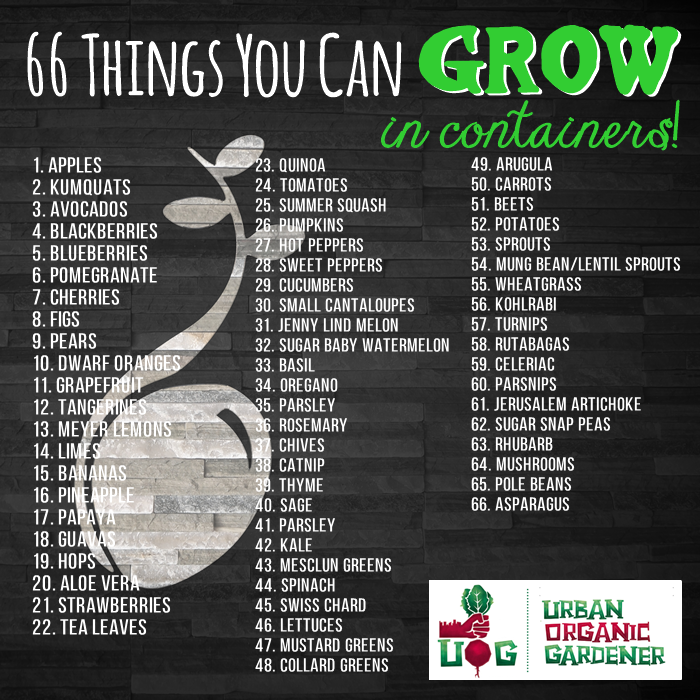
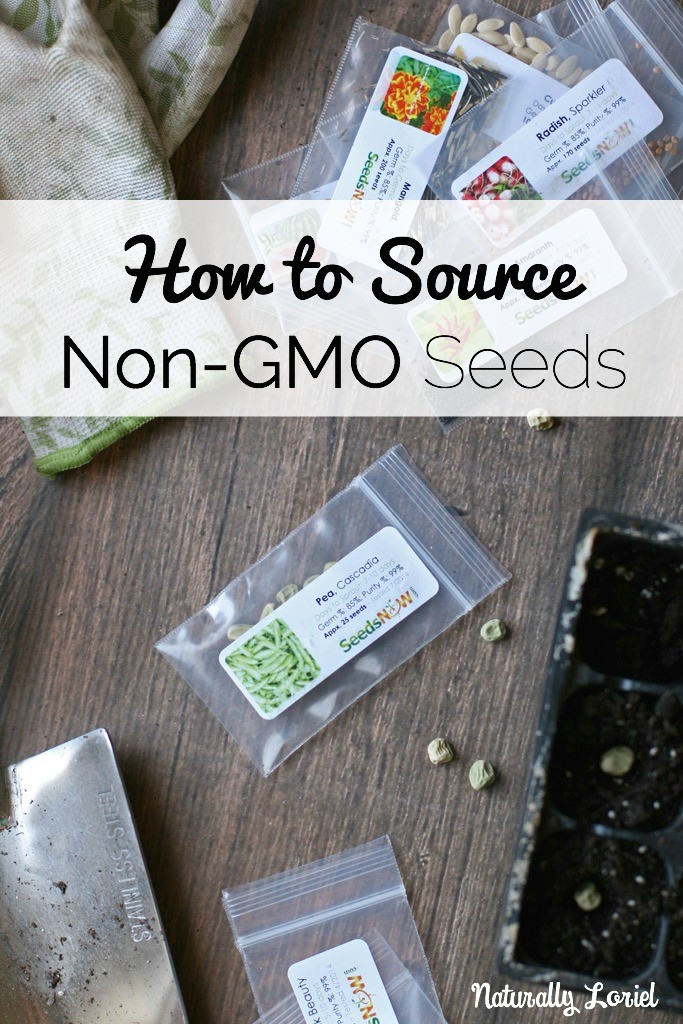
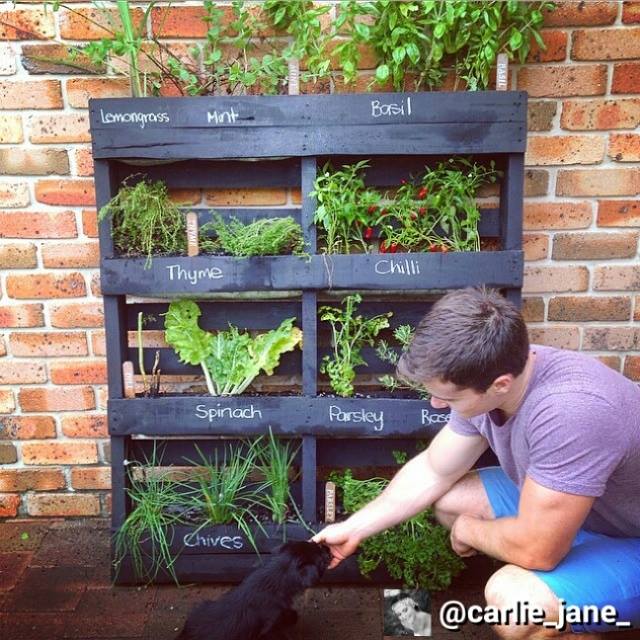
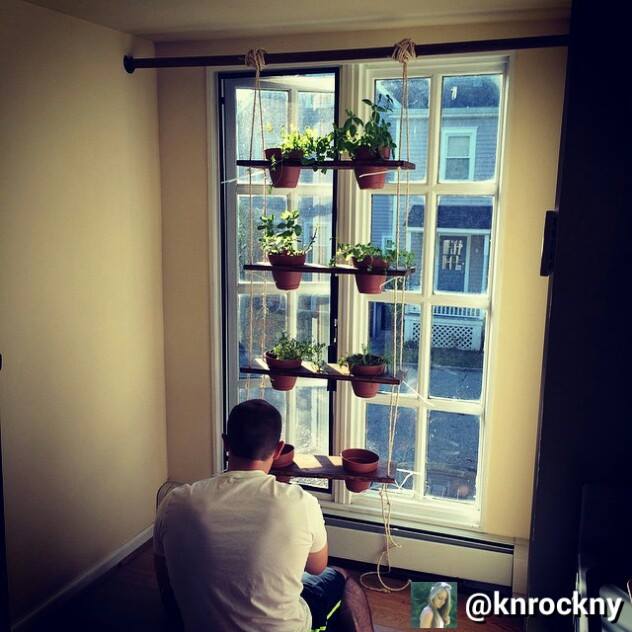
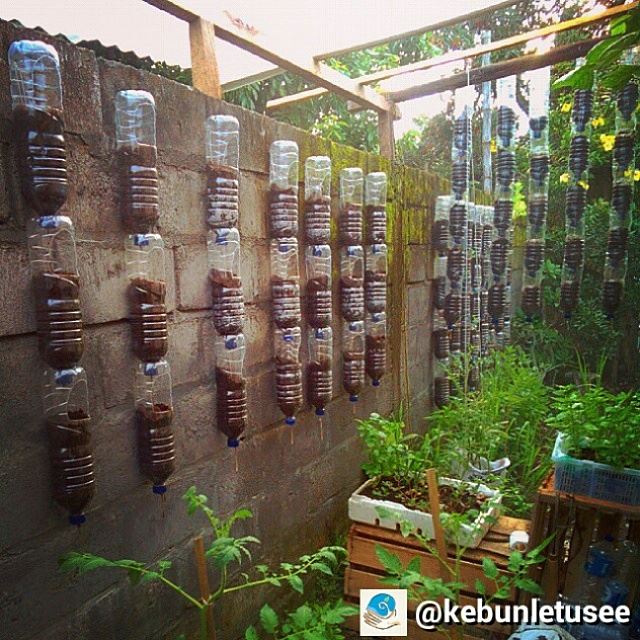
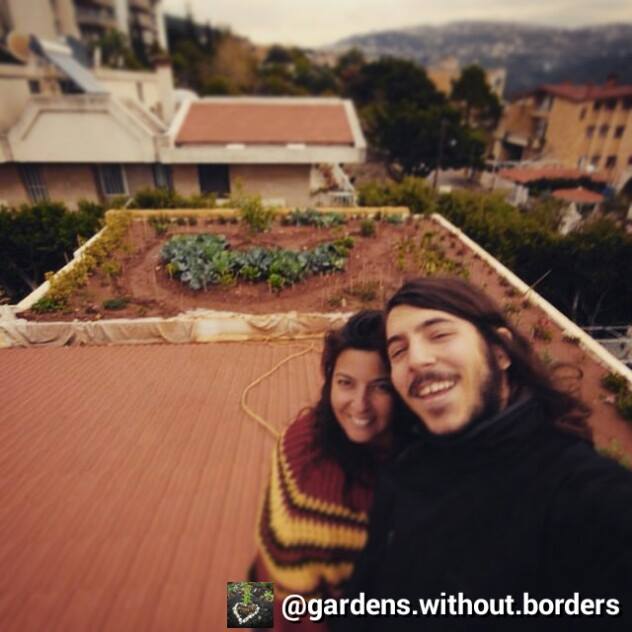
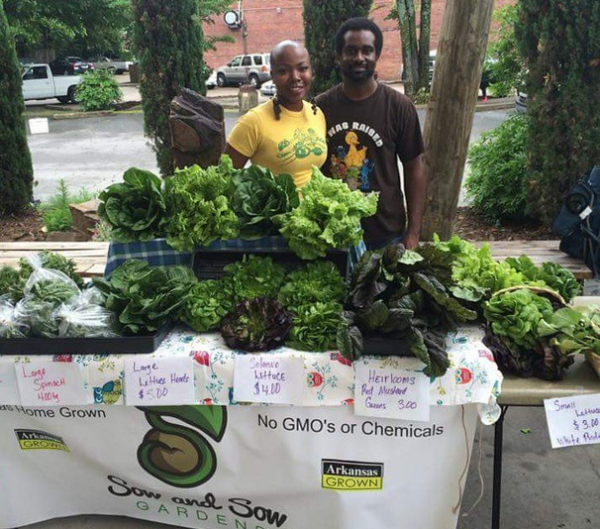
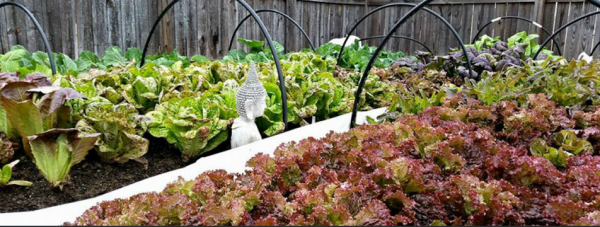
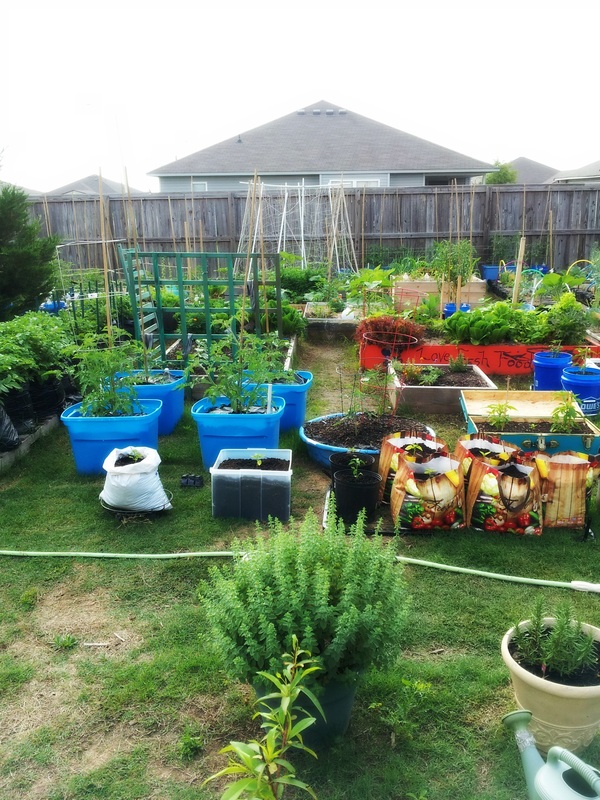
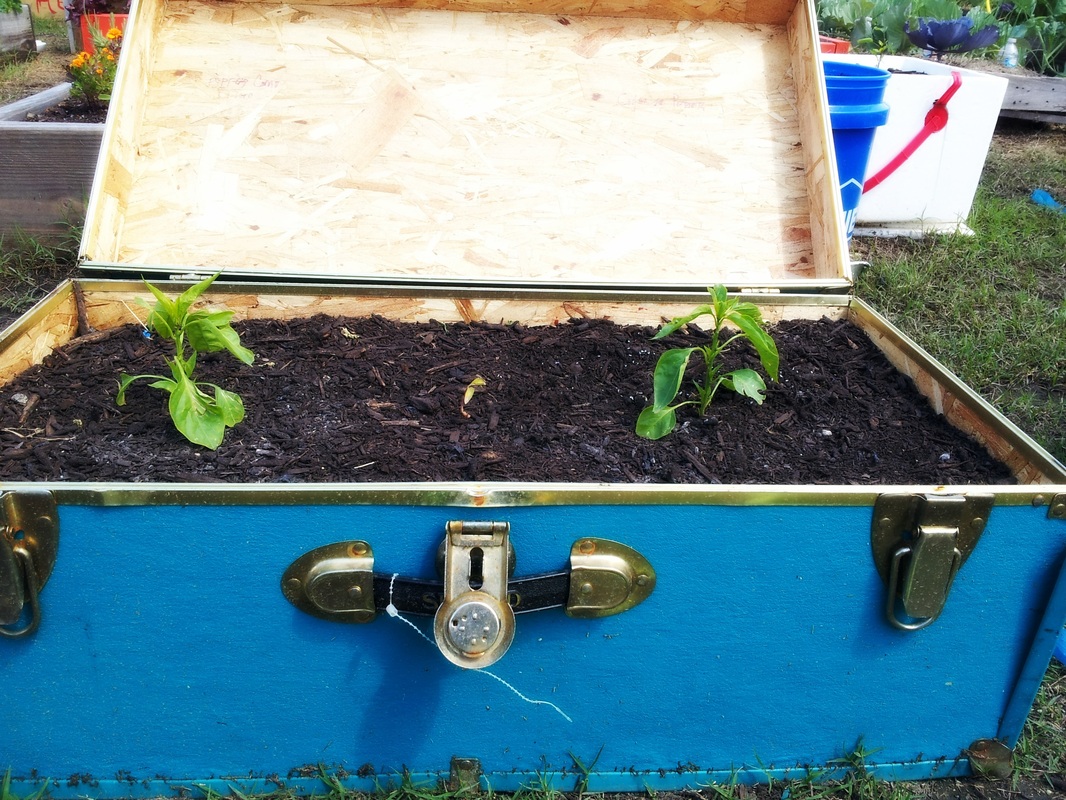
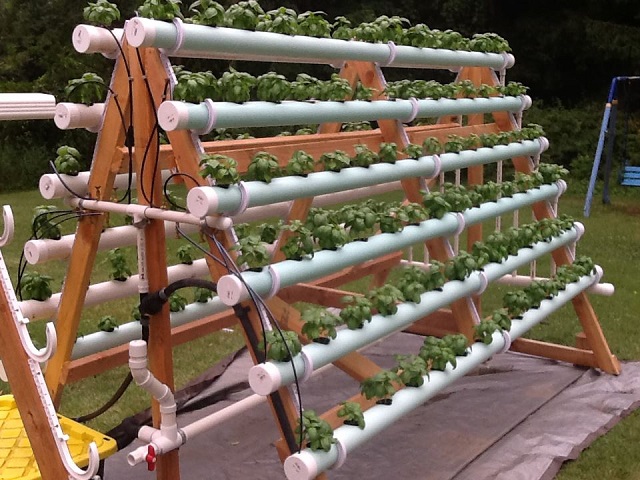
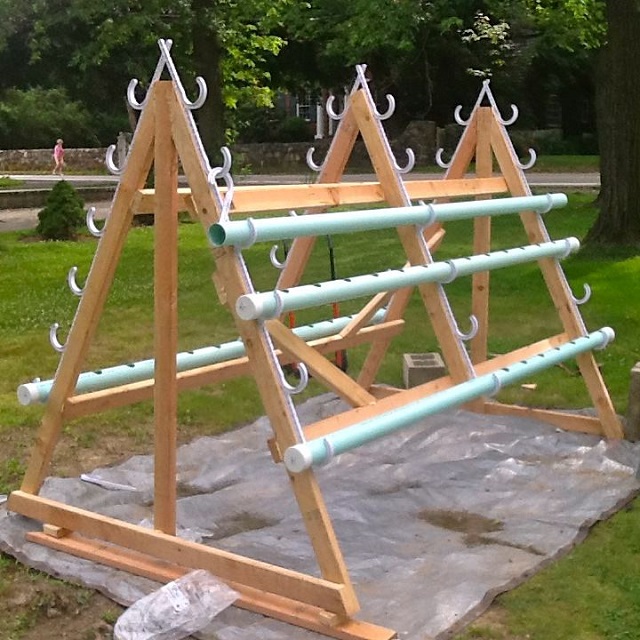
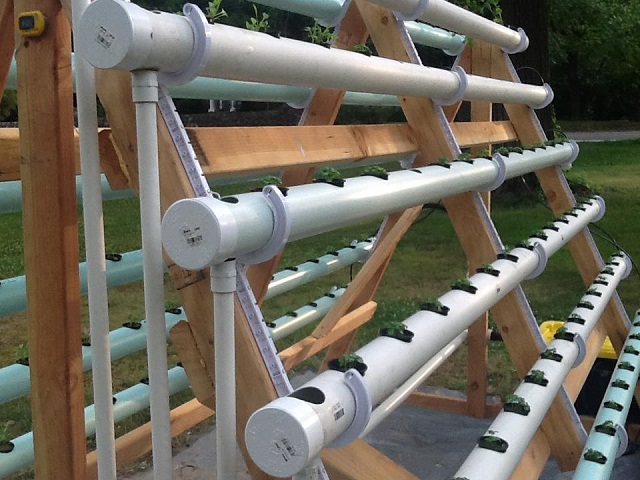
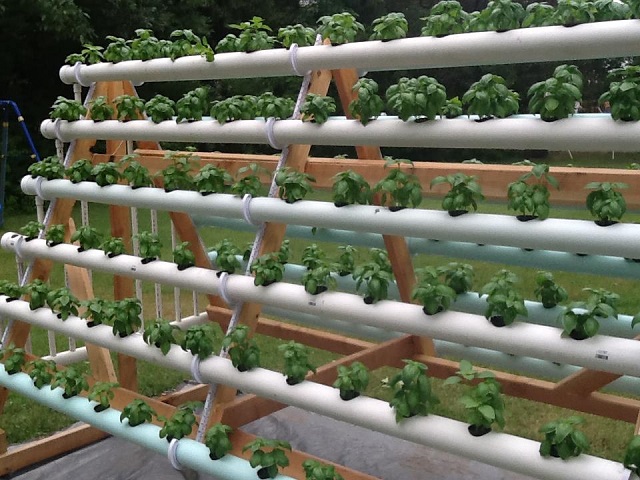
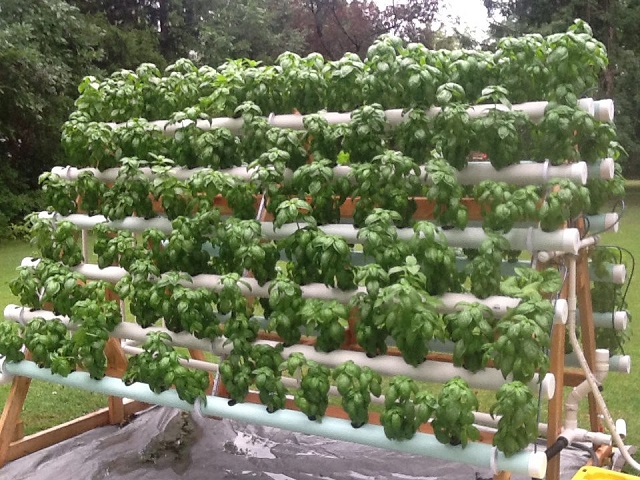
FEATURED PHOTOS FROM HER INSTAGRAM


What are some of the other things you would like to have other people understand about living a healthier and self-sufficient life style?

A few things I’d like people to know is that most likely you won’t receive instant gratification. I’m in my third season of gardening and it has been a struggle — between the bugs, the weather, the fungus, more bugs — it seems like I never win. And actually, sometimes I wonder why I still try but I guess it’s because growing my own food and showing my son what real food grown in a garden from love tastes like is absolutely worth trying over and over again.

Living a healthier lifestyle is about trying, trying, and trying again and sometimes it’s certainly anything but easy. It’s about learning to lean on other people for advice, it’s about researching, and ultimately, I think it’s about teaching you to enjoy the process and slow down a little. Our world is moving so fast right now but moving towards a self-sufficient lifestyle takes time and patience.

What tips and tricks could you share with other people?

Honestly, I’m not sure I have any tips or tricks to share on gardening because I’m much of a beginner and haven’t had a successful garden season I could rave about. This spring I thought it would be abundant but I put the garden in too late and the heat has just been brutal. I’m ready for the fall though and I’m pretty confident I’m going to get a good harvest (at least that’s what I keep telling myself)!


Have you ever made mistakes or failed doing something?

HA! Yes, I have totally made mistakes or failed at doing something. One thing that is constantly a battle for me (and my husband) is my lack of watering the garden therefore keeping my plants alive. If it’s not because I forgot to water, my garden seasons have flopped because of the bugs that I deal with in Florida. Though, with each failed garden season, I am more prepared for the next one.

How did you overcome any obstacles?

Since I’m terrible at remembering to water my garden, I made sure I put my garden beds near my chicken coop. It has helped a lot since I have to change out the chickens’ water every day, but there are still times that I forget simply because I have a lot on my plate.
I am also starting a garden journal to record the things I learned and the solutions I’ve come across to help me remember for the next season.

Have you ever dealt with a person who disregards your life style?

Yes, and I think it is totally normal. 6 years ago, my whole mindset was different. I was ignorant but it wasn’t my fault and I think this is the case with lots of other people. When you think about it, it’s hard and scary to essentially unlearn everything you were taught, so I can see why people have a hard time with going against what mainstream says.
When I first began to make switches, mostly close family members couldn’t understand and I admit, I would get frustrated, upset, and hurt. I would try and preach and give facts but nothing ever changed their minds. It wasn’t until I started just living my life the way I wanted to, that people started to notice and come around. I’ve also learned that some people won’t ever change so it’s not worth using my energy to worry about it and to just keep moving on and focusing on my ultimate goal.

What are some of your greatest rewards with a lifestyle such as the one you live?

I could go on and on about the amazing rewards I get with this lifestyle but I’ll try and keep it somewhat short. In a few words, this lifestyle has taught me patience, gratitude, motivation, excitement, and appreciation for what it takes to grow and raise my own food. For example: by the time I actually account for all the money I put into my chickens, my eggs probably cost me $15-20 a dozen but I never doubt for one second that it’s worth it.

Out of all the rewards, one of the biggest of living this lifestyle is making it possible for my son to grow up with a backyard homestead. I think the problem with our world right now is that most of us have been completely disconnected from our roots. In my opinion, as a society, we’ve all lost the appreciation and knowledge of what it takes to grow real food (veggies, meat, and dairy) and would rather resort to convenience. Most of us don’t realize that the convenience comes with a huge cost that impacts our environment, and ultimately impacts the future of our children.

In my eyes, our children are suffering because they don’t know where their food comes from. That’s why it’s so important to me to continue what I’m doing for my child’s sake and to keep trying each year even if I’ve failed at gardening. It’s imperative for him to see that in order to get an egg that nourishes our body, we need to make sure our chickens are fed, hydrated, and cared for. It’s only until then that a child can see the full circle and learn to appreciate what it takes to have food that makes them feel good.

It’s only until a child sees the patience, handwork, and dedication it takes to start a plant from a seed, water it, love it, and see it grow that they can appreciate their food and truly know the difference between something home grown and something from the store. Ultimately, I want him to know that the good things don’t always come easy, hard work pays off, and there is nothing more gratifying than harvesting something you grew or raised with your own two hands.

Sow and Sow Gardens, Building a Backyard Food Forest

Header SowandsowAt Urban Organic Gardener, we’re all about sharing inspiring stories of how people are growing food in small spaces.  A while back, we found Sow and Sow Gardens on instagram and have been following them ever since. What they’re doing is truly inspiring.

How did you get started with your blog/Instagram page?3

“I got started with my personal Instagram page. I would post all kinds of things about what I was going and what troubles I was having in the garden. Then someone asked me on Instagram if I had blog. At the time, I felt like I was no expert and how could I possibly write a blog. About a year later I decided I really enjoyed growing food and why not write about it.”

{Start Following Sow and Sow Gardens on Instagram!}

Did you start your blog/Instagram when you started your transition to live this life style? 

“I was let go from my job of almost 7 years and decided I wanted to help my husband out with growing food. We had two mortgages and bills. I figured that growing food would help and that it would be less of a grocery bill.  Yes, I began to have many followers on my personal page who was interested in my gardening. I wanted to come up with a creative name. I asked my sisters for their help. My sister Nnenna was like “you are in the South…you know they always say thing like….you know….so and so down the street”. “Why not Sow and Sow Gardens, like sowing seeds.” It was perfect!”

1
Have you always been this way?  If not, what sparked your passion?

“No, I was not always this way. I started learning about GMO’s about 7 years ago. I started reading the labels on things I was buying from the store. Then I started reading about more issues about the food that we were consuming into our bodies.  I started telling people at work but of course they would look at me funny. I was the “Earthy One” was what they started calling me. When I started growing food, it was something amazing to see a seed pop its little head out of the dirt. It was just magic to me. It was so beautiful. It was my creation is how I saw it.  I know this might sound corny but I wanted to be the change I wanted to see in the world. It has to begin with ourselves if we want to see any change come about on this planet.”

What are some of the other things you would like to have other people understand about living a healthier and self-sufficient life style?2754805_orig

“There is nothing like growing your own food…Period. You know where it comes from and how it was grown. I feel great that I don’t have to depend so much on someone else to provide food for my family. It’s much healthier and taste better than what you will get from the stores. I also like teaching my daughter about where her food comes from and how it grows. As one can see, there have been a lot of issues on this planet when it comes the weather. California is going through a drought. I would not be surprised if the prices rose due to the drought. It’s something my family will not have to worry about . I have started 2 apple trees, goji berries bushes and artichokes. I want to have a little food forest in my backyard. Start off little and work your way up. I started growing my own food 3 and half years ago. I started with a 7×4 raised bed.”

What tips and tricks could you share with other people? 

“Always see for yourself how things grow. I was told that radishes did not transplant well. I wanted to see for myself. I transplanted radishes and carrots. The radishes came out great but not the carrots. There are always different results for different growers. I also like to start my seed on paper towels. For two years I could not get pepper seeds to germinate. I was on youtube one day and put in the search engine how to germinate pepper seeds. Someone started theirs from paper towels. I gave it try and now I germinate all my seeds this way. I have the hardest time trying to germinate seeds in the dirt. “

367734_origHave you ever made mistakes or failed doing something? 

“Oh my!!! Yes, I learned to NEVER put mint in the ground. I have been trying to contain that mint in the backyard. The first year, the soil was bad bad bad. I didn’t amend the soil well. Nothing would grow. I thought planting it was all I needed to do. I started researching and reading lots of books. I was on the internet and YouTube a lot. That’s how I really learned how to grow food. I have never really been able to grow tomatoes well. Looks like this year, I might have some luck. Leafy greens always grow best for me.”

How did you overcome any obstacles? 5001191_orig

“My first and second year was hard. I was learning the whole process. I had to learn about the soil.  I wanted to give up but I just kept trying because I loved gardening…my creation. I dealt with flooding last year and it ruined most of my crop. It just sat in water. So I had to find another method of growing food with lots of water involved. On my blog I showed the whole process for months of what I went through for the backyard transformation. I tried the double dig method. It’s a lot of work but it worked for me. You have to see what works for you. The double digging method was the way to go. The beds were high enough that the rain did not affect the food. The book that saved me was ‘How to Grow More Food’ by John Jeavons. For me, this is my garden bible.”

Have you ever dealt with a person who disregards your life style? 

“No I haven’t met anyone. The only thing I hear from people is that they don’t like to get dirty. I love it!”

What are some of your greatest rewards with a lifestyle such as the one you live?

“It brings a peace of mind. Just walking out of my back door to get herbs to cook is a wonderful thing. We have less of a grocery bill. Knowing where my food comes is the greatest reward there is.”

To follow their journey of building a backyard food forest, you can subscribe to their blog.

7693178_orig

How to Build a Tee-Pee Vine

This post originally was found on SeedsNow.com


Vine tee-pees are a fun way to encourage children to spend more time in the garden. They will add a whimsical touch that even the adults will appreciate and are not only fun to look at but are extremely functional. Because they save space in the garden by using vertical gardening techniques, you’ll be able to grow more food in less space, and who doesn’t love that?

You can construct your own vine tee-pee on a weekend with minimal materials, often ones that are free or you may already have on hand. This is a great project to get the kids involved with because they’ll enjoy creating a fun space for them to read, play and make-believe in.


Step 1: Start by selecting your building site.
Depending on what you’d like to grow on your tee-pee, make sure to position the structure in the appropriate, full sun or partial shade location.
Step 2: Choose the material you’ll use to construct your tee-pee.
These tee-pees can be made using free materials such as old branches from a nearby tree, which makes them even more desirable! Free garden projects are always a bonus. You can also use bamboo or other wooden stakes that you may have access too. In the picture above, you can see how even an un-used swing set can be transformed into a vine tee-pee.
Step 3: Build the tee-pee and secure to ground.
You’ll probably need an extra set of hands for this part, as you stand all of the pieces upward creating the tee-pee’s shape. Once you have them all in place, secure the top of the tee-pee together using strong twine or rope. Then secure the bottom of the tee-pee to the ground using garden stakes. You can drive metal stakes into the ground and drill the wooden branches or poles to them so it will be more secure. You don’t want this to fall over or be blown over especially if children will be playing in or around it.
Step 4: Wrap your tee-pee in twine.
Using garden twine or yarn, wrap the sides of the tee-pee so that the vines will have more to grab onto. This will help the tee-pee fill in faster and more evenly.
Step 5: Choose what to plant at the base of the tee-pee poles.
You can grow a mix of perennials and annuals, vining fruit, or spring and summer vegetables on your tee-pee.

Peas, Pole Beans, Nasturtiums, Squash (vining), Cucumbers, & Melons are all wonderful varieties to plant around your tee-pee and will thrive on a structure like this.

How To Grow 168 Plants In A 6 X 10 Space With A DIY A-Frame Hydroponic System

This source of this post, content, and photos is from goodshomedesign.com

The techniques you can use for making gardening far easier than it actually is are not that many and in most cases not that accessible in terms of costs or work put into getting it. In order to succeed, you have to think outside the box! This hydroponic system is that one clever way to grow plants on a small surface area with little effort. In the project featured on this webpage you can see how a homemade vertical A-frame hydroponic system can surely help you grow your garden plants. Actually, the hydroponic system is one great method for growing herbs or other small plants, like radishes, lettuces or strawberries; for the last type it is way more attractive because you won’t have to stand on your knees and on the ground, but just pick them while standing up. View the following video tutorial in order to make a working hydroponic system. Start growing 168 plants on a 6 by 10 surface!

vertical-hydroponic-system-1

vertical-hydroponic-system-5

vertical-hydroponic-system-4.1

vertical-hydroponic-system-7

vertical-hydroponic-system-9

5 Quick Growing Veggies you can Harvest In No Time

5 Quick Growing Vegetables

Gardening isn’t usually a process that should be rushed. It takes time to prepare a spot that you’ll be planting in, and patience usually pays off when you’re growing your own food. There are a few crops, however, that always mature fairly quick.  If you’re short on time during your growing season or just want to get your toes wet as a first time gardener, we’ve put together a list of a few crops that are quick to grow and will have you harvesting your own homegrown veggies in no time at all.


1. Lettuce

shutterstock_107233463_1024x1024Learn how to grow your own organic Lettuce >

Lettuce – (Harvest in about 30 days) Lettuce is a wonderful crop to grow, and matures fairly quickly. Sow new lettuce seeds every 30 days for a continuous harvest that will provide you with fresh leafy greens year-round.  Lettuce prefers cooler temps, somewhere around 50-60 degrees but will also thrive during the summer if grown in the cool shade.  Have a sunny window? It grows wonderful indoors as well.  Short on space? Lettuce loves being grown in containers and usually doesn’t mind being crowded when planted so you can sow your seeds fairly close together as long as you’re not sowing varieties that produce a round head.


2. Radish

shutterstock_45890116_1024x1024Learn how to grow your own organic Radish >

Radishes – (Harvest in about 20-25 days) Want a fast growing crop that packs a ton of flavor?  Radishes take up very little gardening space, grow very quickly, and can come in over 200 varieties with a wide array of colors, shapes, sizes and flavors.   They grow well in containers, and prefer full sun however some varieties can be grown in partial shade.  In cooler climates they can be planted in both the spring and fall. In warmer climates they should be grown over winter.


3. Spinach

700xshutterstock_200666138_1024x1024Learn how to grow your own organic  Spinach >

Spinach – (Harvest in about 30-45 days) Baby spinach leaves can be harvested about a month after planting. The smaller leaves are loaded with flavor, regardless of the variety you choose.  Harvest the larger leaves at the base and allow the plant to continue growing and you’ll be able to harvest from a plant for quite a few weeks before it goes to seed.  It grows a lot like lettuce, so try and grow it in cooler temps. or in the shade during the summer.   Also grows well in containers and doesn’t require a lot of space in the garden.


4. Bush Beans

700xshutterstock_95261911_1024x1024Learn how to grow your own organic Beans >

Bush Beans– (Harvest in about 50 days) Beans love warmer temps. and seeds can be sown every two weeks during the summer to ensure a continuous harvest.  Bush beans usually produce most of their beans within a 2 week period.


5.  Peas

700xshutterstock_194277455_1024x1024Learn how to grow your own organic Peas >

Peas- (Harvest in about 60 days)  Peas are a wonderful cool season crop that take up virtually no space since they grow vertically on a trellis.   They do best when directly sowed. The simplest way to prolong harvest is to plant early, mid season, and late varieties at one time rather than sowing every 2 weeks.

Seattle Mom Quits Her Job to Become a Full-Time Homesteader

5698ec41-af8c-474c-bbb0-71ed984cc706

Most of us may have thought once or twice about throwing in the towel, walking up to our boss and calling it quits.

Maybe you’ve gotten to a point in your life where what’s important to you now isn’t what was important to you when you first started your career.

We all have moments in life when we need to re-evaluate what we’re doing with our time and energy. Sometimes you just need to overcome your fears and do what your gut is telling you to do.  The results just might surprise you.

Here’s a story about how one Seattle mom decided to close her business of over 10 years and started homesteading full time on their 1/2 acre urban farm.

This is her story about how she was able to not only make ends meet without the income she was missing, but how she actually started saving money & became self-sufficient.

Screen Shot 2015-04-30 at 10.46.00 AM

14 Urban Gardening Tips That Will Save You Time, Energy & Money

14 Urban Gardening TipsWhether it’s using leftover coffee grounds from your morning brew, drying herbs on the backseat of your car or using soap under your fingernails before digging into the soil… Paul James, a Master Gardener shares his top 14 gardening tips that will save you time, energy and money in the garden. This post was originally shared on HGTV.com.

Here, the latest tips and tricks from Paul James, host of Gardening by the Yard:

1. To remove the salt deposits that form on clay pots, combine equal parts white vinegar, rubbing alcohol and water in a spray bottle. Apply the mixture to the pot and scrub with a plastic brush. Let the pot dry before you plant anything in it.

2. To prevent accumulating dirt under your fingernails while you work in the garden, draw your fingernails across a bar of soap and you’ll effectively seal the undersides of your nails so dirt can’t collect beneath them. Then, after you’ve finished in the garden, use a nailbrush to remove the soap and your nails will be sparkling clean.

3. To prevent the line on your string trimmer from jamming or breaking, treat with a spray vegetable oil before installing it in the trimmer.

4. Turn a long-handled tool into a measuring stick! Lay a long-handled garden tool on the ground, and next to it place a tape measure. Using a permanent marker, write inch and foot marks on the handle. When you need to space plants a certain distance apart (from just an inch to several feet) you’ll already have a measuring device in your hand.

5. To have garden twine handy when you need it, just stick a ball of twine in a small clay pot, pull the end of the twine through the drainage hole, and set the pot upside down in the garden. Do that, and you’ll never go looking for twine again.

6. Little clay pots make great cloches for protecting young plants from sudden, overnight frosts and freezes.

7. To turn a clay pot into a hose guide, just stab a roughly one-foot length of steel reinforcing bar into the ground at the corner of a bed and slip two clay pots over it: one facing down, the other facing up. The guides will prevent damage to your plants as you drag the hose along the bed.

8. To create perfectly natural markers, write the names of plants (using a permanent marker) on the flat faces of stones of various sizes and place them at or near the base of your plants.

9. Got aphids? You can control them with a strong blast of water from the hose or with insecticidal soap. But here’s another suggestion, one that’s a lot more fun; get some tape! Wrap a wide strip of tape around your hand, sticky side out, and pat the leaves of plants infested with aphids. Concentrate on the undersides of leaves, because that’s where the little buggers like to hide.

10. The next time you boil or steam vegetables, don’t pour the water down the drain, use it to water potted patio plants, and you’ll be amazed at how the plants respond to the “vegetable soup.”

11. Use leftover tea and coffee grounds to acidify the soil of acid-loving plants such as azaleas, rhododendrons, camellias, gardenias and even blueberries. A light sprinkling of about one-quarter of an inch applied once a month will keep the pH of the soil on the acidic side.

12. Use chamomile tea to control damping-off fungus, which often attacks young seedlings quite suddenly. Just add a spot of tea to the soil around the base of seedlings once a week or use it as a foliar spray.

13. If you need an instant table for tea service, look no farther than your collection of clay pots and saucers. Just flip a good-sized pot over, and top it off with a large saucer. And when you’ve had your share of tea, fill the saucer with water, and your “table” is now a birdbath.

14. The quickest way in the world to dry herbs: just lay a sheet of newspaper on the seat of your car, arrange the herbs in a single layer, then roll up the windows and close the doors. Your herbs will be quickly dried to perfection. What’s more, your car will smell great.
View the original post here: http://www.hgtv.com/design/outdoor-design/landscaping-and-hardscaping/14-simple-gardening-tips-and-tricks

How to Grow Perfect Peppers & Tomatoes in a 5 Gallon Bucket

Short on growing space but still yearn for homegrown tomatoes and peppers? Is your garden located on a balcony or terrace and you’re afraid you can’t savor the taste of vine ripened tomatoes or experience the heat of your favorite variety of pepper? Well you can, and all you need is a 5 gallon bucket, nutrient rich soil, a few amendments, water and your favorite variety of heirloom seeds.

Digital Albums-1-3

DSC_5098

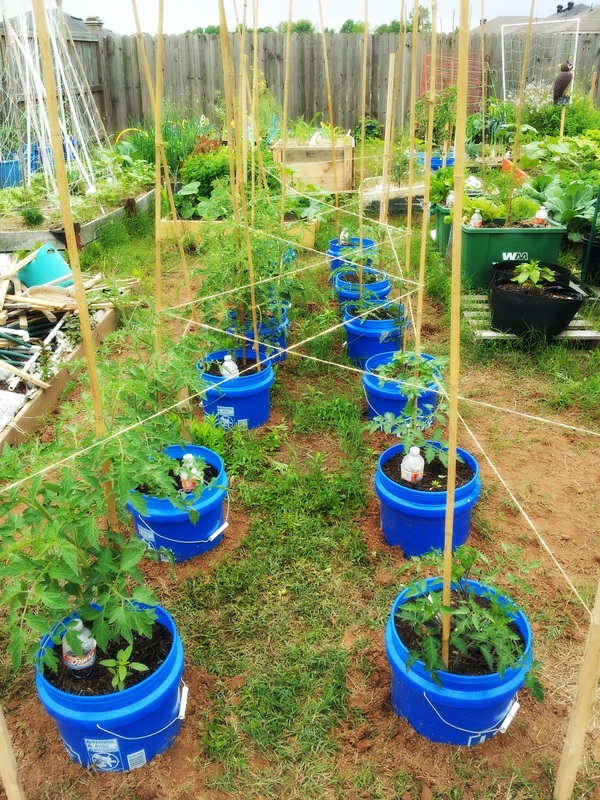
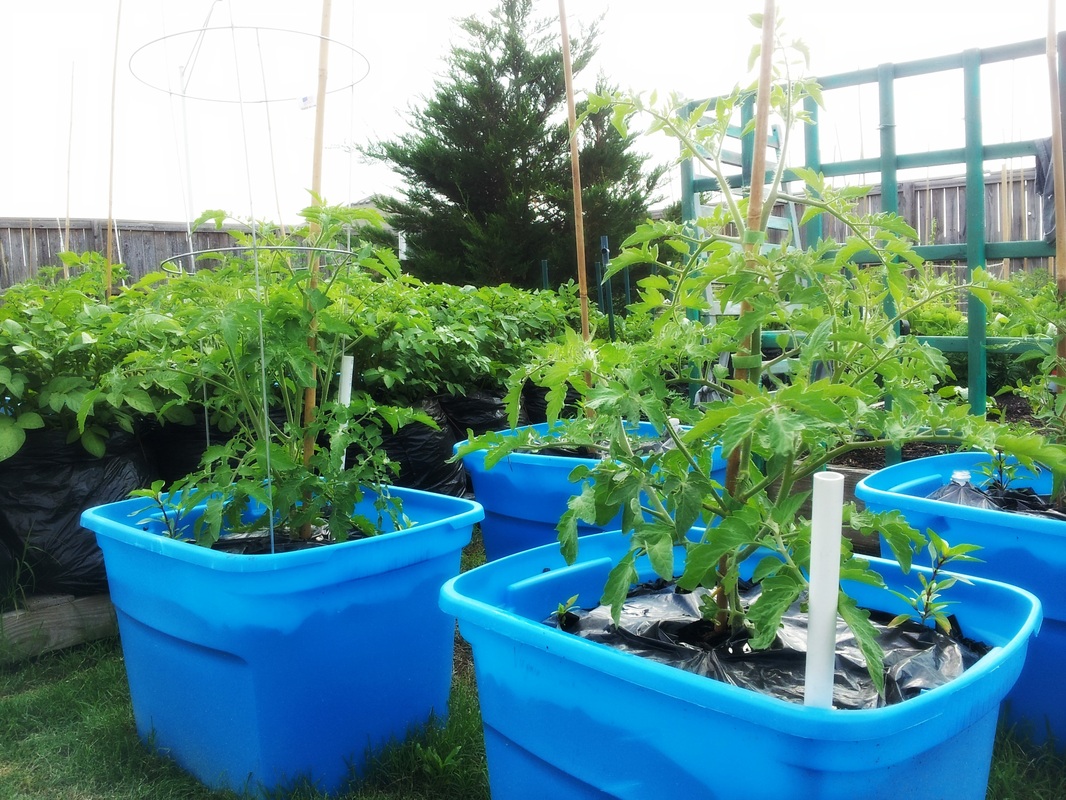
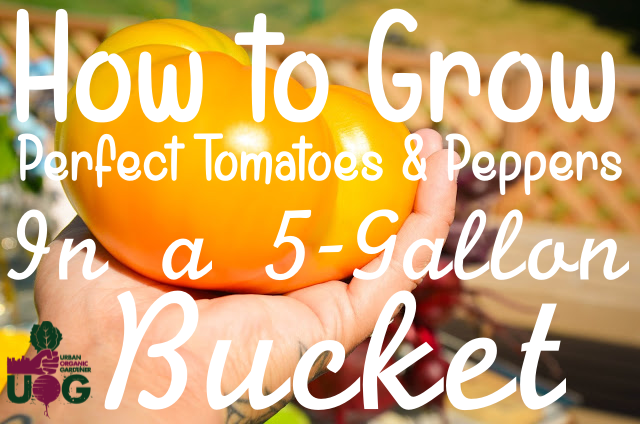
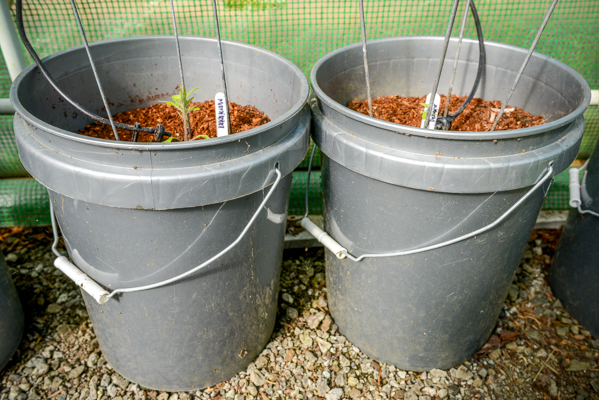
Start by finding a 5 gallon bucket. Make sure it is clean and food grade, meaning there’s never been any nasty chemicals stored or shipped in your container.   Usually you can acquire these by visiting your local bakery or even a trip to the hardware store will lead you to a simple 5-gallon bucket. Generally they can be purchased at your big-box hardware stores for around $2.50.

Once your bucket is clean,  fill it with nutrient rich soil.  If you have your own compost, add some of that. Always use rich organic soil.

DSC_1905 For best results, especially in climates that are a little cooler, try starting your tomato and pepper plants indoors 6-8 weeks before your last average frost date.  Tomatoes and peppers do well with transplanting and rarely experience “shock” once they are moved from their indoor locations out into their permanent home in the garden.

Add your nutrient dense soil into your 5 gallon bucket. Dig a hole deep enough for you to plant your seedlings and then add a small amount of vegetable or tomato plant food at the bottom of each hole.  Give the soil a light water with a watering can.

DSC_1906Place your tomato plant inside the hole and then fill the surrounding area with soil.  Remember that you can bury your tomato plants extra deep, up to their first set of true leaves. This long “stem” that you’re burying into the soil will actually help the tomato plant develop a strong root system. So bury those tomatoes deep! They love it.

Once your tomato and pepper plants have been put into the soil, give the entire bucket a good water.

DSC_1904To help keep weeds down in your container, spread a thin layer of mulch on top of the soil. This will also help keep the soil moist and from drying out too quickly. Because you’re growing in containers, the soil will dry out sooner than if it had been planted directly into the ground, so keep an eye on it. Peppers don’t mind soil that is slightly dryer, once the plant is established but your tomatoes will need regular watering. Too much, or too little watering will result in cracked tomatoes, or blossom end rot, once they have reached maturity.

DSC_1903
Tomatoes and peppers both love the sun and the heat.  Keep your buckets in a sunny location.

Try planting companion plants near your buckets such as: marigolds, basil, borage, chives, calendula, and carrots.  Avoid fertilizing with too much nitrogen. This encourages leafy growth instead of flowering…and the flowers are what will produce the fruit. Try time-released fertilizers so that the nutrients wont all be washed away with frequent watering.

DSC_5004

DSC_5447

The Hell’s Kitchen Farm Project an Urban Rooftop Farm

The Hell’s Kitchen Farm operates on a 4,000 square foot roof & is growing in 52 raised beds. What they’re doing is quite amazing…

According to their website, “HKFP is an urban rooftop farm in Hell’s Kitchen, managed and run by volunteers. HKFP is the outgrowth of community discussions concerning nutritional security, especially scarcity of affordable fresh produce, in Hell’s Kitchen.”

Screen Shot 2015-03-31 at 10.30.39 PM


Screen Shot 2015-03-31 at 10.39.08 PM

NEW! Join the Urban Organic Gardener’s Monthly Seed Club

UOG-Mar15-2

Become an Urban Organic Gardener!

Here at UOG we believe that growing your own organic food can be one of the most rewarding things you can do for your mind, body, and soul. Become a member of the UOG Monthly Seed Club and receive a handpicked collection of seeds and garden supplies – specifically curated based on your growing conditions and location.

Whether you’re growing in a tower garden, containers, raised beds, or directly in the ground in your backyard we’ve got seeds for you.

Just start by answering a few basic questions about your gardening experience and where you will be planting your seeds.

GET STARTED >

  • Pure 100% Non-GMO Heirloom Garden Seeds
  • Receive a unique assortment of seed varieties each month – culinary herbs, fruits, edible flowers, vegetables, etc
  • Includes seed starting supplies, instructions, and so much more


UOG Seed Club BG

5 Container Gardening Tips for Beginners (+ Giveaway!)

Julie from homereadyhome.com just published a great article highlighting important Container Gardening Tips (for Beginners).  Click here to view the original post: http://homereadyhome.com/5-container-gardening-tips-for-beginners/ Here’s a quick preview of what she has has to say about container gardening:

hersteragiveaway4

1. Don’t “grow” overboard.  :)

“Container gardening requires a time commitment. You’ll need to be more hands-on (ie. watering and fertilizing) with plants in pots than plants in the ground. Your container garden will require daily attention so you want to make sure you don’t spread yourself too thin by having too many plants.” … read more

2. Choose the right container.

“Drainage holes are a must. Only consider pots with holes or pots you can drill holes into. Select a container with a broad surface area. Decide what you’ll grow and that will help you to determine how deep your container should be. Root vegetables (think: carrots) and tall plants (like, tomatoes, vines and fruit trees) do better in deep pots. Fast growing crops like herbs and leafy vegetables are fine in a shallow container.” … read more

3. Buy potting soil.

“You may be tempted to fill your container with the free dirt from your backyard, but don’t do it. Dirt from the ground doesn’t work well in containers because it’s dense and heavy. It turns into a hardened clump in your pot and your plants won’t do well. You need soil that is light, drains water quickly but also holds moisture at the same time.” … read more

4. Seek out sunlight.

“Many vegetables need at least 6 hours of sunlight a day, so the more sun you can provide the better. If, like me, you have a lot of shade at your location, no worries. There are still some edibles you can grow. For example, chives, kale, leafy greens, lemon balm, mint, parsley, spinach, swiss chard, peas and radish all tolerate partial shade.” … read more

5. Water your plants.

“Avoid under-watering and be sure you aren’t over-watering your vegetables. How do can you be sure?  I usually wait for the plants to look slightly wilted, then I water. You can also stick your finger in the soil about an inch down and see how it feels. If it’s dry, it’s time to water. My favorite tools for watering my container garden are a watering can and my spray wand that attaches to the hose.  ” … read more

How to Source Non-GMO Seeds

how-to-source-non-gmo-seeds-naturally-loriel-seedsnow-683x1024
Source: NaturallyLoriel.com

Naturally Loriel recently published a blog post on a very important topic:  How to Source Non-GMO Seeds.

She says, “You begin to learn which food companies deserve your support and try to find a local farmer’s market in your area. You realize it’s so important to meet and shake the hands of the farmer that produces your food. Unfortunately though, you’re not as lucky as Lauren is, and the farmer’s markets in your area royally suck. The only other logical solution is to grow your own food.”

Click here to read the original blog post: http://www.naturallyloriel.com/how-to-source-non-gmo-seeds/

Top 5 Featured Urban Organic Garden Photos on Instagram

Follow Urban Organic Gardener on Instagram:  www.instagram.com/urbanorganicgardener

1

– – – – – – – – – – – – – – – – – – – – – – – – – – – – – – – – – – – –

2

– – – – – – – – – – – – – – – – – – – – – – – – – – – – – – – – – – – –
3

– – – – – – – – – – – – – – – – – – – – – – – – – – – – – – – – – – – –
4

– – – – – – – – – – – – – – – – – – – – – – – – – – – – – – – – – – – –
5
Follow Urban Organic Gardener on Instagram:  www.instagram.com/urbanorganicgardener

Compass Green: Mobile Greenhouse visits Frontier Co-op | Real Food Media [VIDEO]

A roving mobile greenhouse teaches children about where their food comes from.

timthumb
“Compass Green is a school garden on wheels. It is a fully functional mobile greenhouse built in the back of an 18-foot box truck that grows vegetables, grains and herbs and is powered by waste vegetable oil. The project teaches practical farming tools and raise awareness on sustainability through presentations, workshops, greenhouse tours at schools and events across the country.” –Organic Connections

Compass Green: Mobile Greenhouse visits Frontier Co-op | Real Food Media Contest Film Library from Real Food Media Project on Vimeo.

Minnesotans Don’t Care About the Snow! Still growing strong.

ows_141875704417544

Season-extending structures are helping some Minnesota gardeners defy winter.

Even in late November, Dawn Pape’s newest garden was a welcome sight for winter-weary eyes.

In her Shoreview yard, under a blanket of snow, is a polycarbonate-topped, 2- by 8-foot box — or “cold frame.” Brush aside the show, lift the lid, and inside was an improbable vision: healthy spinach, kale, salad greens and other veggies growing in the frigid ground.

“It’s so uplifting to see green when it’s kind of bleak outside,” said Pape, a master gardener and garden-book author, who was still harvesting around Thanksgiving — and hoping for at least a few more weeks of homegrown produce. “If I can make it to Christmas, I’ll be pretty happy,” she said.

Cold-weather gardening is not for everyone, but a hardy few are giving it a try.

Some are market gardeners who erect plastic-covered shelters (often called hoop houses or high tunnels) so that they can produce food earlier in the spring and later in the fall. Urban agriculture consultants Cherry Flowers and Tim Page of Page & Flowers (www.pageandflowers.com) grow vegetables in high tunnels at their home in St. Paul and at an apartment in Minneapolis that serves as their office. They sell their produce at the Mill City Farmers Market.

“In the spring, you can get a jump on greens, even in March, and have them ready for the May farmers market,” Flowers said.

Pape is growing on a very small scale, just for her family’s table.

“I’ve read about it [cold-frame gardening] for several years and decided to try it,” she said. She found a kit online (at www.gardeners.com) that was the same size as one of her existing garden beds, ordered it and installed it in the fall, surrounding it with straw bales for extra insulation.

Cold-frame gardening has its limitations in Minnesota, she’s discovered. “The harvest’s not as plentiful” as during the regular growing season. Plant growth is minimal. “You’re not really gardening, just sort of picking. It’s basically a refrigerator.”

But Pape enjoys the challenge of pushing the growing season to its outer limits. “It’s thumbing your nose at Old Man Winter,” she said.

Read the full article here: http://m.startribune.com/lifestyle/homegarden/285986551.html