

One of the best parts about making self-watering containers for your garden is that it’s cheap. Most of the supplies needed are either already laying around the house or you can easily get in your neighborhood.
The best part is that you can grow a ton of different herbs and vegetables in containers just like this.
- Here is a list of seeds that grow well using containers.
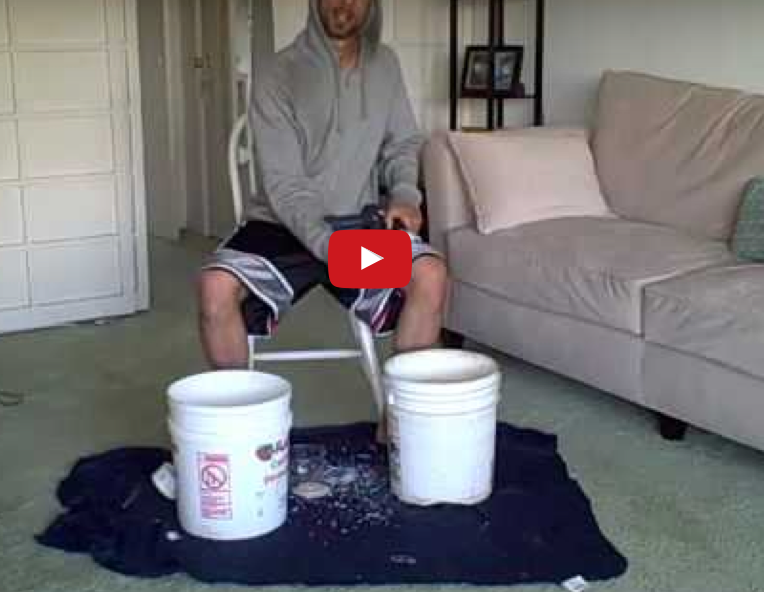
Container Within A Container and No Pipe
httpv://www.youtube.com/watch?v=nHZ4CLEGh-I
Tools
- Drill
- 1/4″ bit
- 3 1/2″ hole saw for metal and wood
- 1 1/4″ hole saw for metal and wood
Materials:
- 2 food grade 5 gallon containers – 1 for planting container and 1 for reservoir container
- 1/2 deli container for wicking basket
Instructions On How to Make With 2 Containers and No Pipe
- Use the 1/4″ drill bit to drill holes in the deli container.
- Attach the 3 1/2″ hole saw attachment to the drill. Drill a hole in the bottom of the container. I’ve found drilling in a counter-clockwise direction to work best.
- Reattach the 1/4″ drill bit and drill holes in the bottom of the planting container to allow for drainage.
- Put the wicking basket in the middle of the reservoir container.
- Place the planting container in the reservoir container aligning the wicking basket with the hole in the middle.
- There will be a little space between the wicking basket and the planting container. You can duct tape the basket to the bottom of the container, but it’s not necessary.
- Hold the containers up to the light. You should be able to see through the reservoir container where the planting container is. Using the 1 1/4″ hole saw, drill a hole 1/4″ in the reservoir container below where the planting container is.
- This is the hole where you will water the plant from.
- That’s it. You’re done!
We drink water from copper pipes. We water plants with water from copper pipes. How is a copper pipe in the soil possibly going to harm the plant?
$40 for a 10' piece of copper pipe? I could probably ship you that much copper pipe for way less than that. I think a 3/4″ 8' copper pipe here costs around $10.
Either way, I think your containers are great. And recycling rocks!
I'm with you Sylvana, but some haters have said that the pipe is bad for the roots of the plants. Either way, this is another low cost way to make the containers.
People will always find a problem with something.
*raises hand* Yay, that is so cool that you tried my idea and it worked!
Awesome. Thanks for the idea. Updated to give you credit for it.
Good solution. You could also consider using PVC pipe instead of copper 🙂
If I'm not mistaken, a 1″ x 10' PVC pipe is about $1. Certainly easier to cut than copper!
Yes, but there is the concern for the potentials of leaching into the water.
Awesome idea! Thanks! I love the self-watering containers! I’ve done square foot gardening for years up in Michigan, but here in Vegas needed something different. I was afraid the plants would die from the heat combined with watering restrictions that keep us from watering during the day. I think the self-watering containers are what I’ve been looking for! I can move them out to get sun early in the day & pull them back under the covered porch before the heat of day hits…and don’t have to worry about them not getting the water they need during the day.
I love your blog! Thanks!
In London it’s dead easy to find PVC pipe for free from skips. I’ve got more than I know what to do with. I see your comment about leaching. I’m no expert but as PVC pipe is often used to carry drinking water I’m guessing it’s not too serious a problem.
I hear ya, but just because it’s used doesn’t mean it’s not too serious of a problem. Look at GMOs, fluoride in water and a million other things…
Hi Mike, Hi Everyone,
for the lower section i’ve used hemp and sissal rope as a wick – provides a nice capillary riser for the water. It keeps the lower water cleaner as only the rope and not soil is in contact with the reservoir.
i’m not sure of the advantages of no pipe. a vertical pipe with a float riser made from a bottle cork has the advantage to allow more water to be in the reservoir and allow top fill rather than a (for me) complicated side fill.
the system also works with chilli – hot like Mike 😉 oooops ! 🙂
Hahahaha. Thanks 😉
Like the hemp and rope idea.
The advantage of no pipe is that it’s cheaper and don’t have to worry about chemical leaching.
Have you had issues with using copper piping? In my experience copper can be toxic for plants! I think PVC may Have PBAs as well, so i am curious if there is truly a foodsafe piping alternative? would Bamboo work?
That’s why I no longer use any pipe.
Not mold, but algae. Mold is a fungus, but algae is just a plant. You can lift the plant bucket out & rinse/wipe out the water bucket every now & then. If you paint your bucket so no light gets though the walls, the algae will either stop or slow down. It thrives in sunlight. It doesn’t harm anything though.
Bamboo is not hollow all the way through – it is segmented. I suppose you can drill it out though. Vinyl tubing you can get at a pet store (aquarium section) would work great, but I’m not sure it comes in large enough diameter for a neat fill, may have to use a funnel with it.
Thanks for the clarification.
Bamboo creates a haven for earwigs, which will devastate your seedling crops. :/
HomeDepot and Lowes sells PEX piping which is non-PVC piping used for running potable water to/from the fridge and other water sources. $5 for 10/ft. It is plastic and I’m researching effects of using plastics (if anyone has good sources for info relating to use of plastics in gardening let me know!)
What about using cut pieces of garden hose for the pipe?
Can do that, but make sure that it’s safe garden hose.
you answered your own question with your first sentence….
Earwigs are good for your crops! They are eating others bugs, not your plant.
I still don’t know what I am looking at here.
Do you put a hose into the hole, or what?..
And why?
It’s container for your garden. There are a few ways you can water it.
i use this. but instead i use 2 , 55 gallon food grade barrels and one 5 gallon bucket in lue of .Patio plants or indoor plants I use recycled milk jugs in lue of the 5 gallon buckets..the basic concept still works for each application
I likes it.
Such as? How do you water it with no pipe coming up through it? Don’t leave me hanging here please…
From the top and the water will drain or lift out the planting container and pour water directly in reservoir.
I have to agree with Jana. What’s the point here? You still need a hose to get the water into the bottom reservoir. You say a watering can’ but you’ll have to turn the whole thing on it’s side, surely?
The reservoir on the bottom holds the water, so you have to water them less frequently. I’ve gone 3 weeks without watering them.
Just finished a project very similar to this. I used rectangular storage bins. My only reservation is that they are black, which may over heat the roots. It’s a trial, so I’m not vesting all my crop in it.
I used a plant basket from the pond supply section of my local big box lumber store as the wicking point and just attached it to the planter bottom with self tapping screws. I drilled overflow holes on each end of the reservoir bin at the same height as the top of the plant basket and made 4 legs from a closet pole to support the planter inside the reservoir. I did use a pipe filler that I placed in the corner of the planter in an appropriately sized hole. Angling the pipe bottom keeps it from blocking the water flow. I saturated the soil when planting, but watering after that is done from this pipe until I see water emerge from the overflow holes.
If you don’t leave some air gap between the planter bottom and the water level your crop’s roots will seek out the water through the holes in the planter and may lack nutrients that would be available from the soil. This gap is maintained by the overflow holes being slightly lower than the planter bottom’s position, as determined by the length of the legs supporting the planter.
The success of this experiment will depend upon the ability of the soil to wick water up through the basket. It is open to the elements, but I don’t intend to water it from the top again between rains. I’m hoping for an abundance of Early Girl’s in about 45 days.
That sounds great. Enjoy your harvest!
Hey Mike, thanks for all the helpful info. I started a tomato plant in a 1 gallon pot, but I think I need to make a self-watering container with the 5 gallon buckets to give this thing some more room to grow. My roots are already poking through the bottom of the 1 gallon pot.
Question about the wicking basket. You said that I can duct tape it to the planting container, or I don’t have to. If I don’t attach it, that would leave a small gap of air between the top of the wicking basket, and the bottom of the planting container, if I understand correctly. Would that cause the soil in the planting container to fall through the 3 1/2″ hole and into the reservoir container? Also, if it is not directly attached to the planting container, how will the soil in the wicking basket wick moisture into planting soil? To clarify here, I’m not being critical, just trying to figure out how to make this thing work the best! Thanks!
Also, are there any alternatives to a 3 1/2″ hole saw, for drilling that hole. They run about $20 at the hardware store…
There is so little room between the two that the connection is made with the soil.
you can use a utility knife, or a keyhole saw too. Just go slow. The plastic, (HDPE) is pretty easy to cut.
Good to know. Thanks for sharing.
where can i find those containers from ?
Here are some places you can get them for free 😉
https://www.urbanorganicgardener.com/2011/04/where-to-get-containers-for-your-container-garden/
I could be foolish in this, but the plastic used in these containers is “closed cell”. That means that it can’t absorb anything from it’s contents. I have used some that contained mortar and joint compound, but I always rinse them with a hydrochloric acid dilution after flexing them well to dislodge any “chunks”. Using the same dilution recommended for cleaning mortar and following up with several clear water rinses leaves a bare plastic surface. This is probably only appropriate where no other source is available, but I wouldn’t hesitate to do so if the alternative was no containers.
Use a16oz. plastic pop bottle. Cut off the bottom, take off the cap, and, place in the drain hole of the planter. Cut another bottle, take off the cap and place it into the previous bottle. You now have a funnel to the container reservoir in which to water with. No PVC, no unsafe garden hose, and, plastic from potable drinking bottles!
It also helps to drill a hole in your leg.
It also helps to work on better methods of link building.
I was just thinking that if you live in an area with a lot of mosquitoes (I’m in Malaysia and we get the dengue one), then one idea is to make the hole for the overfill, but use a waterproof glue to attach clear plastic over it. Then you can see if the water has reached it, but mosquitoes can’t get in.
Love the idea. I’ve got all my plants in pots. I’m going to try and think of a way to do this with them.
5 gallons is quite a bit. If you’ve also got lids, you can make a slightly smaller container from one bucket. Cut down the lid, that’s your planting surface. Everything you do to the planting bucket, you can do to the lid.
You will need some spacers to hold that up. I saw one youtube video that used soda and beer cans (with holes in them, of course).
I myself just used a 10 liter polyethylene bucket (should be food safe enough), a cheap flower pot, a saucer, and a piece of polypropylene pipe. The pipe became both support for the surface (tie-wrapped to the pot for stability) and fill pipe. Total cost of everything new about 6 euro’s. Cheaper than most flower pots 🙂
Wonderful! Thank you so much.
Love your blog and this idea. Thanks for taking the time to put this together.
you can also cut slits in the bottom of the planting container and use old cotton bathtowel strip as wicks vs wicking basket
Yes, I’m struggling here. I’m also new to this, so the containers, pipes and everything is foreign. I guess I need to purchase and learn how to use a drill first, huh? I live on the 8th floor in a NYC apartment and get light in only one small window in the morning. In the afternoon, the sunlight hits a window in another room. Would I have to move this garden everyday? Btw, I’m a single mother with 2 small children, so they wouldn’t be able to help me move it. Thanks Mike!
For what you can grow on a windowsill (stick with the afternoon light) I don’t know if I would advise you to take on this project, especially if it means purchasing tools. There are several very good commercially produced grow boxes that closely emulate the system here. Check with Home Depot or Lowes. If you decide to make this for the experience and bragging rights then a battery powered drill would be a good purchase that will likely come in handy many times in the future. There is always great satisfaction in DIY projects, but the tossup is one only you can decide.
Hi, I’m writing a gardening book I read this article and it was amazing! I wanted to ask if I can put it in my book. It will be published only on Amazon Kindle. And I will also mention the source of the article. Please let me know if I’m allowed to add it to my book. It will be great information for the readers!
Often bakeries will be throwing them away. Their fillings and other products come in those buckets and they just pile up until they have to throw them out just to make space. I have never paid for them.
I have used this method for 6 years now and have come to the conclusion that while this method does work it is only good for people who want stunted growth and lower fruit yield. I grew three breeds of pepper, tomato and squash using this method and grew the same three of each in a raised bed gardens . The self watering buckets produced fruit but it was smaller and there was less of it while my raised beds flourished and were bountiful with food. In conclusion I would be inclined to say that self watering buckets are a good way to grow things if you are not depending on large yields or you just don’t have room or space for a grow box or it is just a hobby. I also would like to add that in my experience,Plant life was drastically reduced with the oldest plant , a bhut jolokia, only reaching two years old and 3 ft tall.