

Source: Fix.com
Luckily for all you green-thumb wannabees, gardening isn’t a passing fad. In fact, the act and art of growing flowers, vegetables, and herbs is only gaining in popularity. According to Greenhouse Magazine, nearly half of all people gardened in a year, while the Garden Writers Association found that edible gardening increased over 11 percent in 2013.

For budget-smart gardeners like you and me, the expense of buying new plants can be the biggest deterrent to establishing a new green space or adding to an existing vegetable or flowerbed. Fortunately there’s a solution that’s less difficult than it might seem: seed starting. As an added bonus, once you start your own seeds you can grow plants that you can’t find elsewhere, or want to try but are too price-tag phobic to purchase.
Seed starting isn’t complicated or messy—and it’s a good way to plan and think about your garden before growing season even begins. Here are the essential steps to help you start your own flowers, vegetables, and herbs from seed.
Choose a Seed Starting Container
You can purchase a ready-made seed-starting flat made of plastic; it resembles a series of cubes. Or you can make your own using re-used plastic containers or egg cartons. If the material you choose is biodegradable—paper egg cartons, for example—you may be able to plant your seedlings along with the container directly into the soil. If not, you can re-use the seed starting pots from year to year as long as you sterilize them in a diluted bleach solution.
If you’re making your own container, pick something that’s about 3 inches deep. If your container doesn’t have drainage holes, use a nail and hammer to add a few as a way for moisture to escape the bottom.

Purchase Your Seed Starting Supplies
While the containers used for seed starting are fairly flexible, the material your seeds first grow in are not. There are plenty of ways for you to mix your own seed starting material, but to reduce headache and complication, you can also just purchase a pre-made mix. The mixture may be soilless or contain soil; the difference is important (and we’ll discuss why later on in this post). It’s also helpful to have a spray bottle, and trays to place under your seed starting containers to catch any water runoff.
Do a Seed Starting Calendar
Printed on all seed packets are basic guidelines that help you understand when you can plant seedlings outside; use those to determine when you should start seeds indoors. The planting date is related to the average last frost date; to find your specific date, view the USDA Plant Hardiness Zones: http://planthardiness.ars.usda.gov/PHZMWeb/.
Once you’ve found your zone, use the seed guidelines to establish seed starting dates. Sound complicated? It isn’t. For example, if your last frost date is May 1 and the seed packet for green peppers recommends sowing seeds 8 weeks ahead of time, you would start those seeds around March 6.

Plant Your Seeds
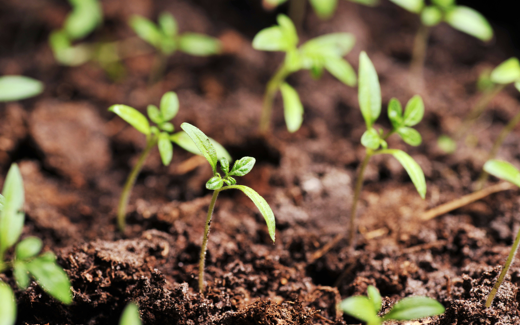
Once you have your seed starting supplies and seed starting calendar, it’s time to begin sowing seeds. Start by filling your containers with seed starting mix. Moisten the mix so it’s wet but not soggy. Then plant your seeds; scatter them lightly over the soil and gently press into place. If the seeds are very small, you can plant more than one seed; if large (such as cucumbers) you can plant just one. And, make sure your seed starting containers are labeled with name and planting date.
Tend Your Seeds
Seeds need only regular moisture, warmth, and sunlight in order to grow. Once planted, place them in a spot that’s free from chills and cover with plastic or newspapers until the seeds sprout. As they begin to sprout, remove the covering.
Your seedlings should never dry out, but also should not be wet; use a spray bottle to apply moisture just a bit at a time. You can also add water to a tray and let the seedlings pull it up as needed, but don’t allow the containers to get overly saturated. If you are not planning on transplanting your seedlings into larger pots and have grown them in soilless seed starting mix, you also need to give them a weekly feed of diluted plant fertilizer. As seedlings begin to grow, you can thin them to select stronger, hardier plants.
Transplanting Seedlings
If you’ve chosen a large enough pot AND used a soil-based planting mix, you may be able to leave your seedlings until it’s time to place them in the garden. If the pot is very small or the mix is soilless, you’ll have to transplant them into a bigger pot until it’s time to put them outside. That way the plants will develop vigorous roots.
To transplant, start by filling larger containers with potting soil. Dig out your seedlings, saving as many roots as you can, and place the plant in the new pot. Spread out the roots and cover with potting soil; tamp gently and water well. Every two weeks give the seedlings a dose of diluted fertilizer.

Encouraging Healthy Seedlings While just-sprouting seedlings need super-warm temperatures, established seedlings have less stringent requirements. Overheating in particular can push plants to become spindly. Either way, you’ll need to offer seedlings about 16 hours of light—not possible in cold-weather months.
The solution is to supply supplemental light by using fluorescent tubes. If you have lots and lots of seedlings, you may want to think about setting up a grow station in a spare room or the basement (if warm enough). Lights should be adjustable in height so that you can keep them at a constant distance of about 4 to 5 inches from the tops of the plants. A timer can help maintain a lighting routine so you don’t have to worry about manning the on-off switch.
Best and Worst Seeds to Sow Indoors
Many state extension services have helpful lists of plants that work well (and those that don’t) to establish from seeds you start indoors. Some of the best include tomatoes, peppers, cucumbers, pumpkin, squash, and watermelon. The worst-from-seeds list? Asparagus, snap and lima beans, carrots, cilantro, corn, parsnips, radishes, spinach, and turnips.

Hardening Off
Once your seedlings are ready to make the big leap into the great outdoors, they’ll need to be hardened off. But that is a topic for another blog post! Until then, happy seed starting!