


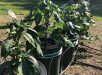


I took my first crack at making the insert for the self watering container today. The hardest part was cutting a square into circles that would fit snuggly into the bucket. Yes, I just said snuggly.
- Tools that I needed:
- Razor blade
- Scissor
- Pen
- Thumbtack
- Rope or string
- Something to measure water
-
Materials:
- 5-gallon bucket
- Coin cup to use as my wicking basket
- 1 12″x12″ vinyl tile
- Drill with 1/4″ bit
- Steps in making the insert:
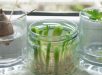
- Put the cup in the container and fill with water. Stop when the water reached the top of the cup. Was about 9 gallons.
- Next I traced the top and bottom circumference of the bucket onto the tile.
- Cutting out the circle of the tile wasn’t as easy as this website implied. Eventually I cut out the circle with the help of a scissor.
- Once the big circle was out had to cut the circle out in the middle for the wicking basket. This was fun.
- Now I had to trim down the outer circle so that it would fit into the bucket. Used the scissor for this. It was much easier than the razor blade.
- Then I had to drill holes in the cup. I used a 1/4″ bit and drilled a bunch of holes to allow the soil to soak up the water and feed the roots.
- It was then put all together and a 1/4″ hole was drilled in the side of the bucket just under the insert for overflow of water.


One insert down, many more to go. There has to be an easier way to cut the circles.


What is a coin cup? Do I have to be from New York to know this?
You can use a 1lb deli container such as a margarine tub.
This is easier if you just use two buckets sleeved together, cutting the hole through the bottom of the inside(top) bucket.
If you are lucky you can find a 5 gallon for the plant and 6 and 1/2 gallon for the bottom reservoir.